Log Cabin Crochet Christmas Pillow - Free Pattern
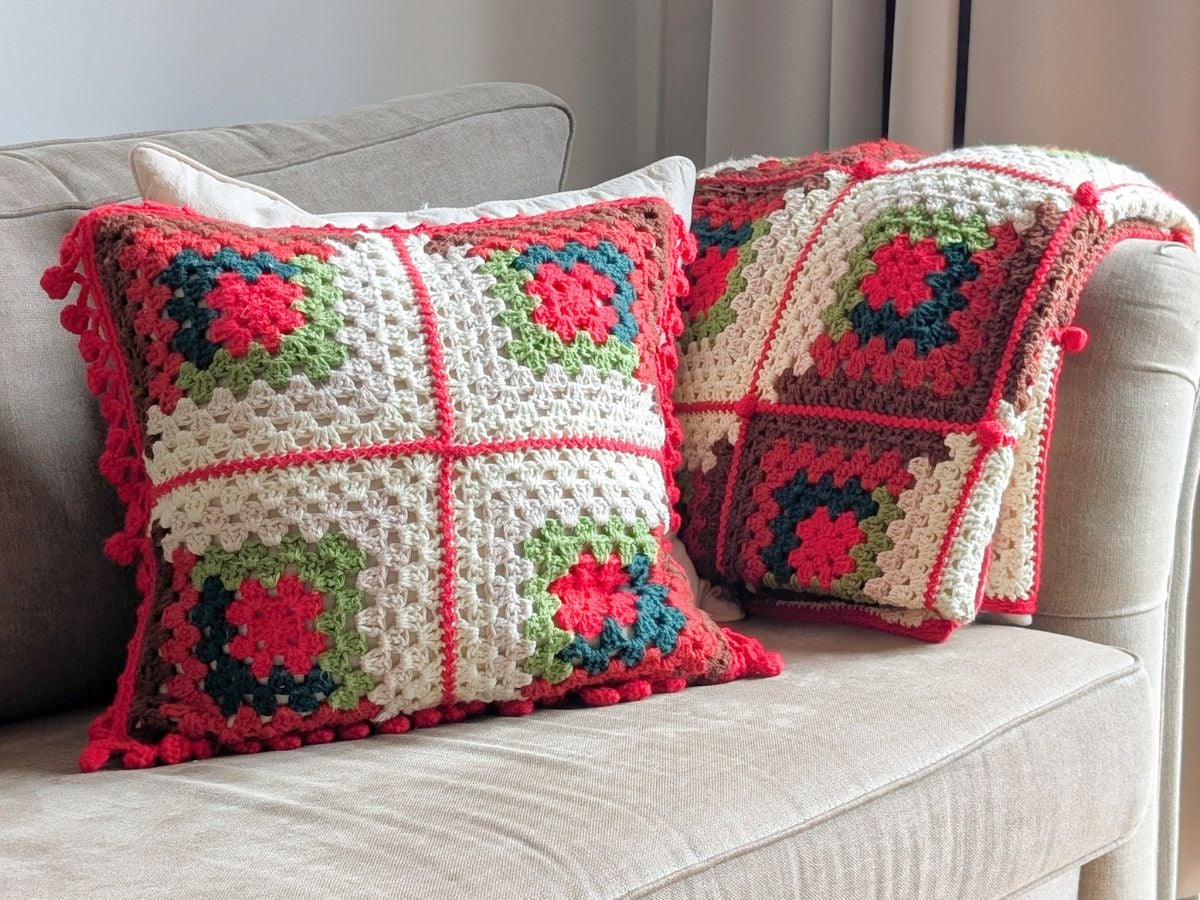
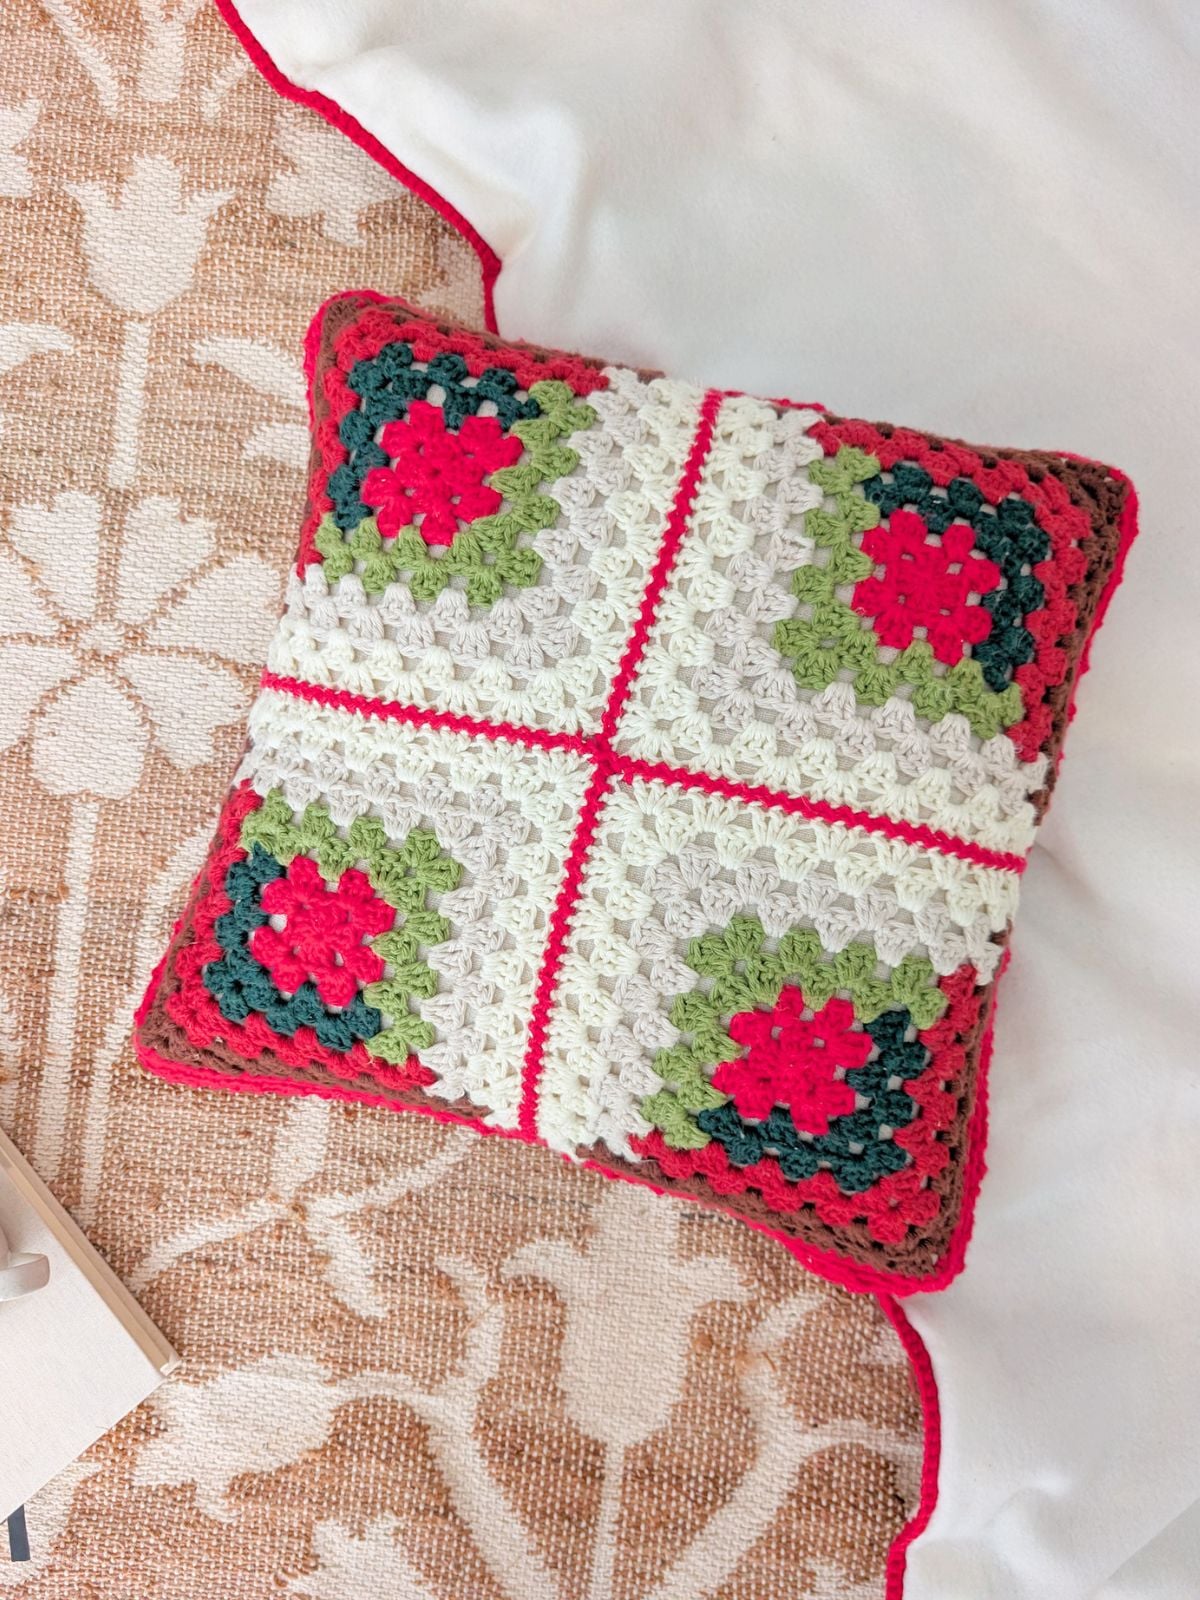
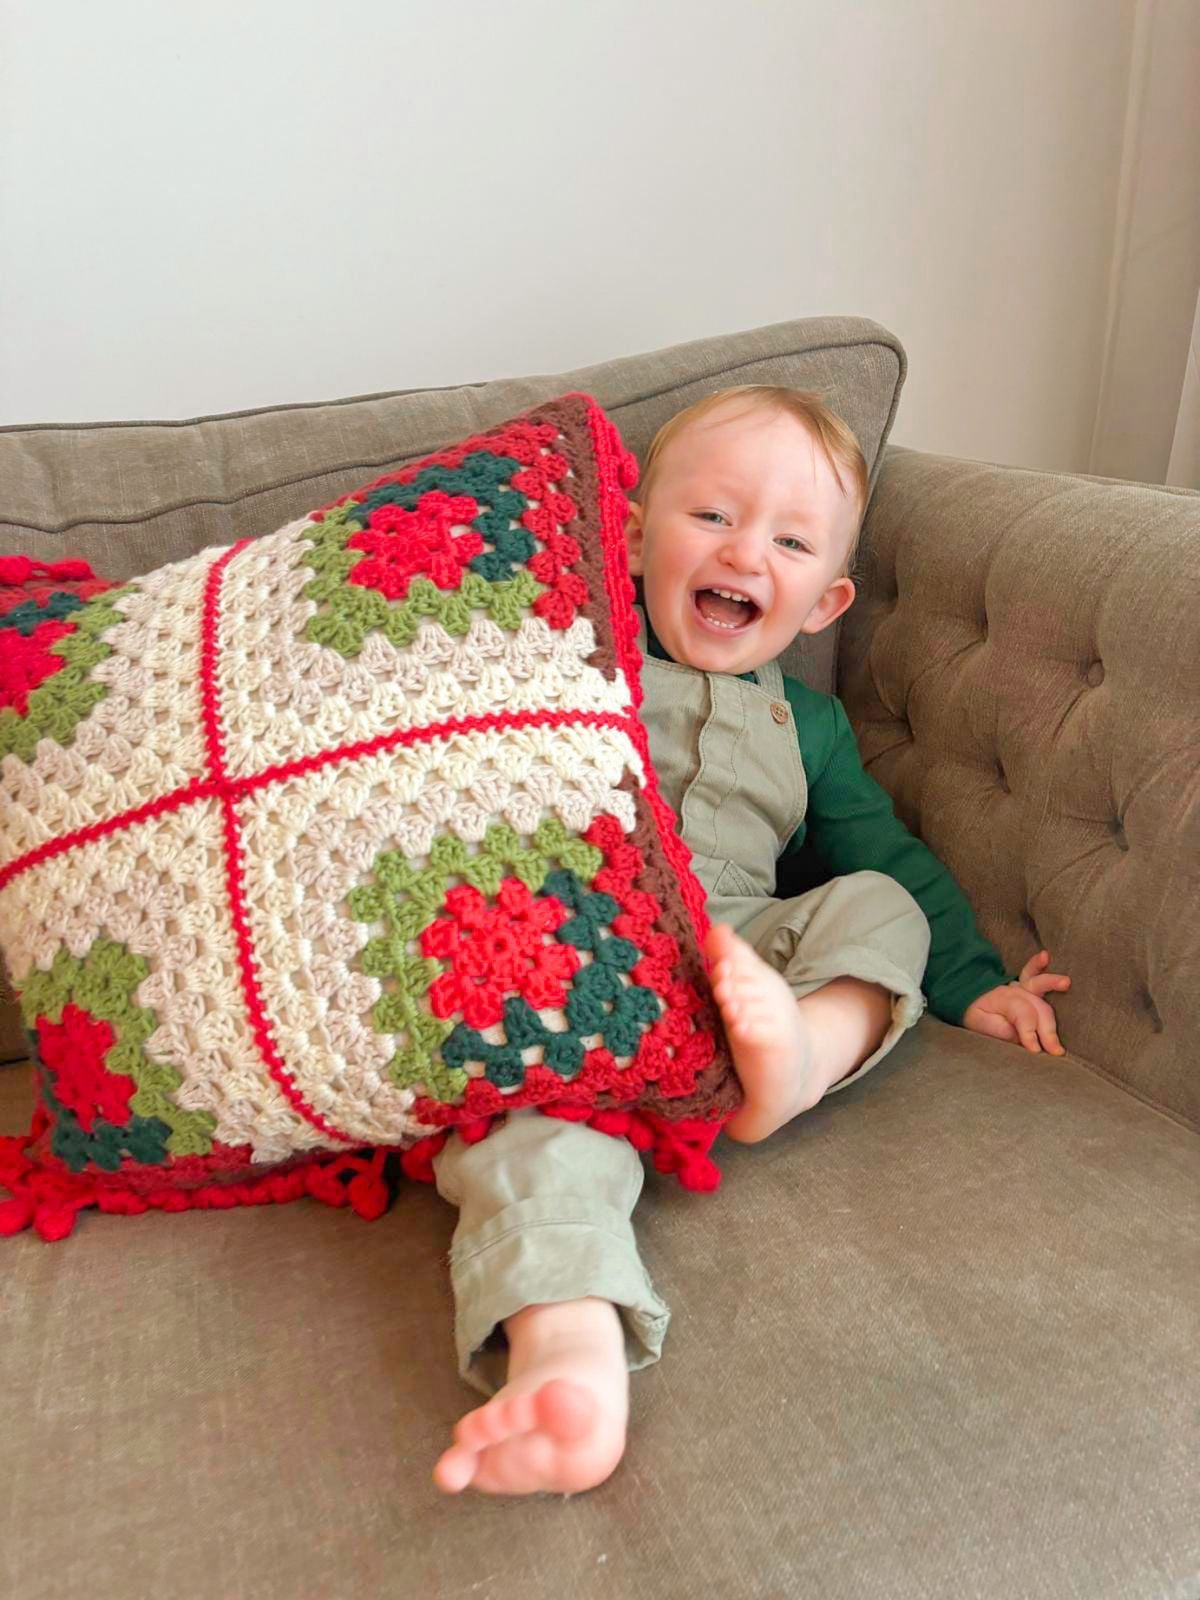
Bring a little handmade charm to your holiday décor with the Log Cabin Crochet Christmas Pillow! This free crochet Christmas pillow pattern features a classic granny square style design and is the perfect project for adding something warm and festive to your space.
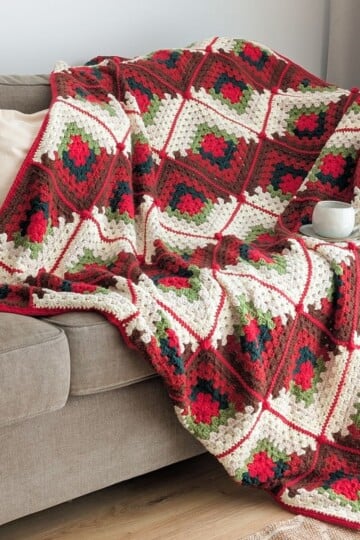
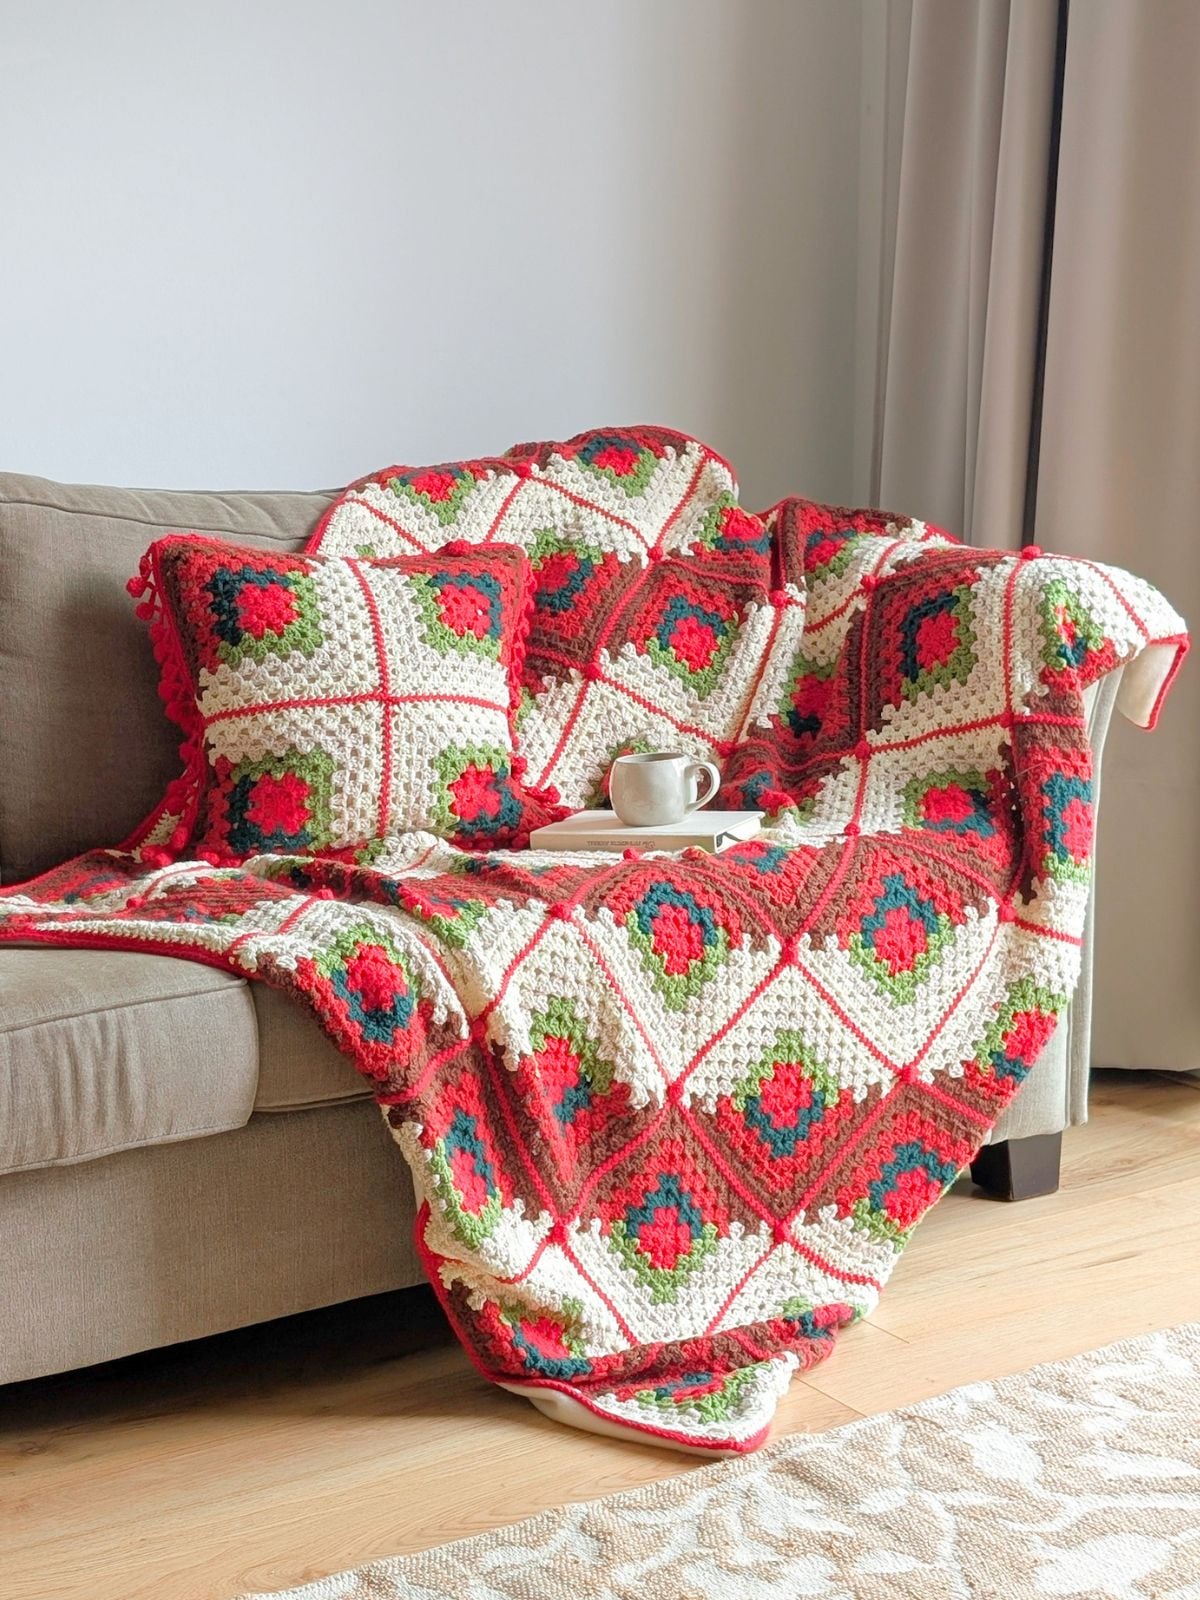
Designed to coordinate with the matching Log Cabin Crochet Christmas Blanket, this pillow uses the same cozy colors and timeless log cabin-inspired squares. Make the pillow on its own, or pair the two patterns together for a beautiful handmade Christmas set.
You can find the free crochet pillow pattern with step-by-step instructions down below, or you can purchase the printable PDF version here.
This post contains affiliate links, which means I make a small commission at no extra cost to you. See my full disclosure here.
Free Log Cabin Crochet Pillow Pattern - Christmas Edition
My latest free pattern is the Log Cabin Crochet Christmas Pillow! I designed it to go with my Log Cabin Crochet Christmas Blanket for a cozy, handmade set.
So if you're looking for a matching crochet pillow and blanket set that is Christmas themed, then definitely give this pattern a go. It's a beginner-friendly pattern made with basic crochet granny squares in Log Cabin style.
And if you're wondering what Log Cabin style means, it's basically a technique where you use different colors to create a light and dark effect. As you work each granny square, the colors come together to create this really pretty patchwork-style design.
I'm always in awe at the end because the granny square itself is so simple to make, yet it looks so intricate. Anyhow, I hope you enjoy making this cozy Christmas pillow as much as I enjoyed designing it!
Now, let’s take a look at how it all comes together.
How to Make a Crochet Christmas Pillow
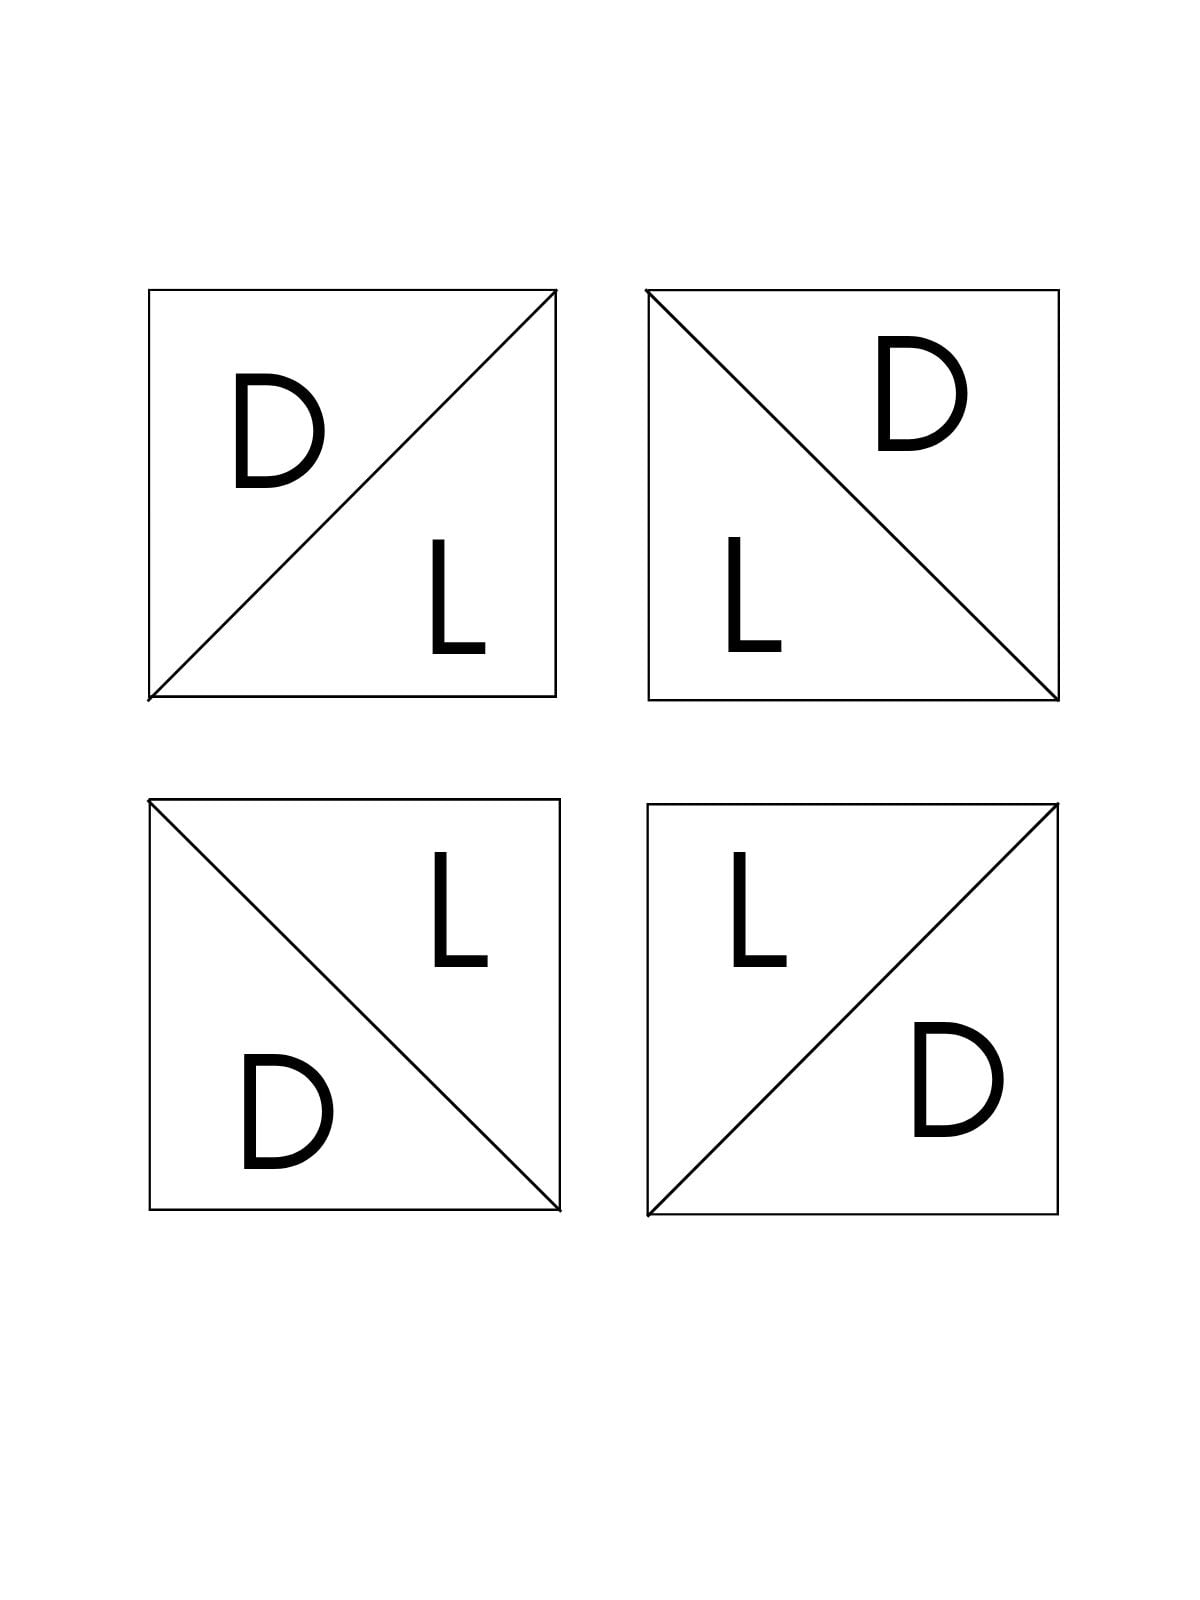
This crochet Christmas pillow comes together pretty easily once you have all 4 granny squares made. You’ll start by arranging the squares using the graph included in the pattern, and then you will seam them together using the zig zag slip stitch method.
From there, you’ll work a simple single crochet border around the outside of the crochet panel, followed by a pom-pom border. And then the last step is to sew the finished crochet panel onto a fabric cushion cover.
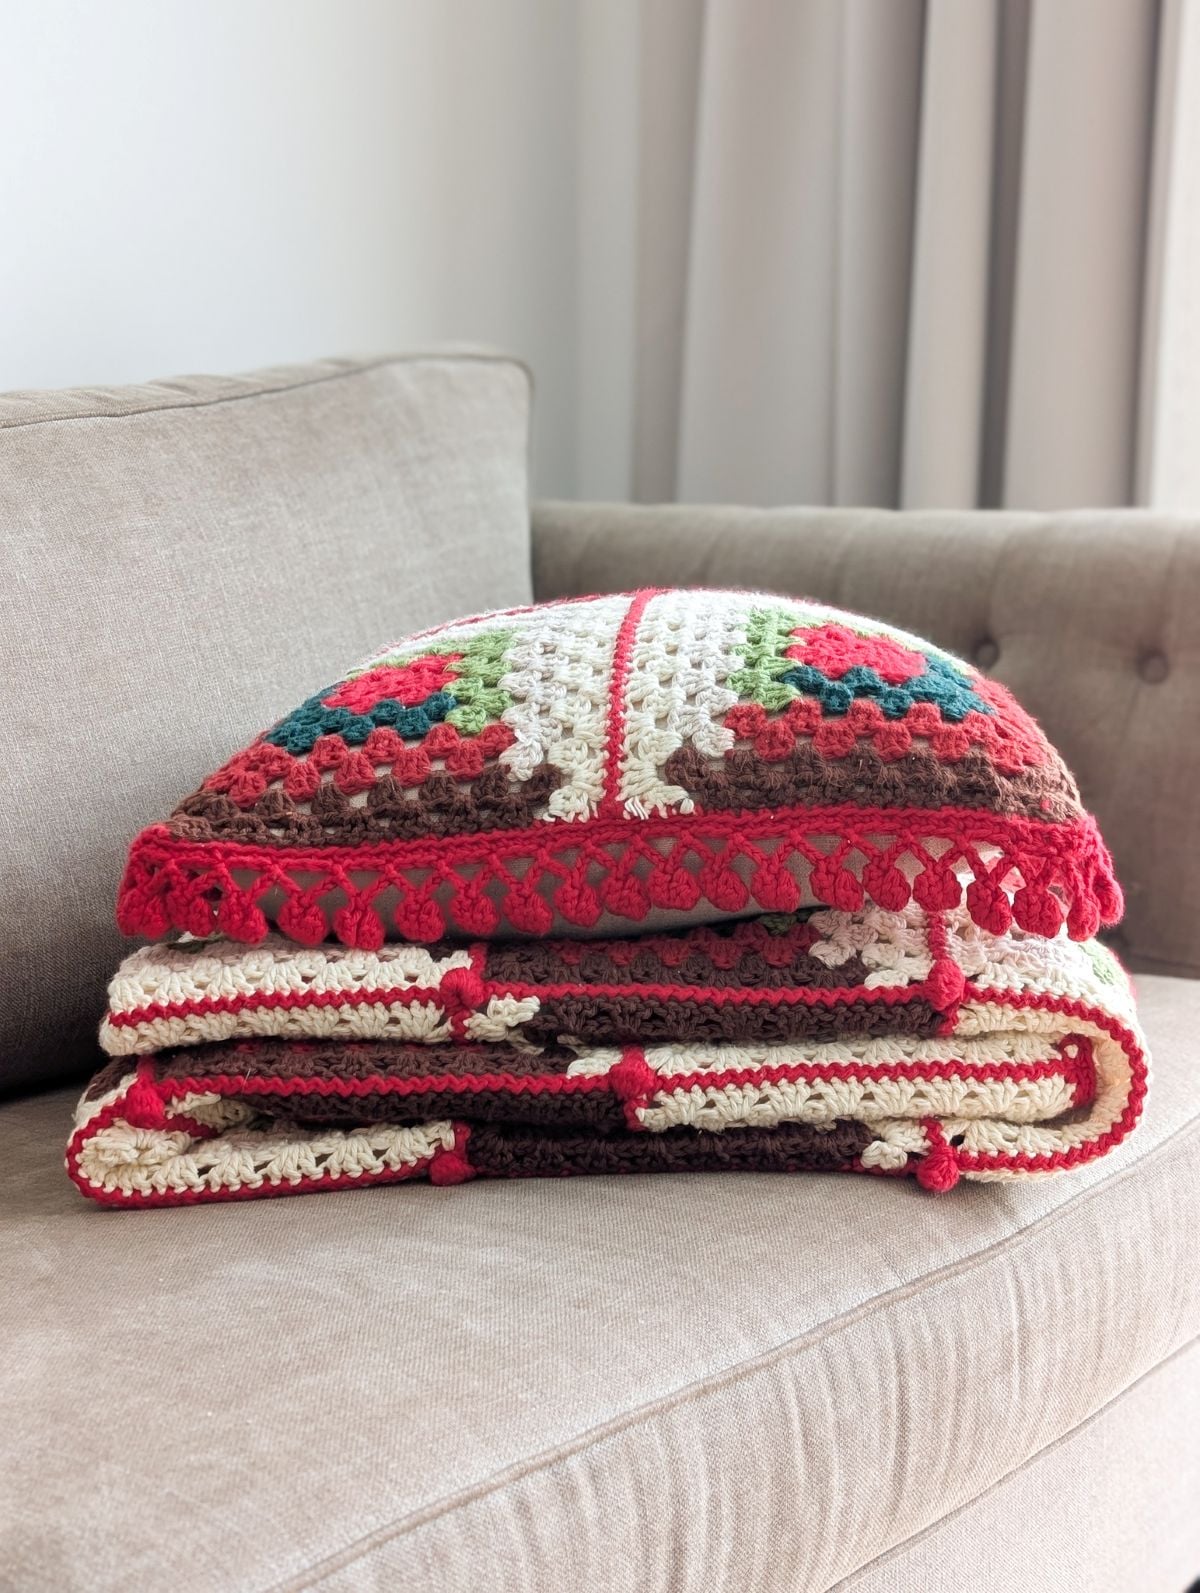
So it's a pretty quick crochet project to make, plus I love how all the little details come together in the end. Between the different colors, the zig zag seam, and the pom pom border, you get a pillow that looks intricate but is actually simple to make.
Yarn
For this pillow, I used the same 7 colors of Hobby Lobby’s I Love This Cotton yarn that I used for the matching blanket. It’s a soft, worsted-weight cotton yarn that’s really easy to crochet with and works beautifully for this pattern.
I especially love the color selection for this project because all 7 shades work together to create that pretty Log Cabin look. Plus, using the same colors as the blanket makes it easy to create a matching Christmas set for your home.
That said, you can absolutely use any worsted-weight yarn you prefer, or even switch to a different fiber if that’s what you have on hand. Just be sure to make a gauge swatch before getting started.
Alright, let’s start making the pillow! Down below, you’ll find the full material list and free crochet pattern.
Add the Log Cabin Crochet Christmas Pillow Pattern to your Ravelry queue here.
Purchase a PDF copy (ad free) of the Log Cabin Crochet Christmas Pillow Pattern here.
Log Cabin Crochet Christmas Pillow Pattern
Materials
- Hobby Lobby I Love This Cotton Yarn (Weight 4 / 3.5 oz, 180 yds per skein) in 7 colors. You will need: Red: 2 skeins, Sage: 1 skein, Forest: 1 skein, Burnt Red: 1 skein, Parchment: 1 skein, Brown: 1 skein, Ivory: 1 skein.
- Size 4.00 (G) mm Crochet Hook.
- Pillow Cover - Size 17" x 17" inches.
- Needle + Thread.
- Sewing Pins.
- Darning Needle.
- Scissors.
Gauge:
1 granny square measures approximately 8 ¼" inch x 8 ¼" inch.
Abbreviations:
- ch – chain: Yarn over, pull through loop on hook.
- sc – single crochet: Insert hook into stitch, yarn over and pull through, yarn over and pull through last two loops on hook.
- dc – double crochet: Yarn over, insert hook into stitch and pull through, yarn over and pull through first two loops on hook, yarn over and pull through last two loops on hook.
- sl st - slip stitch: Insert hook into stitch, yarn over, pull through stitch and loop on hook.
- ch sp - chain space.
- corner sp - corner space.
- rep - repeat.
- sts - stitch.
Special Stitch:
3dc-cl – 3 Double Crochet Cluster: Yarn over, insert hook into the indicated ch, yarn over and pull up a loop. Yarn over and pull through 2 loops. (2 loops remain on hook.)
Yarn over, insert hook into the same ch, yarn over and pull up a loop. Yarn over and pull through 2 loops. (3 loops remain on hook.)
Yarn over, insert hook into the same ch once more, yarn over and pull up a loop. Yarn over and pull through 2 loops. (4 loops remain on hook.)
Yarn over and pull through all 4 loops on hook to complete the cluster.
Pillow Size:
17" inch x 17" inch.
Pattern Notes:
- Pattern written in U.S Terms.
- You will need 4 granny squares to make this crochet pillow.
- Pattern notes when to switch colors when making each granny square. Color A - Red, Color B - Sage, Color C - Forest, Color D - Burnt Red, Color E - Parchment, Color F - Brown, Color G - Ivory .
- Pattern includes a graph. The graph shows how to place each granny square. Instructions for graph are given within the pattern.
- The granny squares are made individually and then seamed together to form the pillow. The zig zag slip stitch is used to seam the pillow together. Click this link for a video tutorial on how to work the zig zag slip stitch seam. Alternatively, you may use your preferred seaming method.
- The granny squares are seamed together using Color A (Red). The two borders are also made using Color A.
- A single crochet border and a pom-pom border is worked around the entire pillow. Instructions are provided within the pattern on how to make these borders.
- Once you have seamed your granny squares together and have made both borders, you will then hand sew the piece onto a pillow (cushion) cover.
Make 4 granny squares.
Start with a magic circle (Alternatively, ch 5 and join with a sl st to the first ch to form a loop.)
Row 1: Using color A, ch 3 (counts as first dc and throughout), 2 dc in circle, (ch 3, 3 dc in circle) 3 times, ch 3, join with a sl st to top of 3rd ch at the beginning of the round.
Turn and continue on with color A for one more round.
Row 2: ch 3 (counts as first dc), (2 dc, ch 3, 3 dc) in same 3 ch sp, *ch 1, (3 dc, ch 3, 3 dc) in next 3 ch sp; rep from *twice more, ch 1, join with a sl st to top of 3rd ch at the beginning of the round.
Fasten off. Now you will work with color B and color C.
Row 3: Using color B, join yarn with a sl st to corner sp, ch 3, and work 2 dc. ch 1, 3 dc in next 1 ch sp. ch 1, (3 dc, ch 3, 3 dc) in next corner sp. ch 1, 3 dc in next 1 ch sp. ch 1, and make 3 dc in corner sp. Switch to color C, ch 3, and make 3 dc in corner sp.
Now you're going to finish the round in color C. Continue by working a ch 1, 3 dc in next 1 ch sp. ch 1, (3 dc, ch 3, 3 dc) in next corner sp. ch 1, 3 dc in next 1 ch sp. ch 1, and make 3 dc in corner sp. ch 3, and join with a sl st to top of 3rd ch at the beginning of the round.
Turn and continue on with color C.
Row 4: Make a sl st in corner sp, ch 3, and work 2 dc in corner sp. *ch 1, 3 dc in next 1 ch sp; rep from *1 more time. ch 1, (3 dc, ch 3, 3 dc) in next corner sp. *ch 1, 3 dc in next 1 ch sp; rep from *1 more time. ch 1, and make 3 dc in corner sp. Switch back to color B, ch 3, and make 3 dc in corner sp.
Then *ch 1, 3 dc in next 1 ch sp; rep from *1 more time. ch 1, (3 dc, ch 3, 3 dc) in next corner sp. *ch 1, 3 dc in next 1 ch sp; rep from *1 more time. ch 1, and make 3 dc in corner sp. ch 3, and join with a sl st to top of 3rd ch at the beginning of the round.
Fasten off. Now you will work with color D and color E.
Row 5: Using color D, join yarn with a sl st to corner sp, ch 3, and work 2 dc. *ch 1, 3 dc in next 1 ch sp; rep from * 2 more times. ch 1, (3 dc, ch 3, 3 dc) in next corner sp. *ch 1, 3 dc in next 1 ch sp; rep from * 2 more times. ch 1, and make 3 dc in corner sp. Switch to color E, ch 3, and make 3 dc in corner sp.
Now you're going to finish the round in color E. Continue by working a *ch 1, 3 dc in next 1 ch sp; rep from * 2 more times. ch 1, (3 dc, ch 3, 3 dc) in next corner sp. *ch 1, 3 dc in next 1 ch sp; rep from * 2 more times. ch 1, and make 3 dc in corner space. ch 3, and join with a sl st to top of 3rd ch at the beginning of the round.
Turn and continue on with color E.
Row 6: Make a sl st in corner sp, ch 3, and work 2 dc in corner sp. *ch 1, 3 dc in next 1 ch sp; rep from * 3 more times. ch 1, (3 dc, ch 3, 3 dc) in next corner sp. *ch 1, 3 dc in next 1 ch sp; rep from *3 more times. ch 1, and make 3 dc in corner space. Switch back to color D, ch 3, and make 3 dc in corner sp.
Then *ch 1, 3 dc in next 1 ch sp; rep from *3 more times. ch 1, (3 dc, ch 3, 3 dc) in next corner sp. *ch 1, 3 dc in next 1 ch sp; rep from *3 more times. ch 1, and make 3 dc in corner space. ch 3, and join with a sl st to top of 3rd ch at the beginning of the round.
Fasten off. Now you will work with color F and color G.
Row 7: Using color F, join yarn with a sl st to corner sp, ch 3, and work 2 dc. *ch 1, 3 dc in next 1 ch sp; rep from *4 more times. ch 1, (3 dc, ch 3, 3 dc) in next corner sp. *ch 1, 3 dc in next 1 ch sp; rep from *4 more times. ch 1, and make 3 dc in corner space. Switch to color G, ch 3, and make 3 dc in corner sp.
Now you're going to finish the round in color G. Continue by working a *ch 1, 3 dc in next 1 ch sp; rep from *4 more times. ch 1, (3 dc, ch 3, 3 dc) in next corner sp. *ch 1, 3 dc in next 1 ch sp; rep from *4 more times. ch 1, and make 3 dc in corner sp. ch 3, and join with a sl st to top of 3rd ch at the beginning of the round.
Turn and continue on with color G.
Row 8: Make a sl st in corner sp, ch 3, and work 2 dc in corner sp. *ch 1, 3 dc in next 1 ch sp; rep from *5 more times. ch 1, (3 dc, ch 3, 3 dc) in next corner sp. *ch 1, 3 dc in next 1 ch sp; rep from *5 more times. ch 1, and make 3 dc in corner sp. Switch back to color F, ch 3, and make 3 dc in corner sp.
Then *ch 1, 3 dc in next 1 ch sp; rep from *5 more times. ch 1, (3 dc, ch 3, 3 dc) in next corner sp. *ch 1, 3 dc in next 1 ch sp; rep from *5 more times. ch 1, and make 3 dc in corner sp. ch 3, and join with a sl st to top of 3rd ch at the beginning of the round.
Fasten off. You have now completed 1 granny square. Repeat the instructions above to make 3 more squares, for a total of 4 granny squares.
Placement of Granny Squares
Once all the granny squares have been made, it’s time to assemble and seam them together.
Use the graph below as a guide for arranging your granny squares before seaming them together.
Granny Square Placement:
- L = Light: Position the square with the light/white corner first, as shown in the graph.
- D = Dark: Position the square with the dark-colored corner first, as shown in the graph.
Seaming
Once you have your granny squares in the correct order, it's time to seam each square together using the zig zag slip stitch method (notes section includes a link on how to seam using this technique).
Start by seaming 2 granny squares together from top to bottom to create one vertical strip. Repeat this process for the other 2 squares.
You should now have 2 strips. Now seam the 2 strips together until all 4 squares are connected.
Borders
Now you will start the border. First you will work a single crochet border and then you will work a pom-pom border.
Work a single crochet border around the blanket using Color A (Red) as follows:
Reattach yarn to the top right corner stitch, and work 1 sc per stitch along each of the sides, and work 2 sc stitches in each corner stitch. Sl st to the first stitch to finish the round.
Once you have completed your first round, work another round of sc. When you have completed both rounds, continue on by working the pom-pom border.
Work the pom-pom border in the same color as the single crochet border as follows:
Make 1 sc in the first stitch. *Ch 6, then work a 3dc-cl into the 3rd ch from the hook, then ch 1 to close the cluster. Ch 2, work another 3dc-cl into the 3rd ch from the hook, then ch 1 to close the cluster.
Next, bring the two clusters together by gently pushing the top cluster over the first one. Sl st into the 3rd ch where you made your first cluster to join them together.
Ch 3, skip 3 stitches, and sc into the next stitch.
Continue to repeat this sequence from * all the way around the pillow. Sl st to the first sc stitch to finish the round.
Fasten off and weave in any remaining ends.
Sewing
Now you will sew the finished crochet panel onto the pillow cover. Grab your needle and thread and follow the steps down below:
Step 1: Lay your pillow cover down first and put your crochet panel on top. Secure the panel by working a few sewing pins through both the fabric and crochet panel.
Step 2: Using a needle and thread, start at one corner of your pillow and insert your needle through the first row of the single crochet border and through the fabric cushion cover. Continue sewing the crochet panel to the cushion cover by weaving your needle in and out through both layers, working your way around the entire pillow.
Note: You want the second row of your single crochet border and the pom-pom border to flow freely over the cushion cover. The first row of the single crochet border will be stuck to the pillow cover.
Step 3: Tie a knot when finished, and weave in the remaining thread.
Step 4: Grab your pillow and insert it into your pillow cover.
You're finished! I hope you enjoyed making this Christmas crochet pillow pattern.