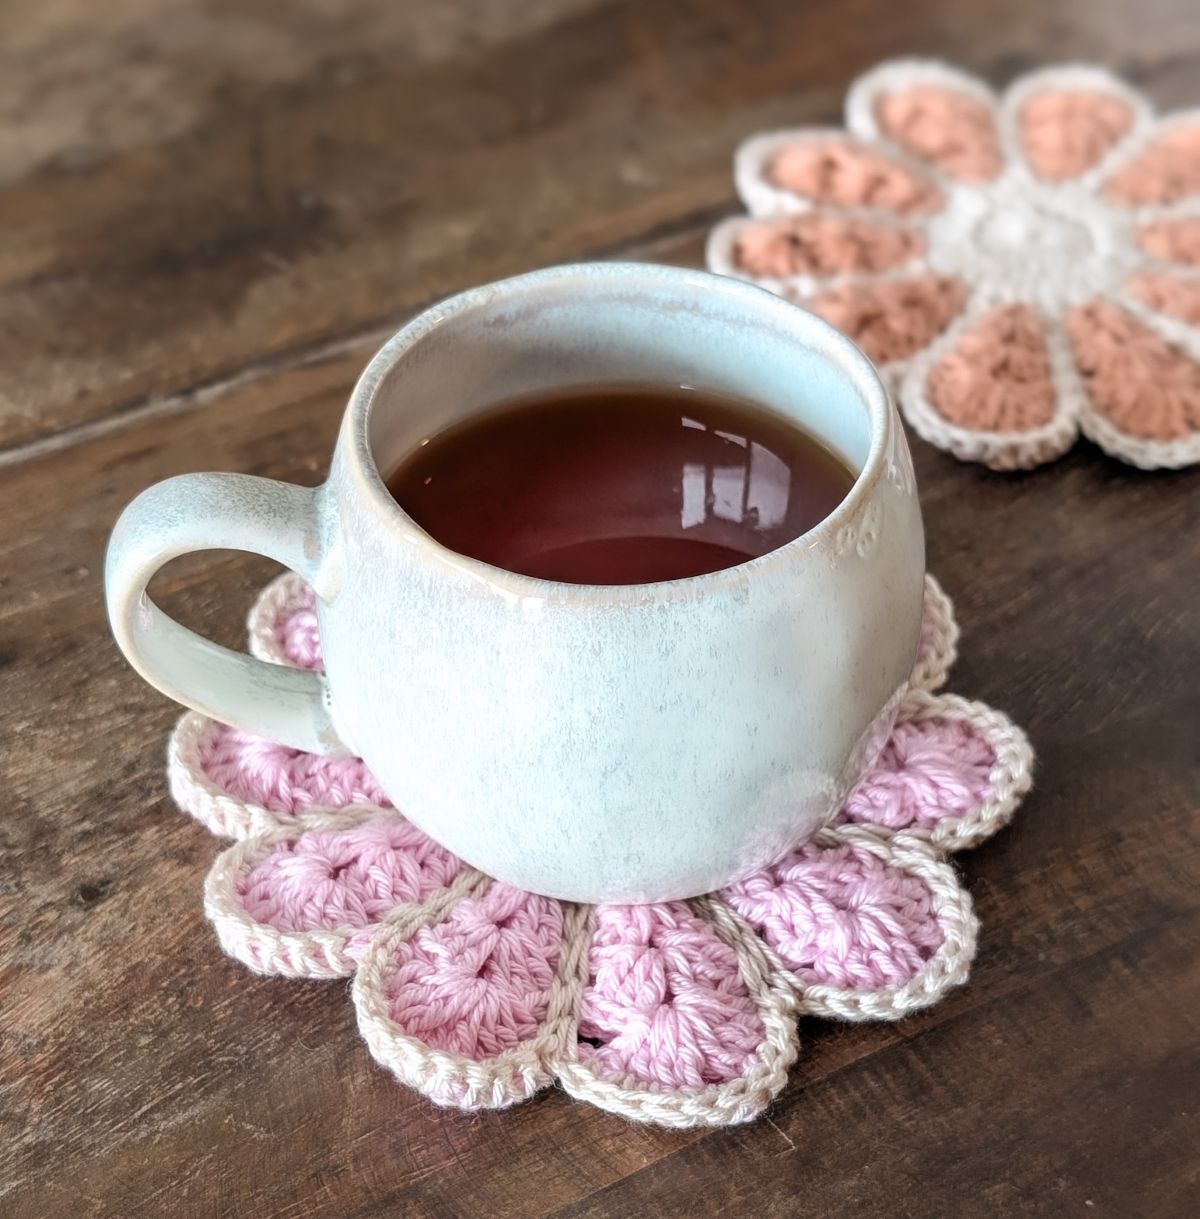
Brighten up your table with a touch of handmade charm! This free vintage crochet flower coaster pattern is quick to make, cheerful, and adds a bit of vintage charm to any room.
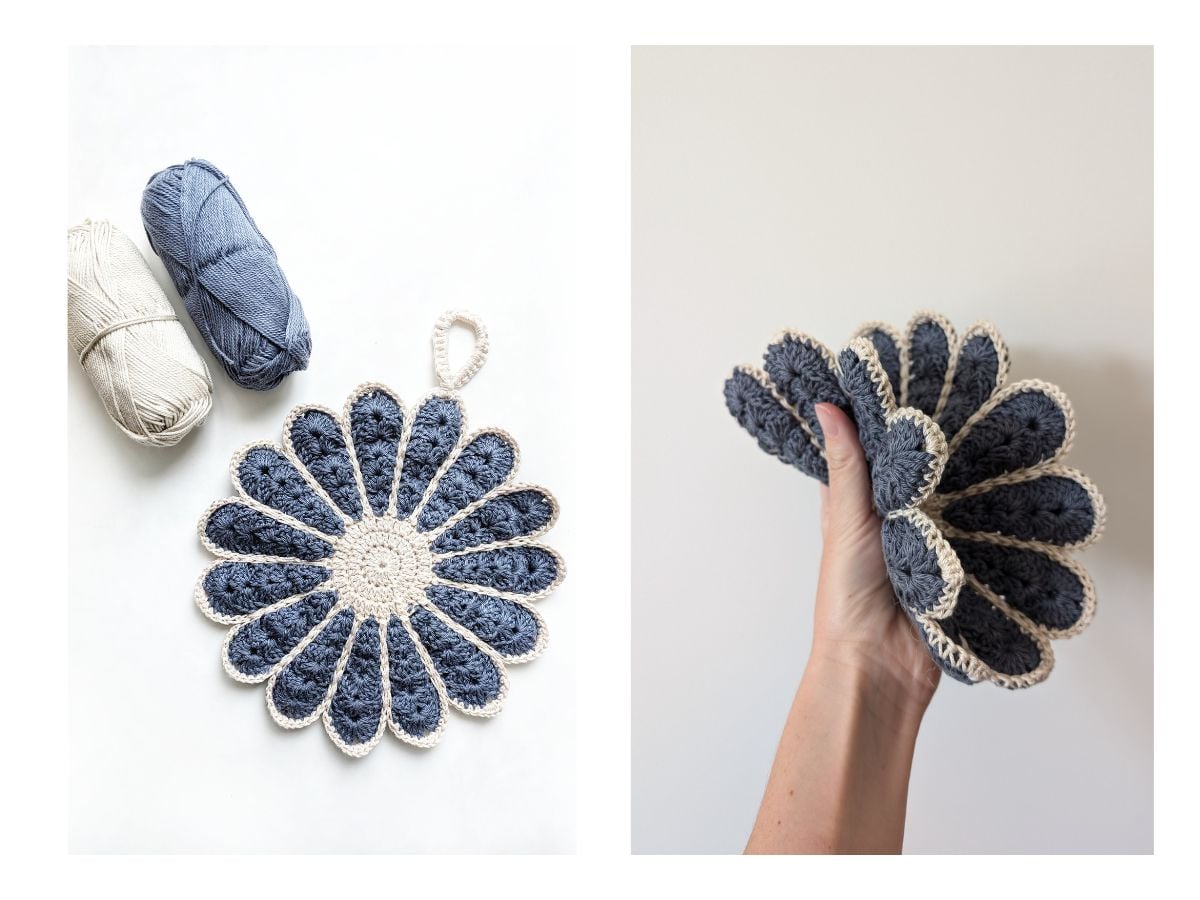
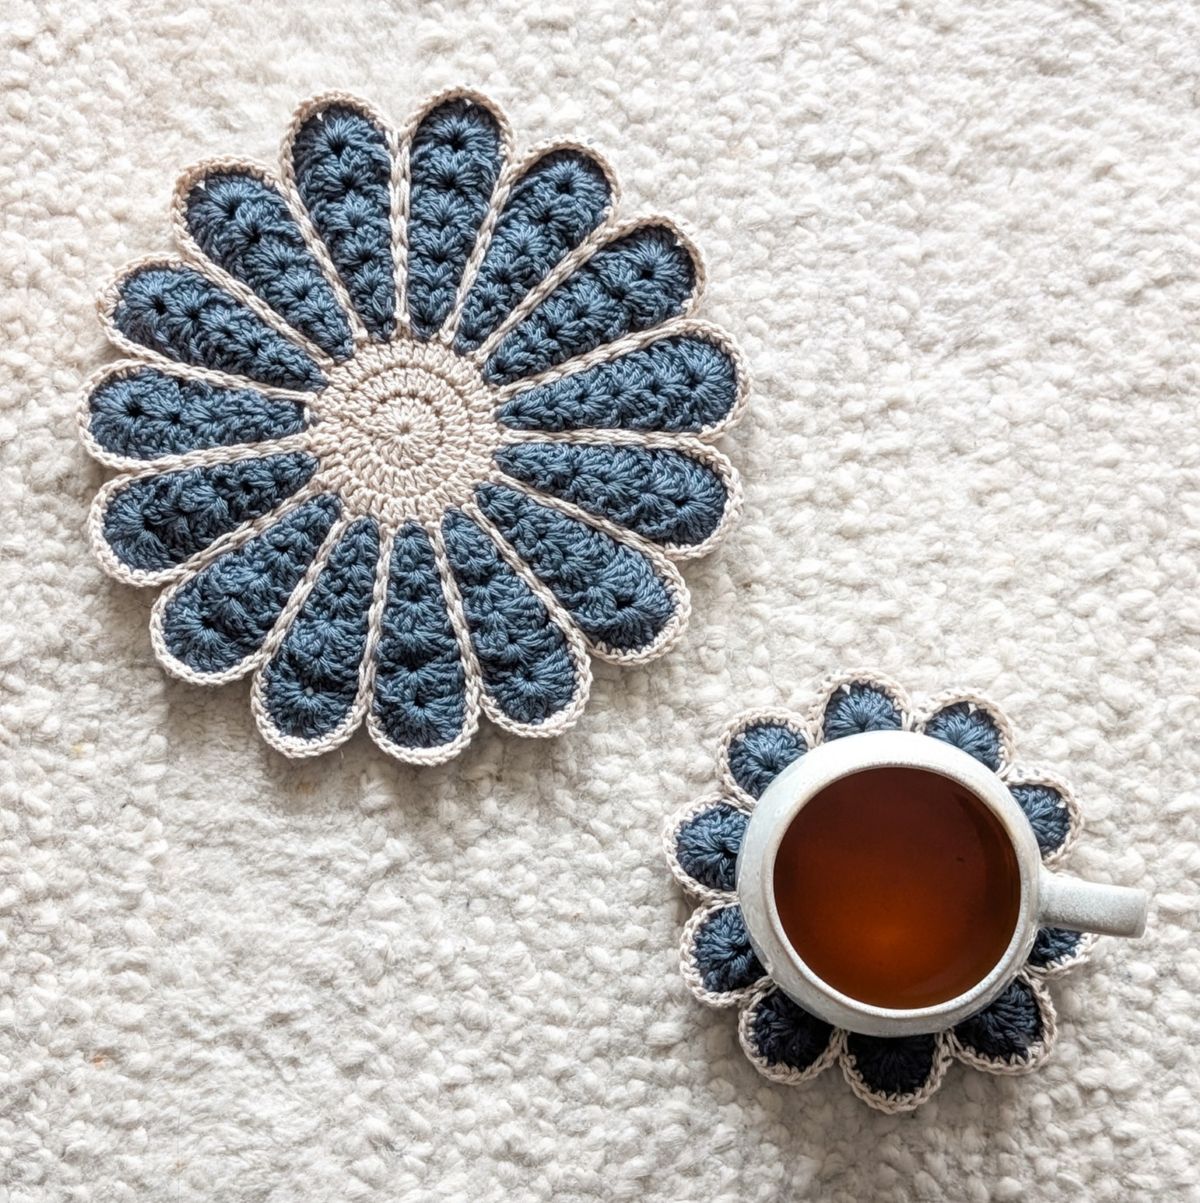
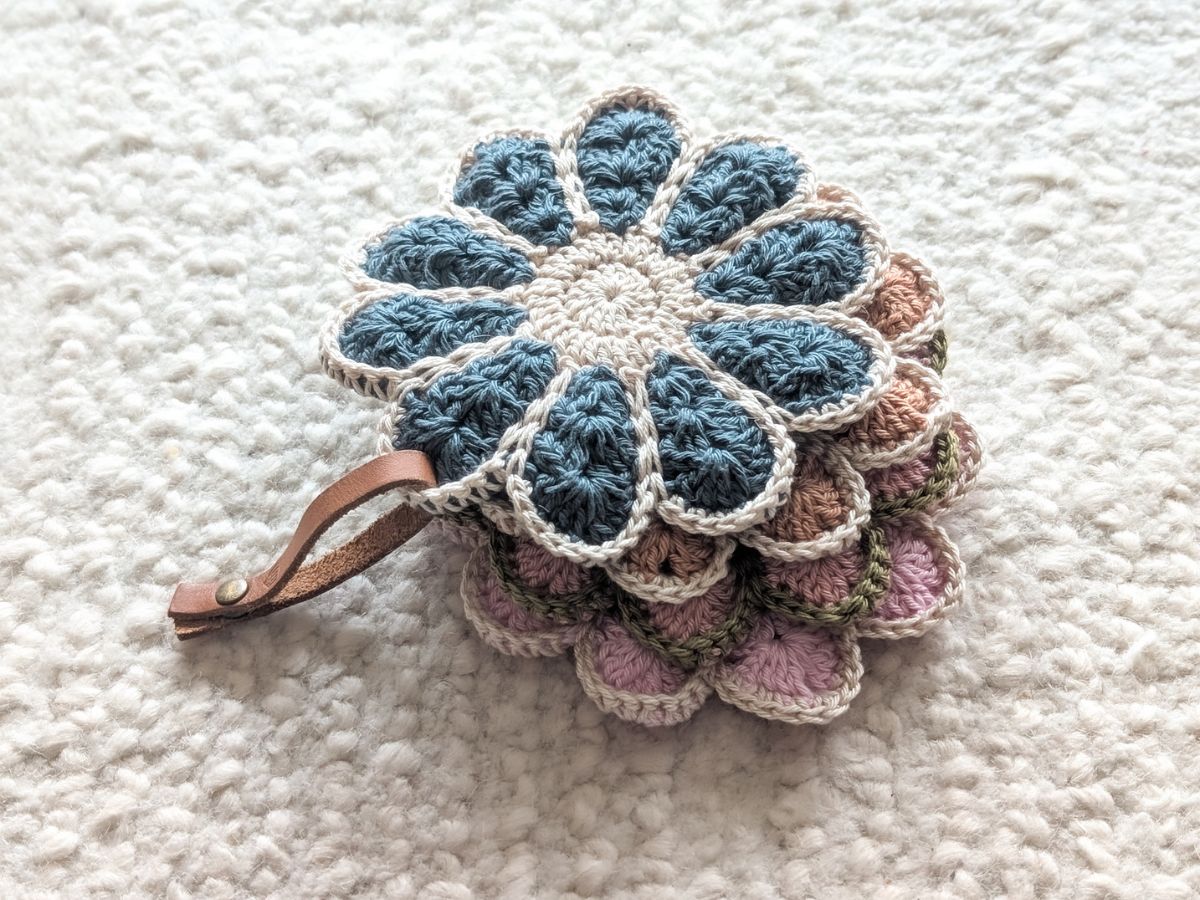
This coaster is made using the same stitch pattern as my vintage crochet flower potholder, so the two make a cute, matching set. It’s just a smaller version, perfect for mixing and matching around your home.
You can find the free crochet coaster pattern and video tutorial down below, or you can purchase a printable PDF pattern here.
This post contains affiliate links, which means I make a small commission at no extra cost to you. See my full disclosure here.
I’ve always loved adding little homemade crochet pieces to my home. There’s something so satisfying about turning a simple skein of yarn into something useful, pretty, and a little nostalgic.
Today, I’m excited to share a pattern that's been on my list of things to make for a while. After welcoming my first baby last summer, things have been a little bit on the slower side for me. So I'm so excited to be sharing free patterns with you all again.
The first pattern I'll be sharing this year is a spin-off of the vintage crochet flower potholder pattern I shared last year. After making that pattern, I thought why not take the same concept but make it smaller.
So after a couple of trial-and-error attempts, I was able to come up with a smaller version that works perfectly as a coaster.
So if you enjoyed making the potholder version, I think you're really going to love making this version too! It's just so cute.
So let's go ahead and get into all the things you need to know for this pattern.
How to Make a Crochet Flower Coaster
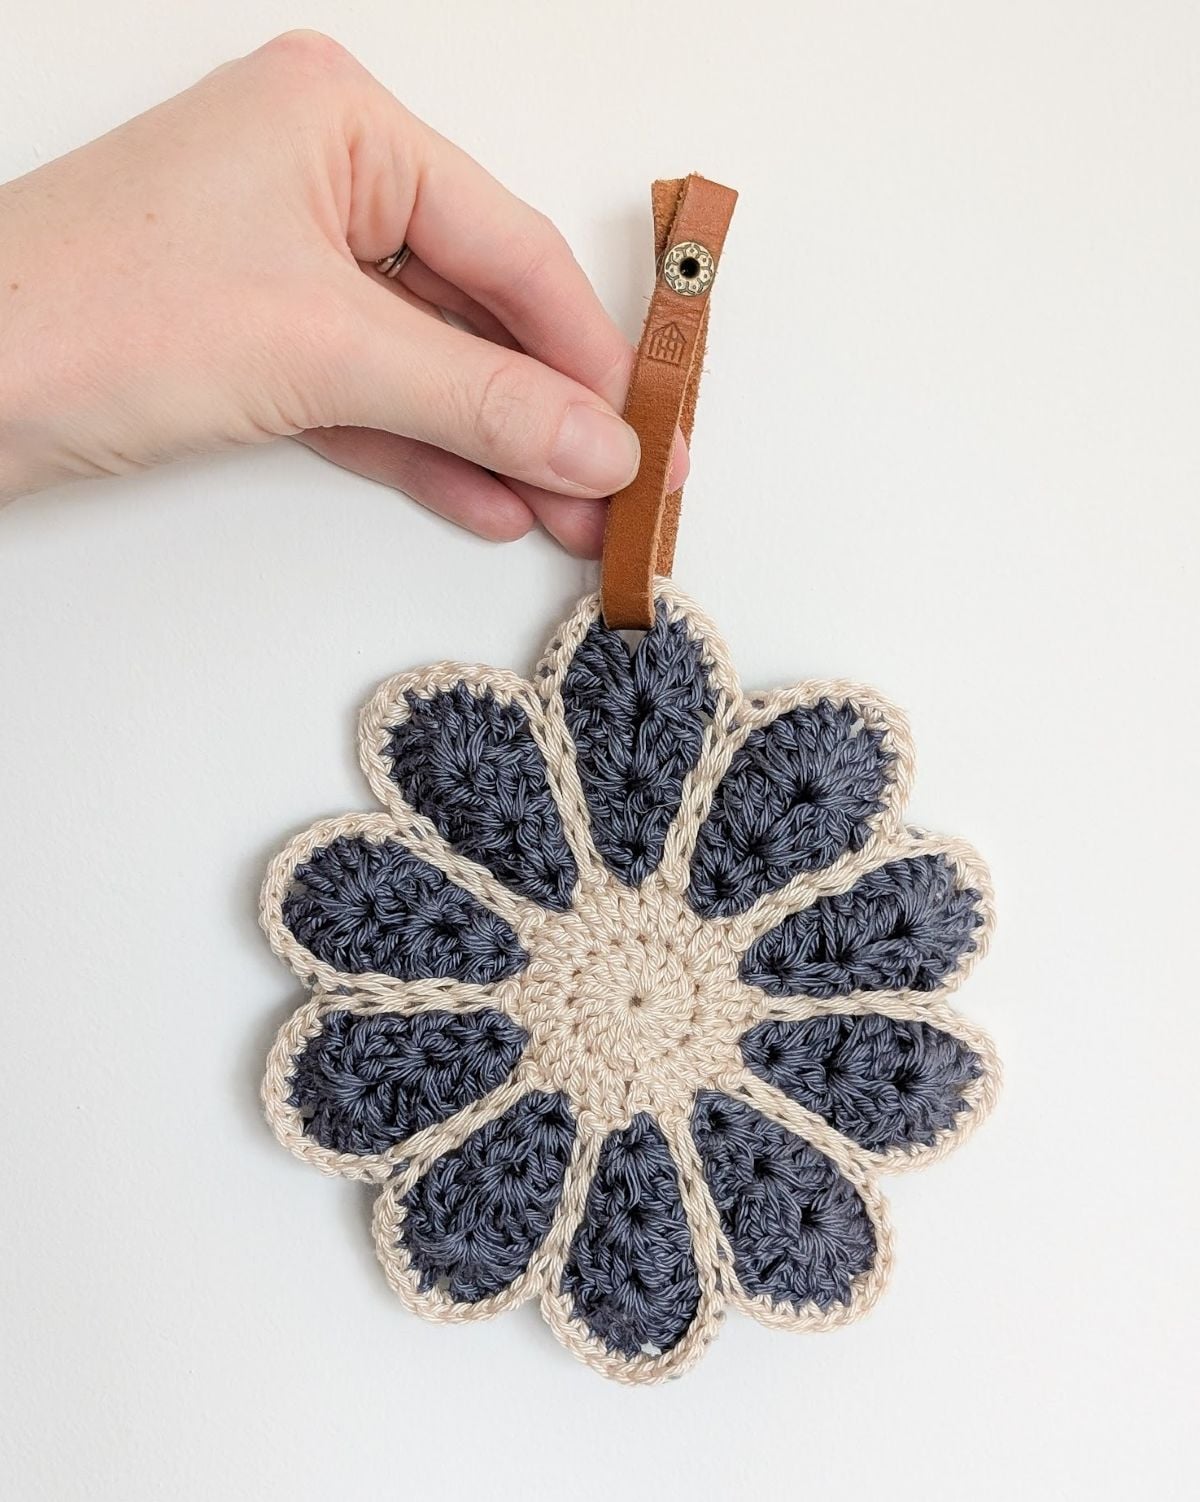
The coaster uses the same stitch pattern and construction as the original pattern. The only difference is the amount of rounds and repeats you have to make per section.
So you're going to start by making two rounds of double crochet for your circle section and then you'll make four rounds for your petal section. So it's a condensed version of the potholder.
Once you've made your first petal, you are then going to make a second petal. Once both petals are made, you will then seam them together to make a coaster.
So it's a fun crochet project that's not too hard to make and works up surprisingly fast!
The Yarn You'll Use for This Crochet Coaster
For this crochet flower coaster pattern, I used Scheepjes Catona yarn, which is a fingering weight cotton yarn.
I've used this yarn several times now and can't recommend it enough. It really is a nice cotton yarn to crochet with and the stitch definition is so good. Even though this yarn is a fingering weight yarn, you can totally get away with using a yarn that is a bit thicker, like a DK weight yarn.
The only difference is that your project might be slightly bigger. I wouldn't recommend doing this for a garment pattern per se (because you need it to fit), but for a coaster pattern, it's ok. But it's totally up to you.
Anyhow, one yarn recommendation that I can highly recommend for this pattern is Lion Brand 24/7 yarn, the DK version. That one will work great for this pattern. You can also check out YarnSub.com and see what yarn recommendations they recommend.
Alright, let's start our pattern!
Purchase an ad-free, printable, PDF pattern HERE.
Add this pattern to your Ravelry queue HERE.
Materials:
- 1 skein of Scheepjes Catona yarn in the color Linen, #505 (fingering 4/ply - 50 grams/ 136.7 yds).
- 1 skein of Scheepjes Catona yarn in the color Charcoal, #393 (fingering 4/ply - 50 grams/ 136.7 yds).
- Size 3.0 mm (D) Crochet Hook.
- Darning Needle.
- Stitch Markers or Sewing Clips.
- Scissors.
Coaster Size:
Crochet flower coaster (petal to petal) - 5 1/2" x 5 1/2" inches.
Gauge:
20 double crochet stitches x 8 rows = 4" inch square.
Abbreviations:
st - stitch.
slst – slip stitch: Insert hook into stitch, yarn over, pull through stitch and loop on hook.
ch – chain: Yarn over, pull through loop on hook.
sc – single crochet: Insert hook into stitch, yarn over and pull through, yarn over and pull through last two loops on hook.
dc – double crochet: Yarn over, insert hook into stitch and pull through, yarn over and pull through first two loops on hook, yarn over and pull through last two loops on hook.
Notes:
- Pattern written in U.S terms.
- Pattern includes a step-by-step video tutorial.
- You will start this pattern by making 2 flower petals per the instructions and then you will seam these two flower petals together to form the coaster.
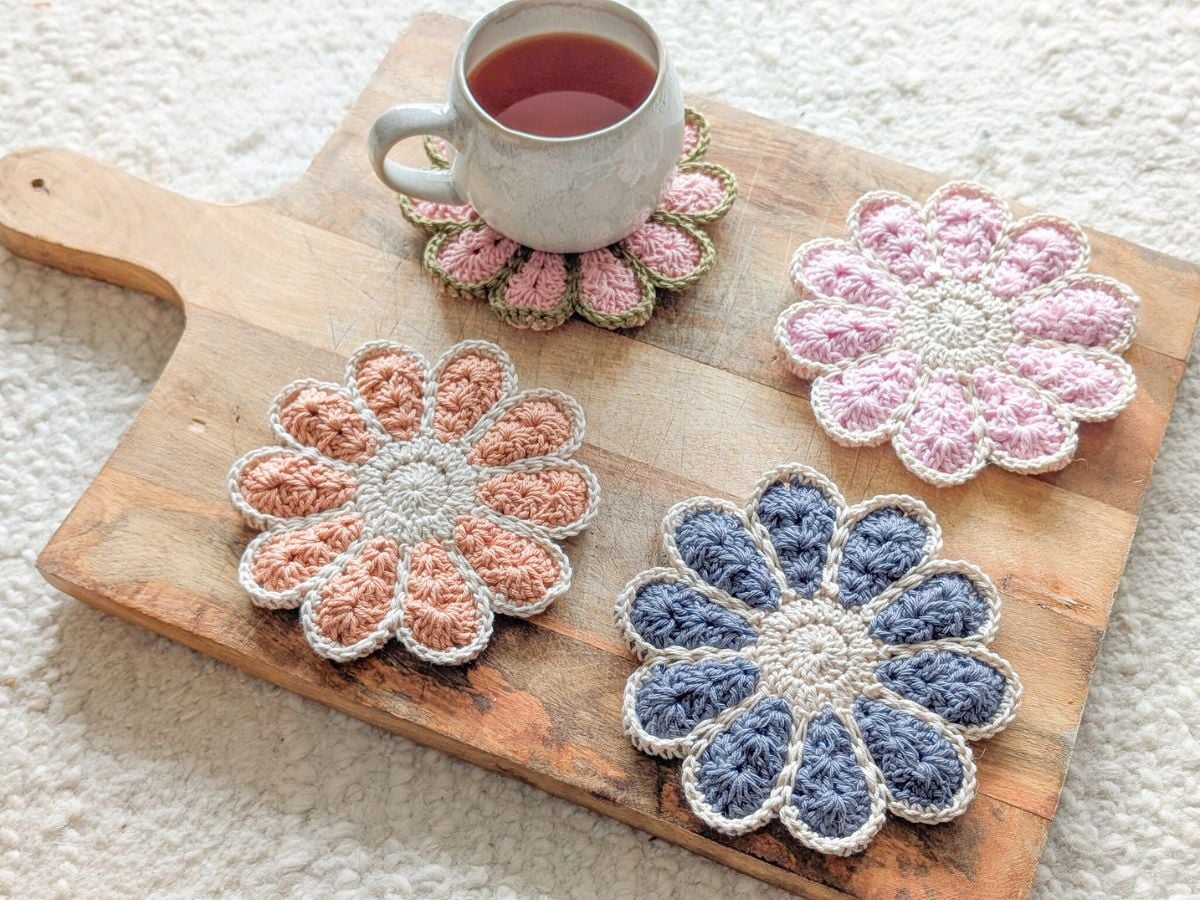
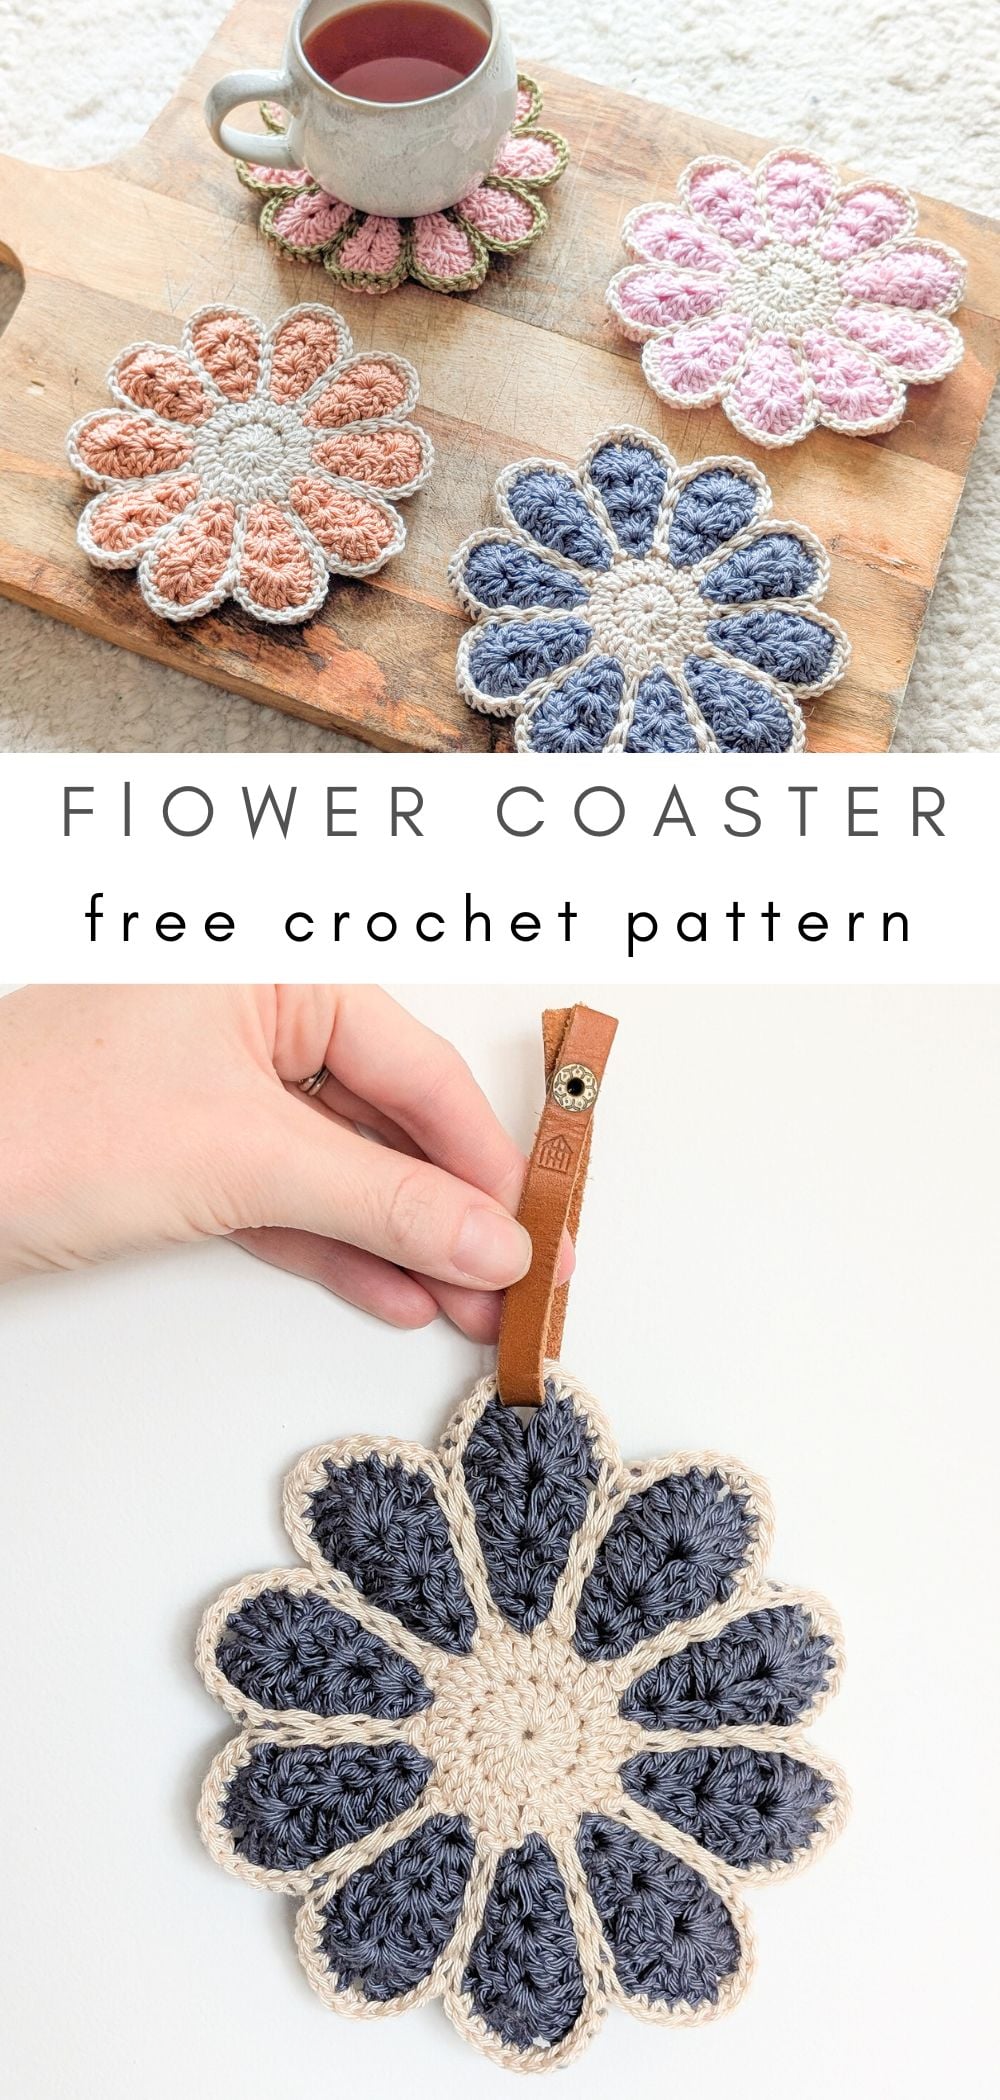
- The pattern notes only 2 colors, however, you can use several colors to make one coaster. As seen in the photos, you can also use 3 colors.
- This pattern is made using a fingering weight yarn, however, you can also use a dk weight yarn. The only difference is that the coaster might be slightly bigger. You also might have to go up one hook size. Either way, both yarn sizes work. If you choose to go with a DK yarn, Lion Brand 24/7 DK makes a great substitute.
- 2 flower petals are needed to make 1 coaster. If you only make 1 flower petal, your coaster will be floppy and might not be thick enough if you put a hot cup on it.
- Total stitches for row are indicated between ( ).

Pattern
Make 2 flower petals.
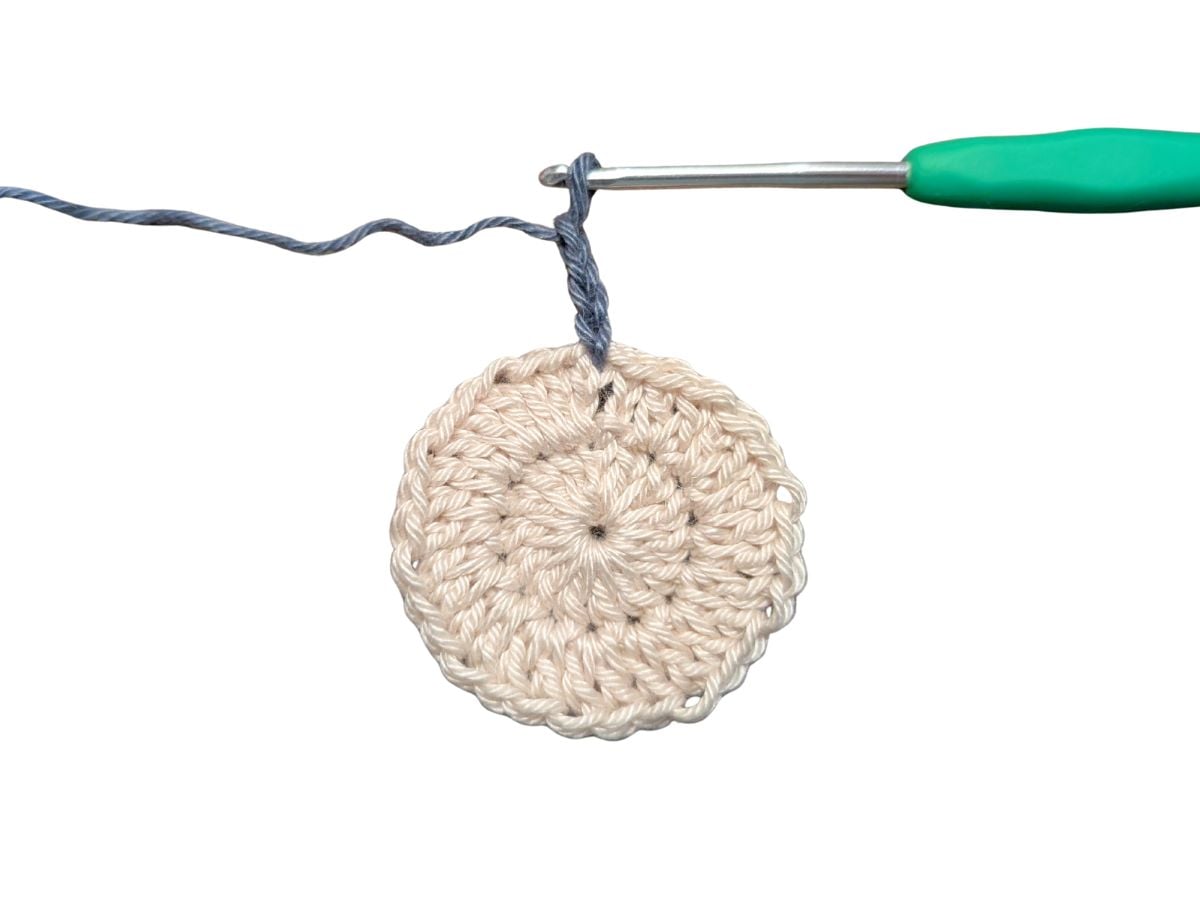
Round 1: With Scheepjes Catona color Linen, make a magic circle, and chain 3 (counts as a dc). Now make 14 dc within your magic circle, and join with a slst to the 3rd chain. (15 sts).
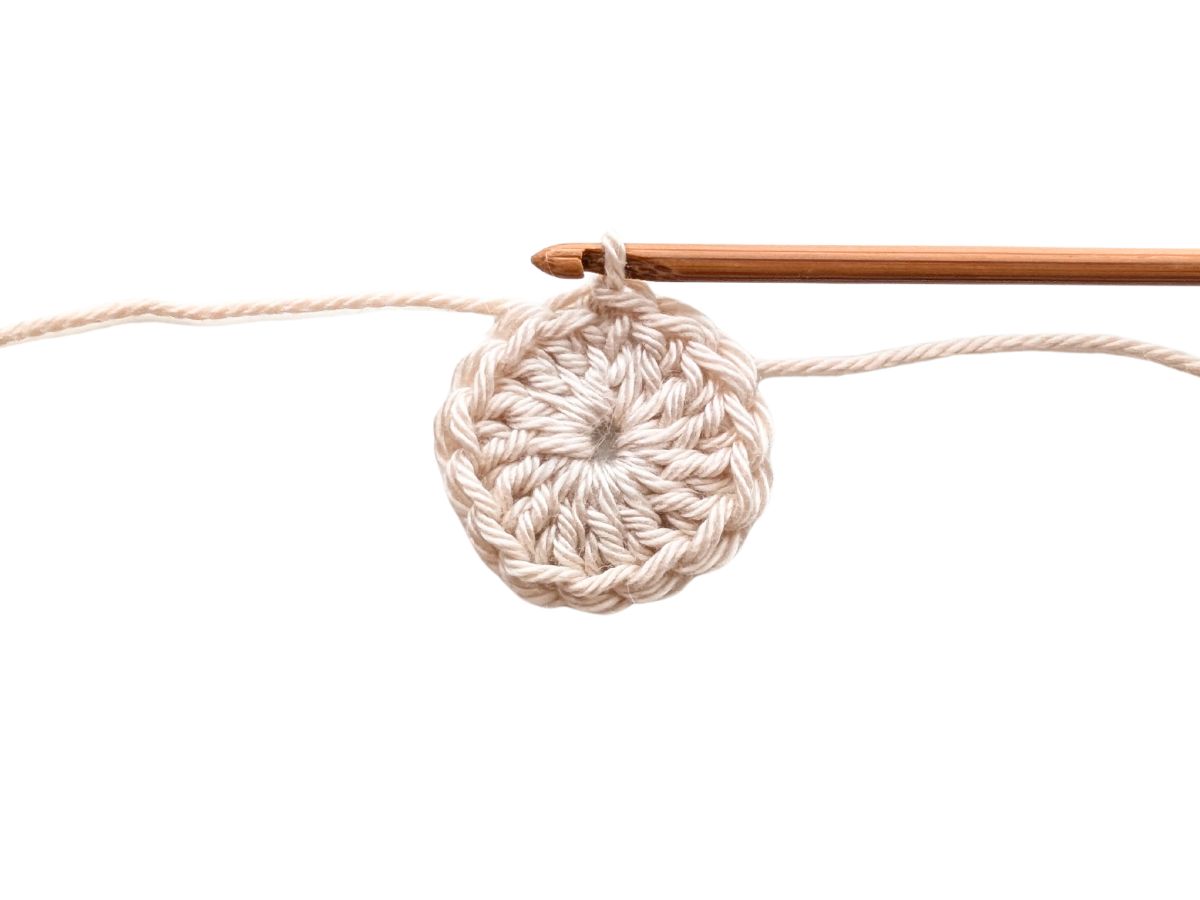
Round 2: ch 3 (counts as a dc). Make 1 dc in the same st that ch is coming from. Make 2 dc in each remaining st. Join with a slst to the third ch. (30 sts).

Now make another slst in the following chain, and then make 1 more slst, but as your finishing your last slst, change to the second color (Scheepjes Catona Charcoal) for a seamless color change.
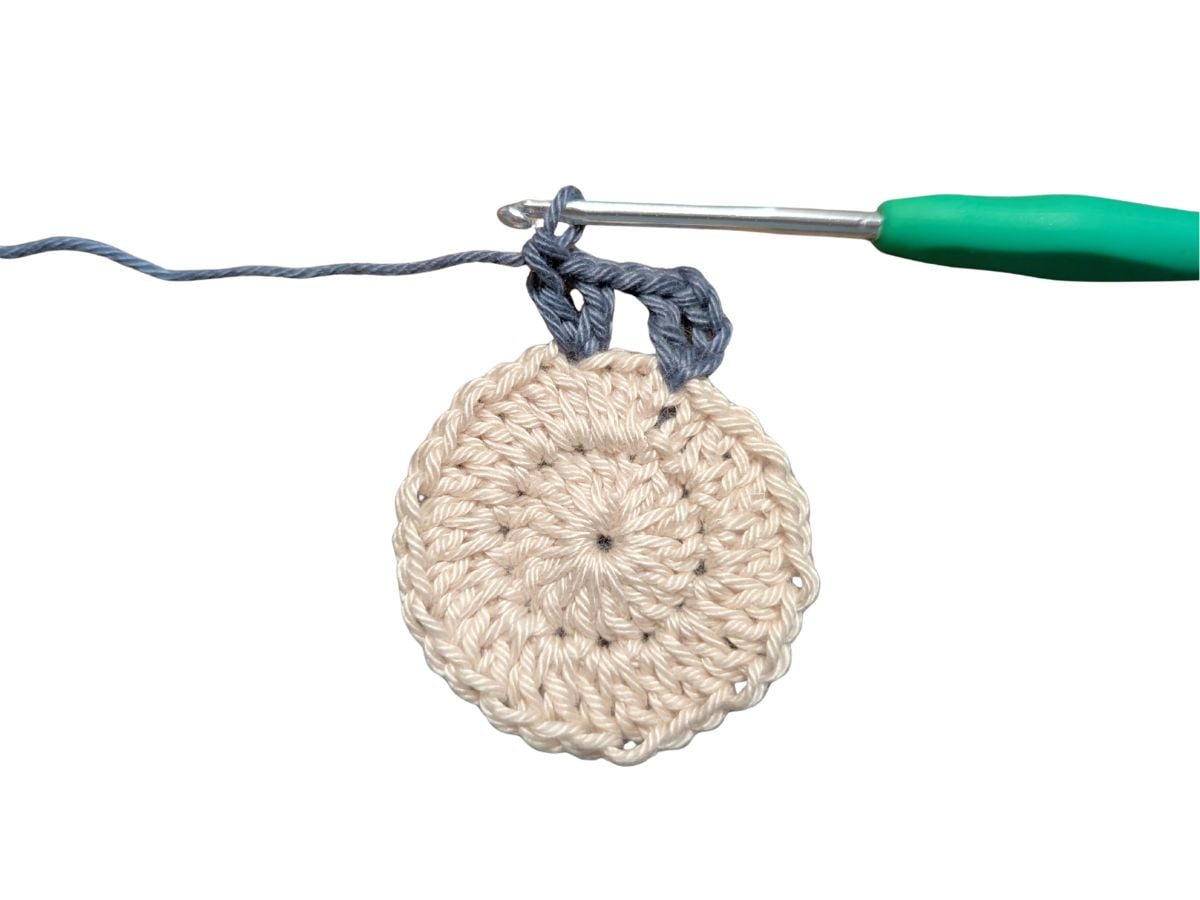
Round 3: ch 4 (counts as 1 dc + ch), then make 1 dc in the same st that ch is coming from. *Skip 2 st, then make (1 dc, ch 1, 1 dc) in the following st, then ch 1. Rep from * till last 2 st. Then slst to 3rd ch, and make 1 more slst in the following space. (10 groups of (1dc, ch 1, 1 dc)).
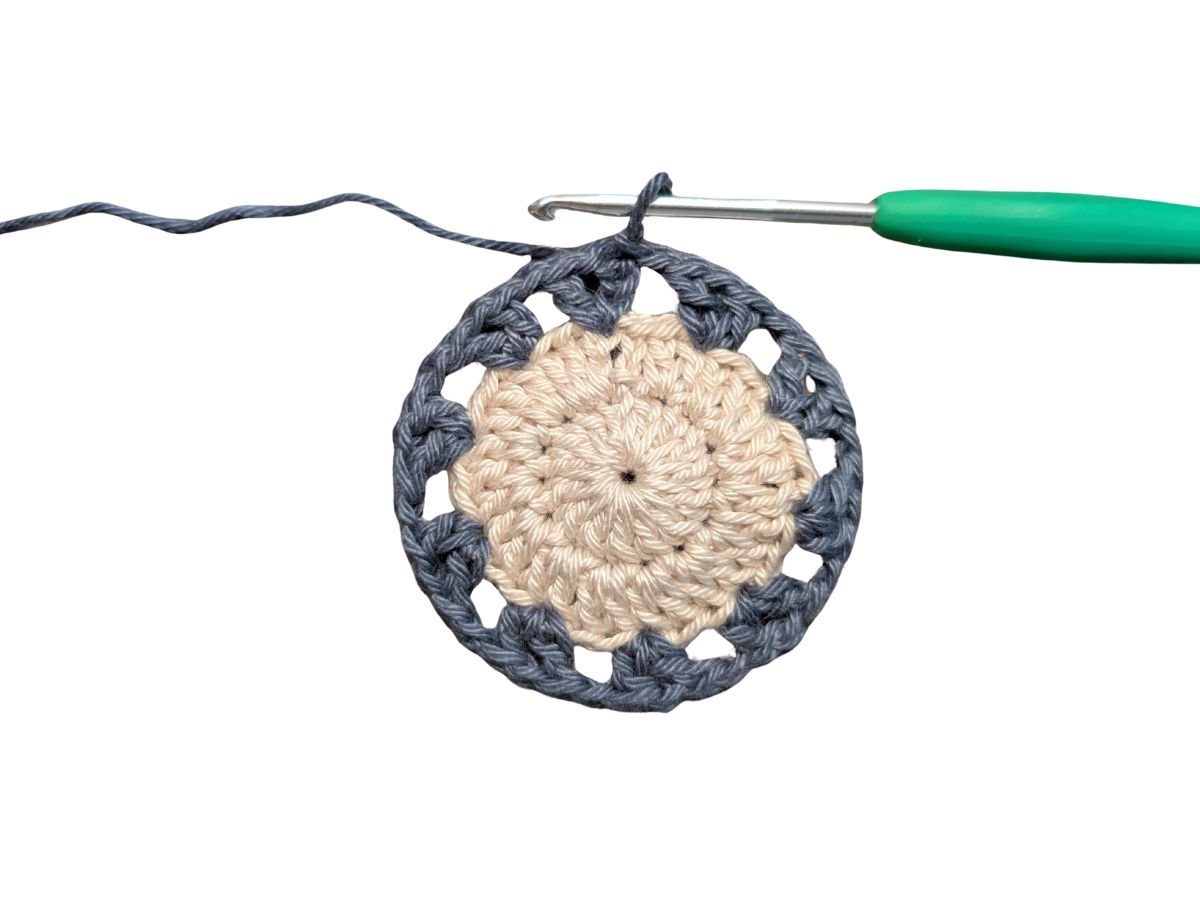
Round 4: ch 3 (counts as a dc), then make another dc, ch 1, and 2 dc in ch 1 space from previous row and ch 1. *Skip the next ch space, and work (2 dc, ch 1, 2 dc) in the following ch 1 space from previous row, and ch 1. Rep from * till last chain. Then slst to 3rd chain, and make 1 more slst in the space from the previous row. (10 groups of (2 dc, ch 1, 2 dc)).
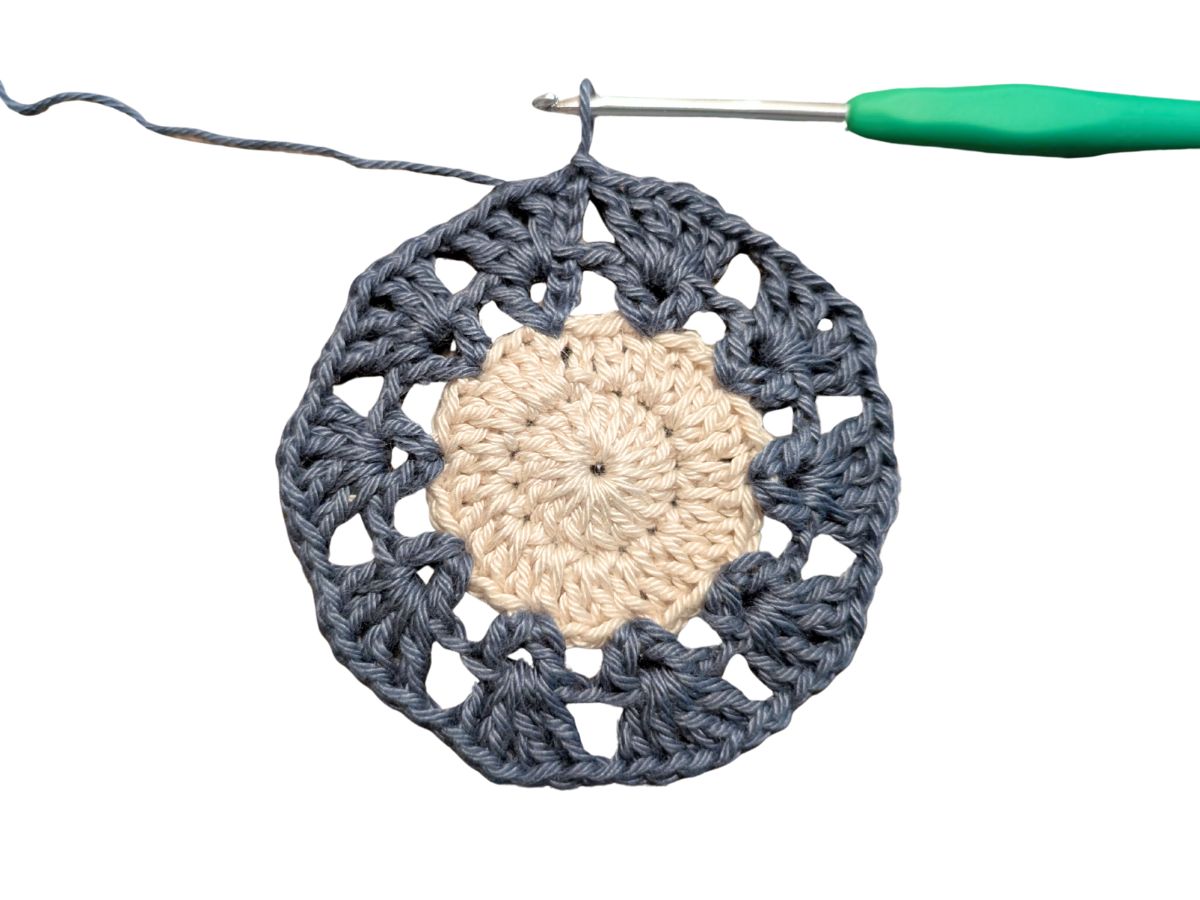
Round 5: ch 3 (counts as a dc), then make 2 dc, ch 1, and 3 dc in ch 1 space from previous row and ch 1. *Skip the next ch space, and work (3 dc, ch 1, 3 dc) in the following ch 1 space from previous row, and ch 1. Rep from * till last chain. Then slst to 3rd chain, and make 2 more slst in the next 2 st from the previous row. (10 groups of (3 dc, ch 1, 3 dc)).
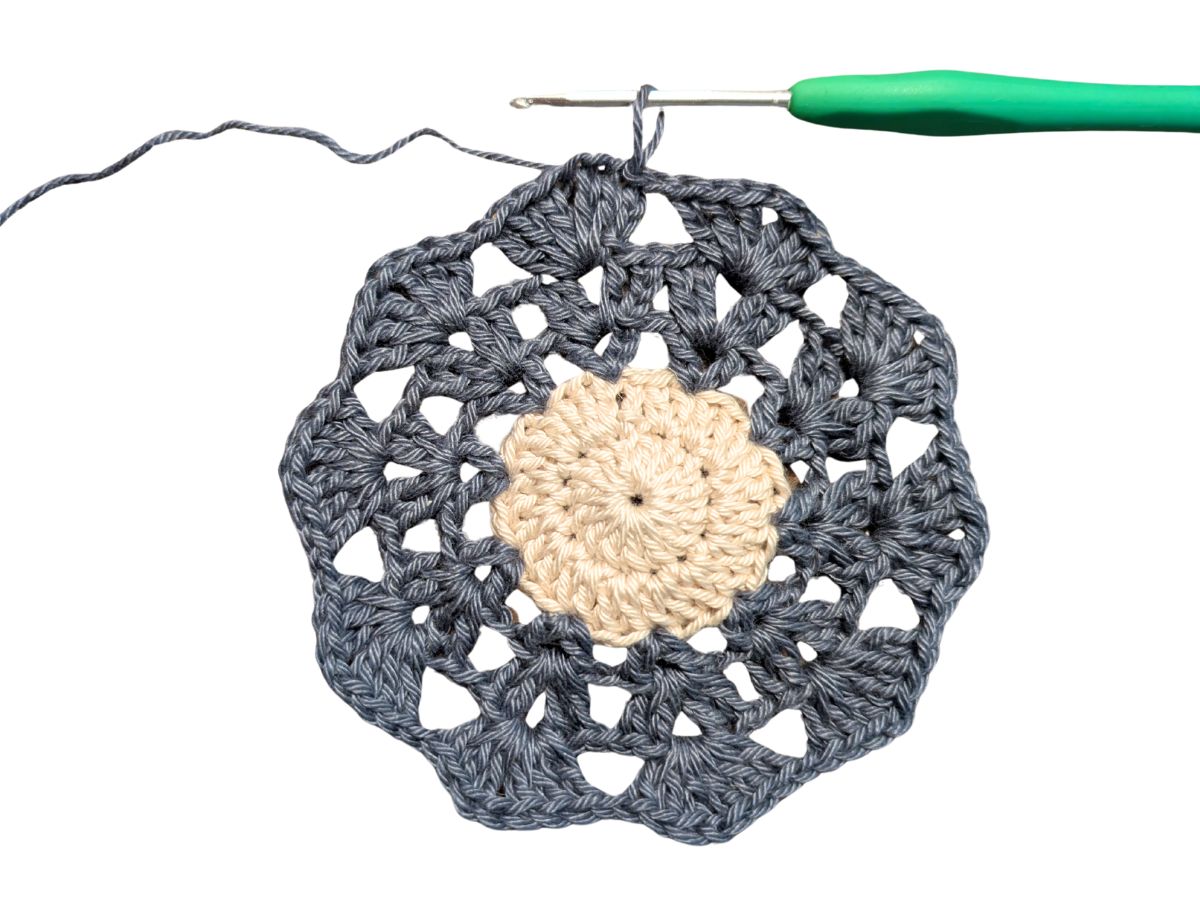
Round 6: ch 3 (counts as a dc), then make 3 dc, ch 2, and 4 dc in ch 1 space from previous row and ch 1. *Skip the next ch space, and work (4 dc, ch 2, 4 dc) in the following ch 1 space from previous row, and ch 1. Rep from * till last chain. Then slst to 3rd chain, and make 3 more slst in the next 3 st from the previous row. (10 groups of (4 dc, ch 2, 4 dc)).
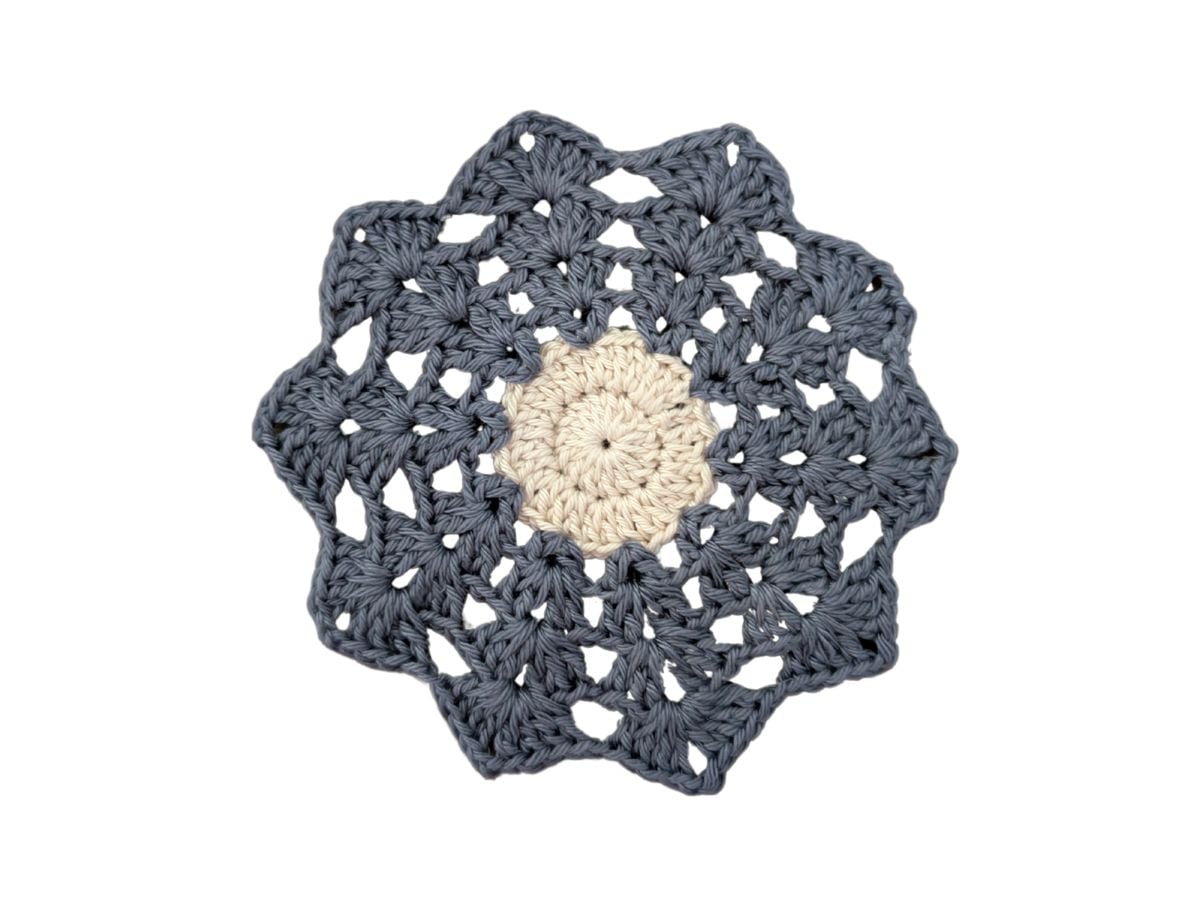
Finish off and weave in your ends.
Part 2: How to Seam Your Petals Together
Now you're going to seam your two flower petals together to create the coaster. The next set of instructions is explained in steps as I found it easier to explain.
Step 1: Place your two flower petals on top of each other, making sure that the right side is facing up (you want the wrong sides facing each other).
Step 2: Then place a stitch marker at the top of every 2nd group to hold the two flower petals together.
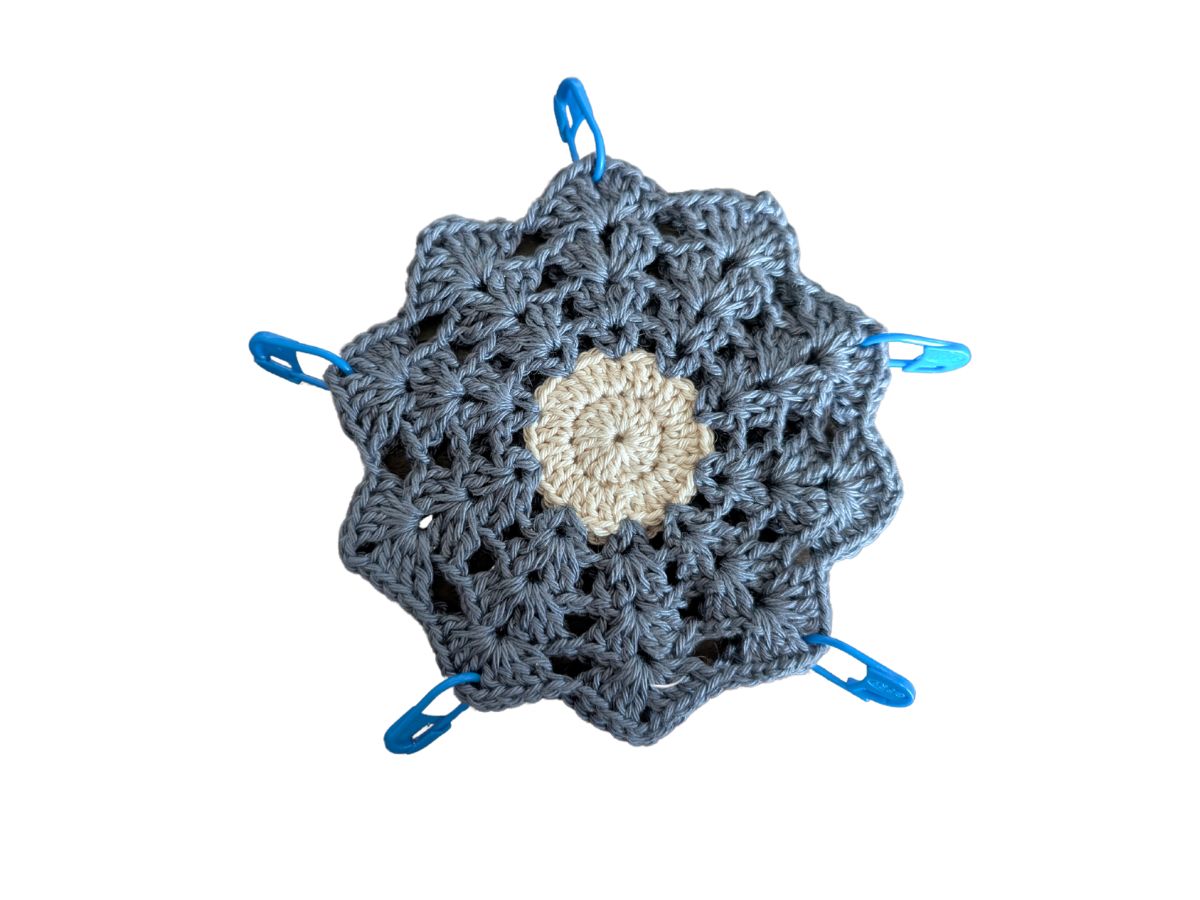
Step 3: Once you have added your stitch markers, grab your yarn (Scheepjes Catona color Linen), and reattach it to the ch 2-space of any one of the groups.

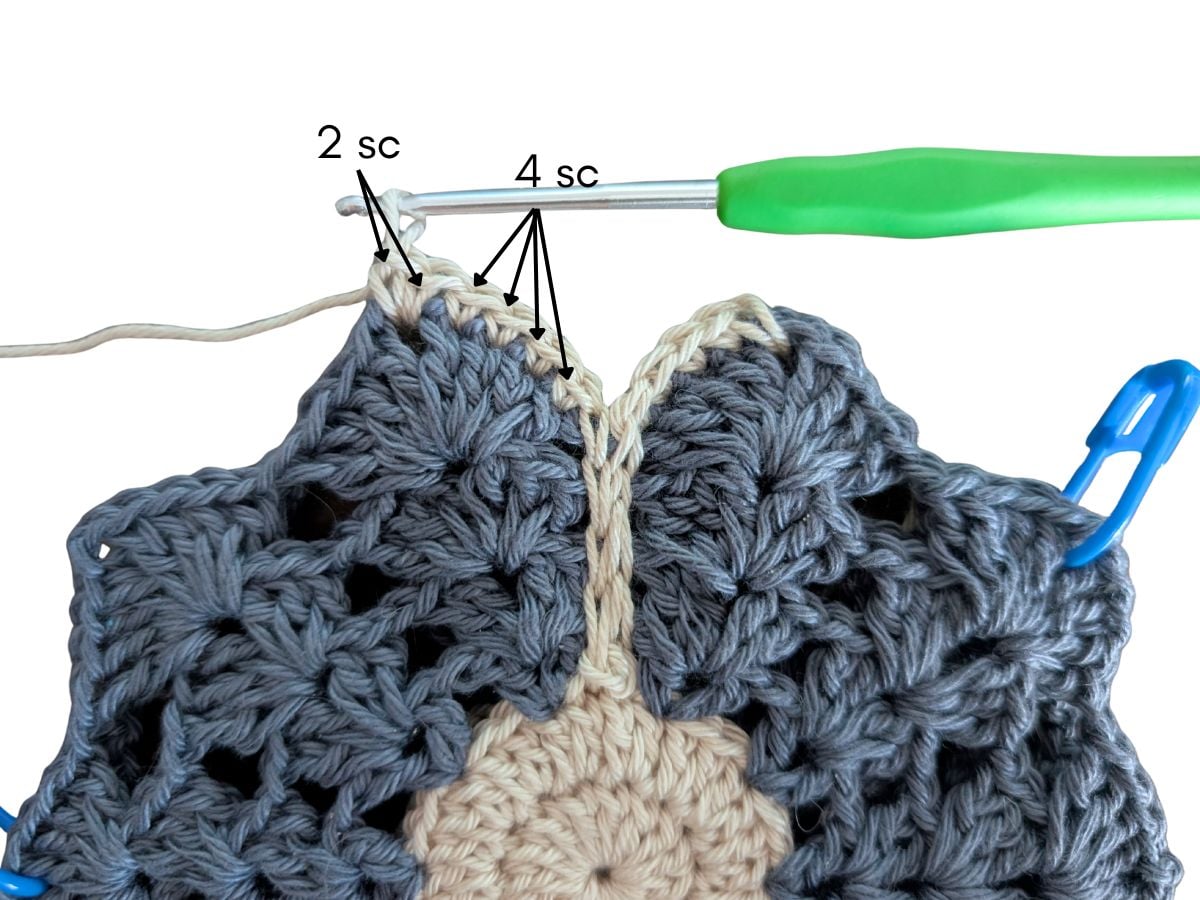
Step 4: Then work 4 sc in each of the dc stitches from the group of 4 (making sure that you're working your hook through both of the petals), and then work a slst in the ch 2 space from the previous row.
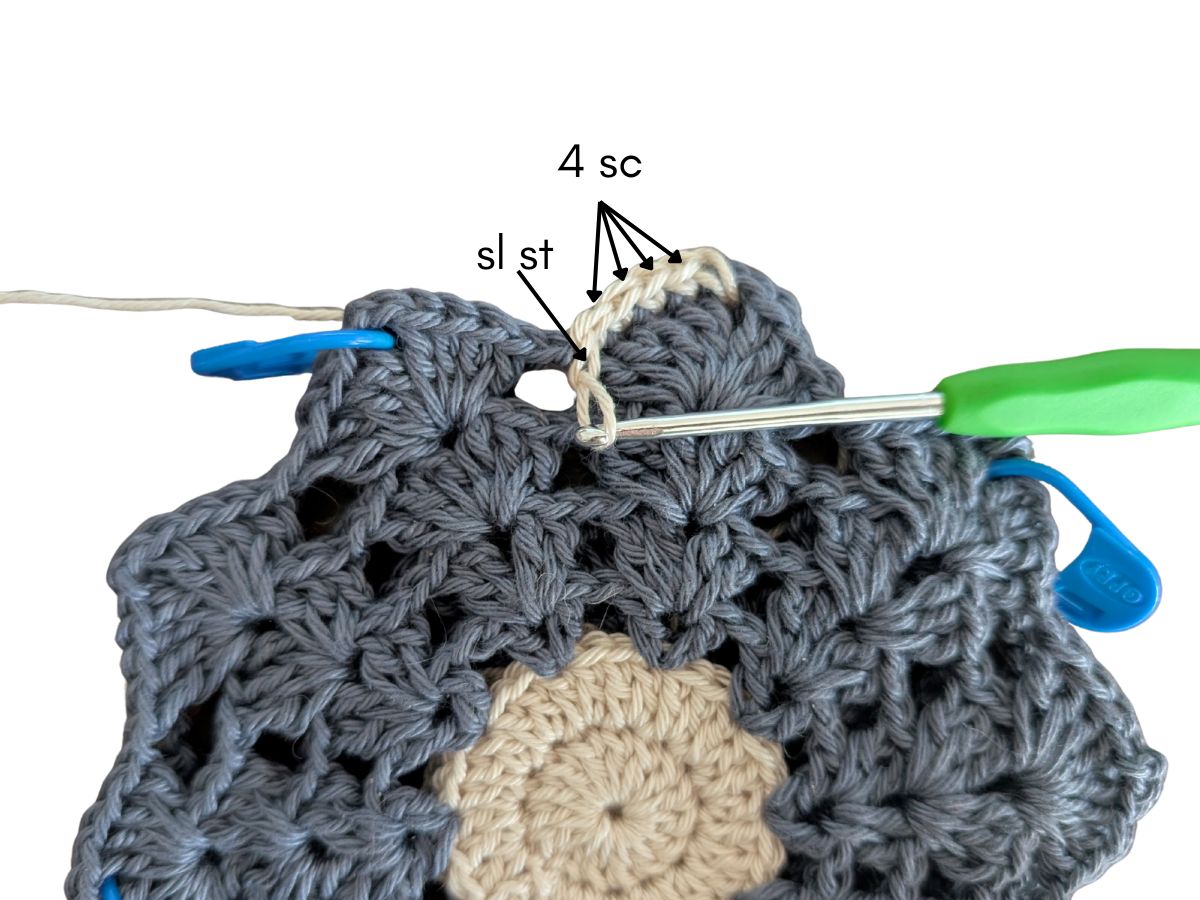
Step 5: Now work 3 more slst going down in each ch 2 space, making sure not to pull tight on your slst. You want your slst to be loose for this part of the tutorial. If you create very tight slst, your groups will start to bunch together and your petals will start to curve upward.
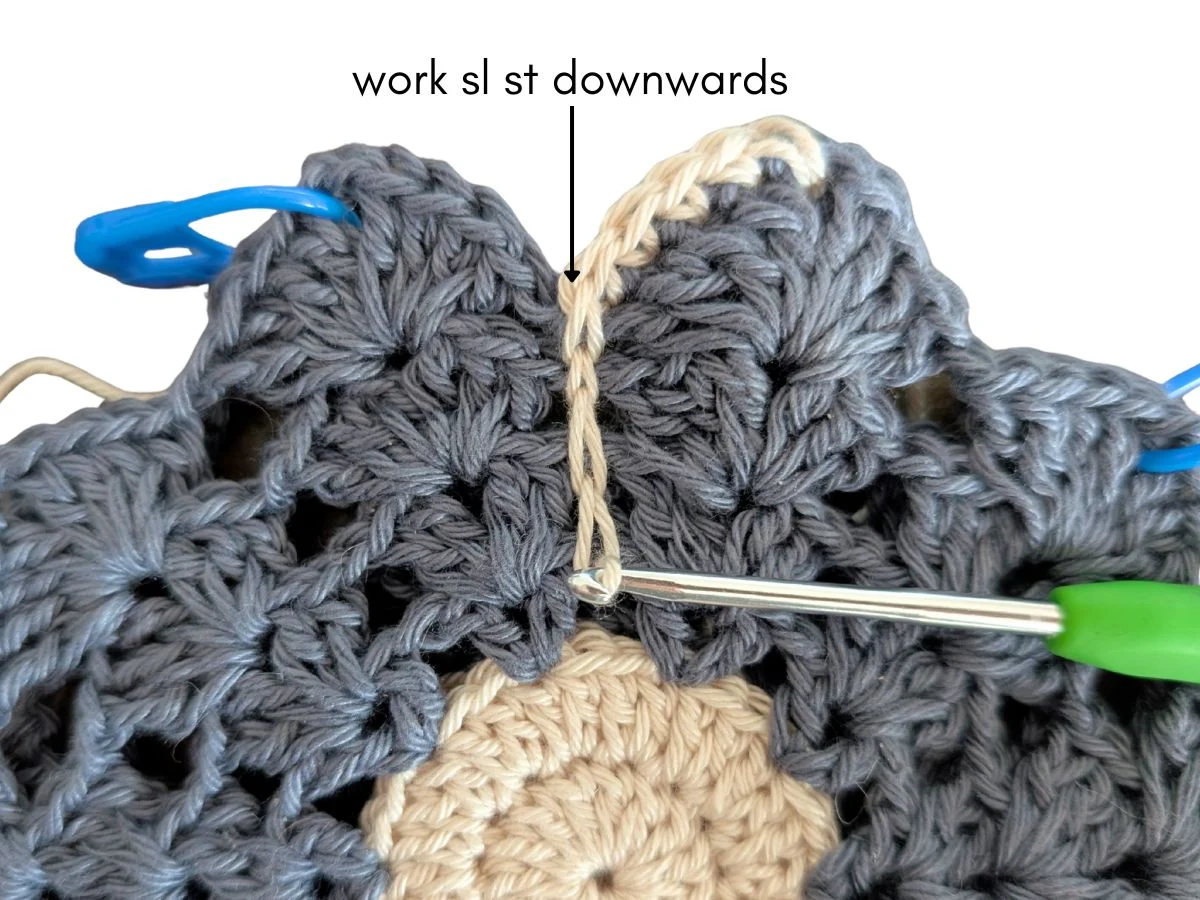
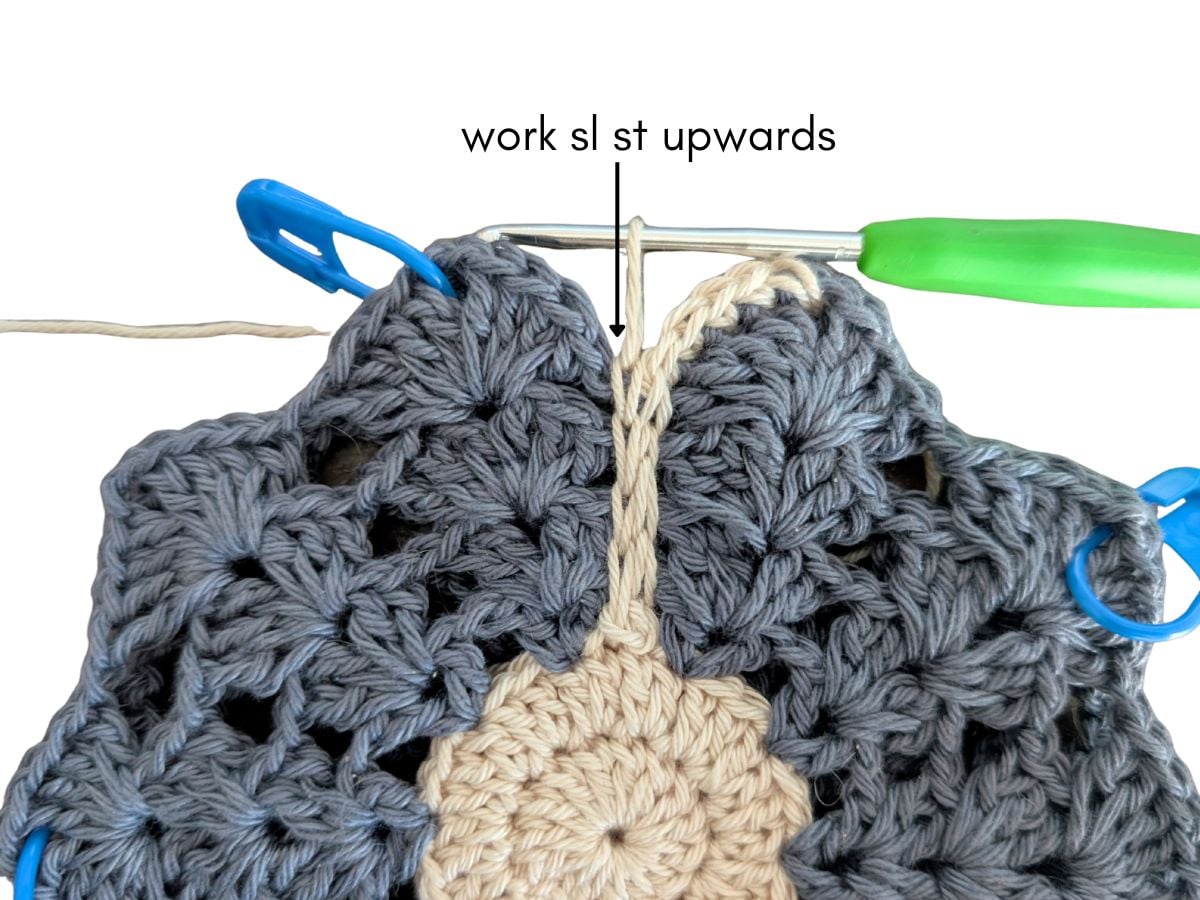
Step 6: Once you have worked your slst going down, make 1 slst in the following stitch of your second round of your circle. Then work another slst in the following stitch (next to the slst you just made), and then work your way back upwards making slst in each ch 2 space.
Step 7: Then continue by working 4 more sc in each dc stitch from the group of 4, and then work 2 sc in the ch 2-space between the group of 4.
Step 8: Repeat steps 4-7 for each petal. Once you have finished working your last petal, make 1 more single crochet in the space where you added your yarn and slip stitch to that stitch.
Step 9: Remove all your stitch markers, and finish of your work.
You're finished! I hope you enjoy using your new crochet flower coaster. If you want to make a matching set, then click here to make the crochet flower potholder pattern.