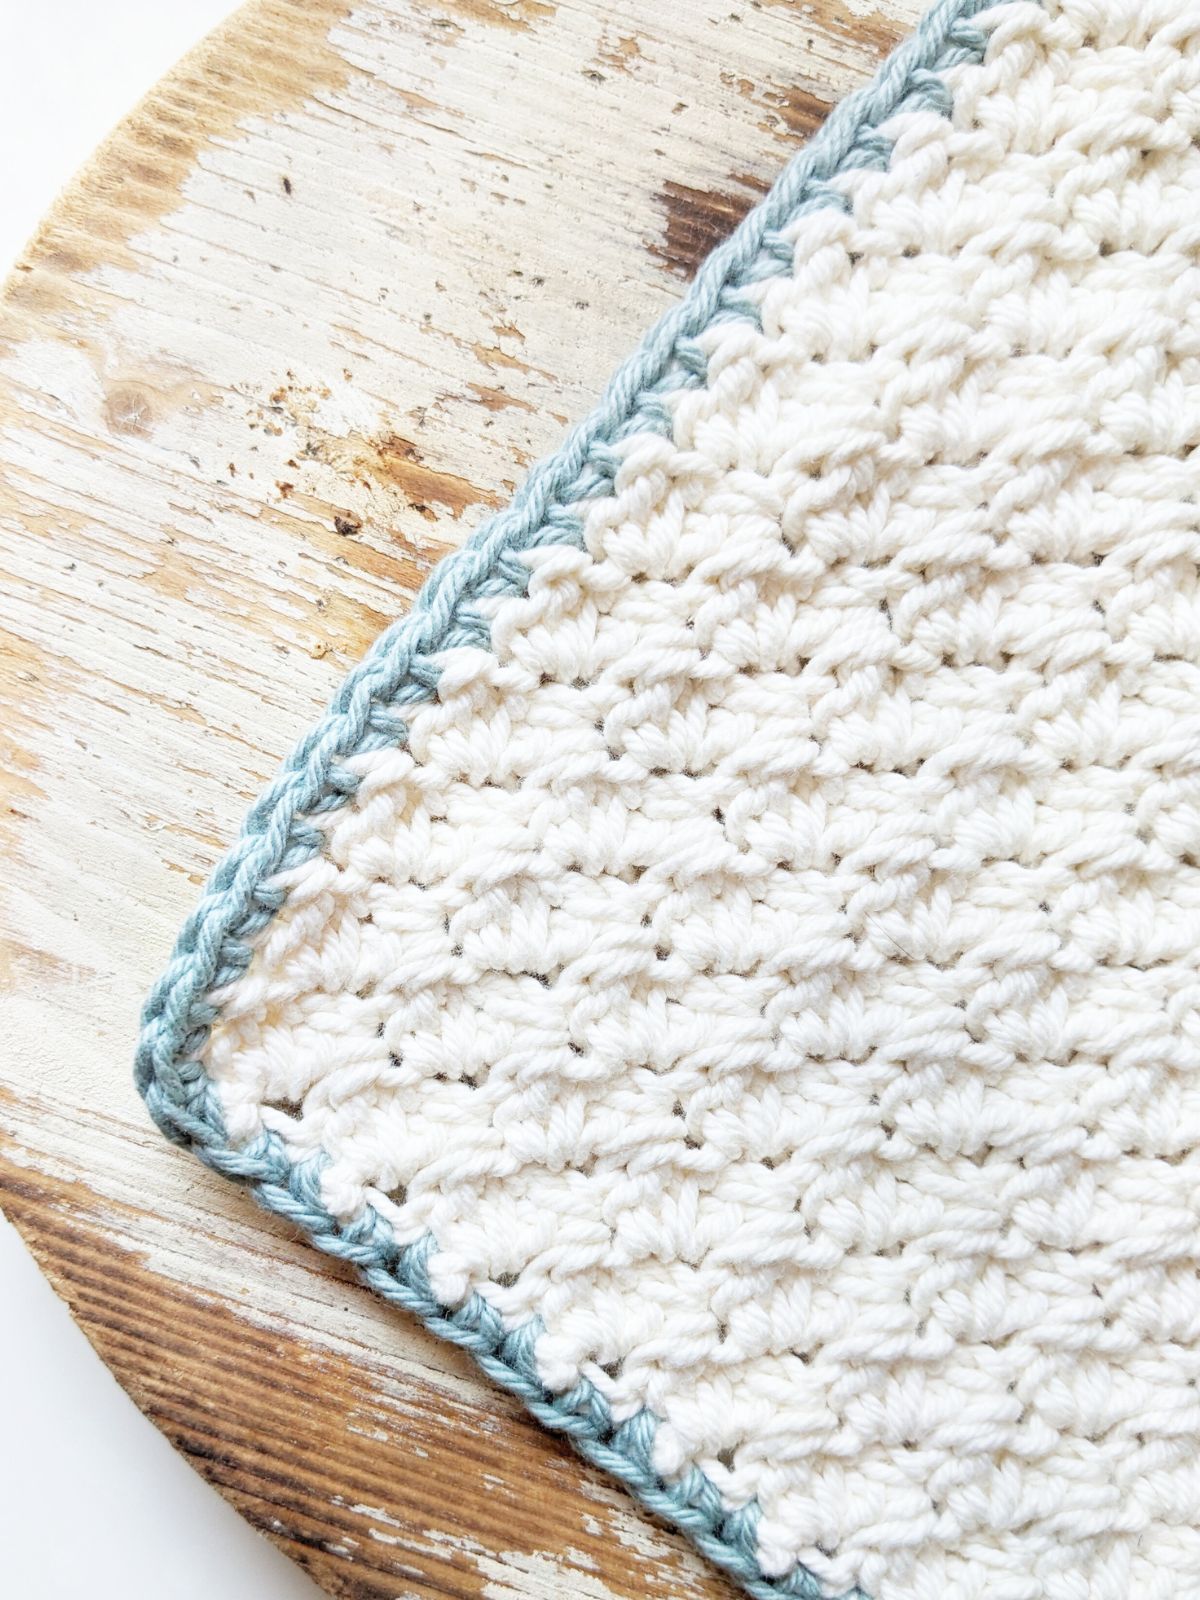
In this tutorial, you'll learn how to single crochet a border on a blanket. A single crochet border is easy and quick to make as you're only making one stitch.
So it's perfect for beginners looking to make their first border on a crochet project. If you want to spice it up a bit, then you might enjoy this crab stitch border which is made using a reverse single crochet stitch.
This post contains affiliate links, which means I make a small commission at no extra cost to you. See my full disclosure here.
Either way, you'll have a really cute edging on your blanket! Alright, let's get into the nitty-gritty of how to add a crochet border to a blanket.
Single Crochet Border
I love adding borders to my crochet projects because I often find that it adds the perfect finishing touch. It's especially great if you want your edges to look a little neater.
For example, some stitches can look a little wavy on the ends and so to get it a bit straighter you can either block it or make a border. More often than not, I find myself making a simple single crochet border.
If I want a little bit of a fancier edging, all crochet the picot stitch border.
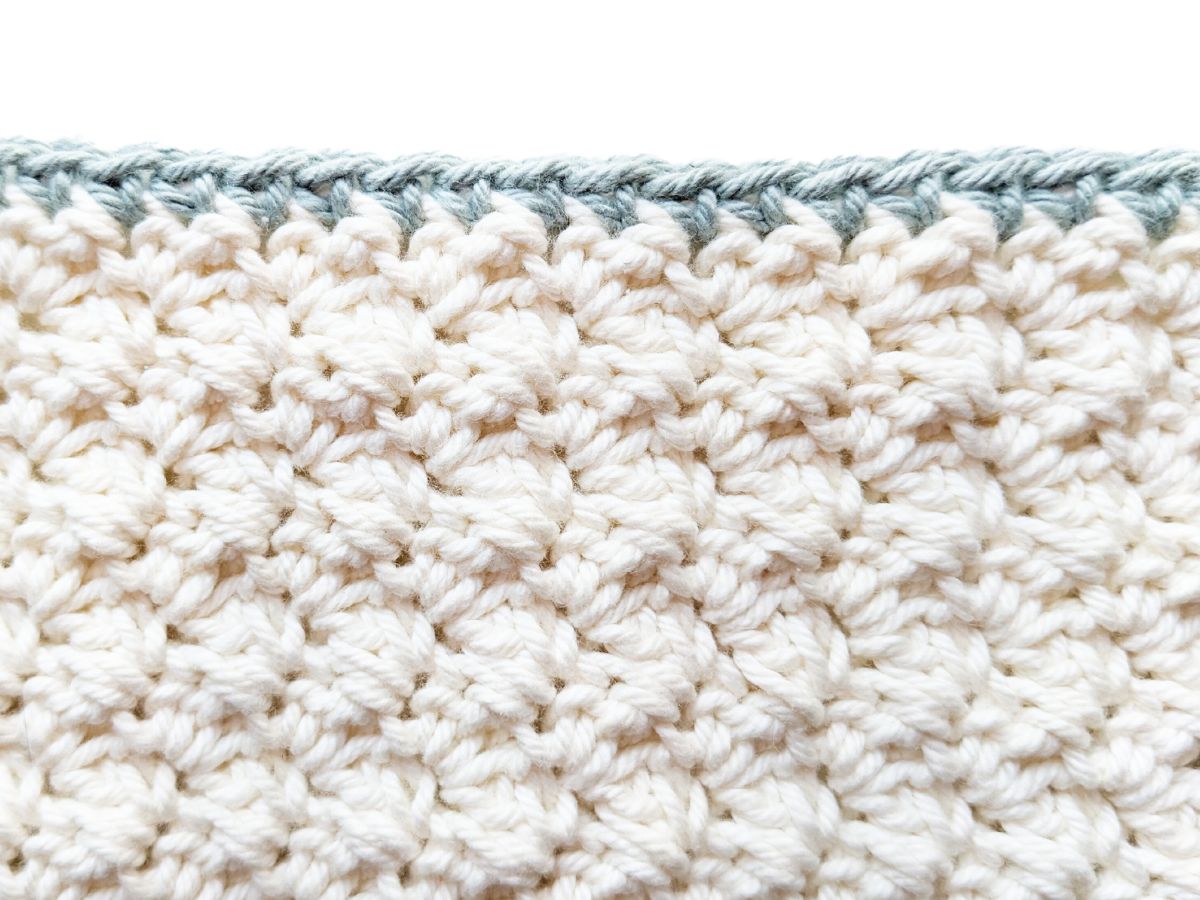
So what do you need to know to make a single crochet border? All you need to know to make this border is a single crochet stitch and you also need to know where to make the stitches on your project.
This can sometimes be a little hard to see, especially on the sides, but here are some tips to help in making a straight neat edge.
Crochet Border Tips: Straight Edges
- Stitch markers. I place a stitch marker in every corner before I start my border. This way it's easier for me to see which stitch was last/first in every corner. It might seem silly, but I find it really helpful with more complicated stitch patterns.
- Large Crochet Hook. In order to keep my border neat, I sometimes like to use a larger crochet hook when crocheting my border. I find that it really helps my stitches look even!
- Add an extra stitch. When in doubt, add an extra stitch. If I see that my work is pulling or it's rounding on the side, I like to add an extra stitch. You can also add a chain within a single crochet stitch when working the corner stitches (sc, ch, sc).
And those are some of my tips for making a crochet border. If you have some tips and would like to share them, make sure to leave them in the comment section.
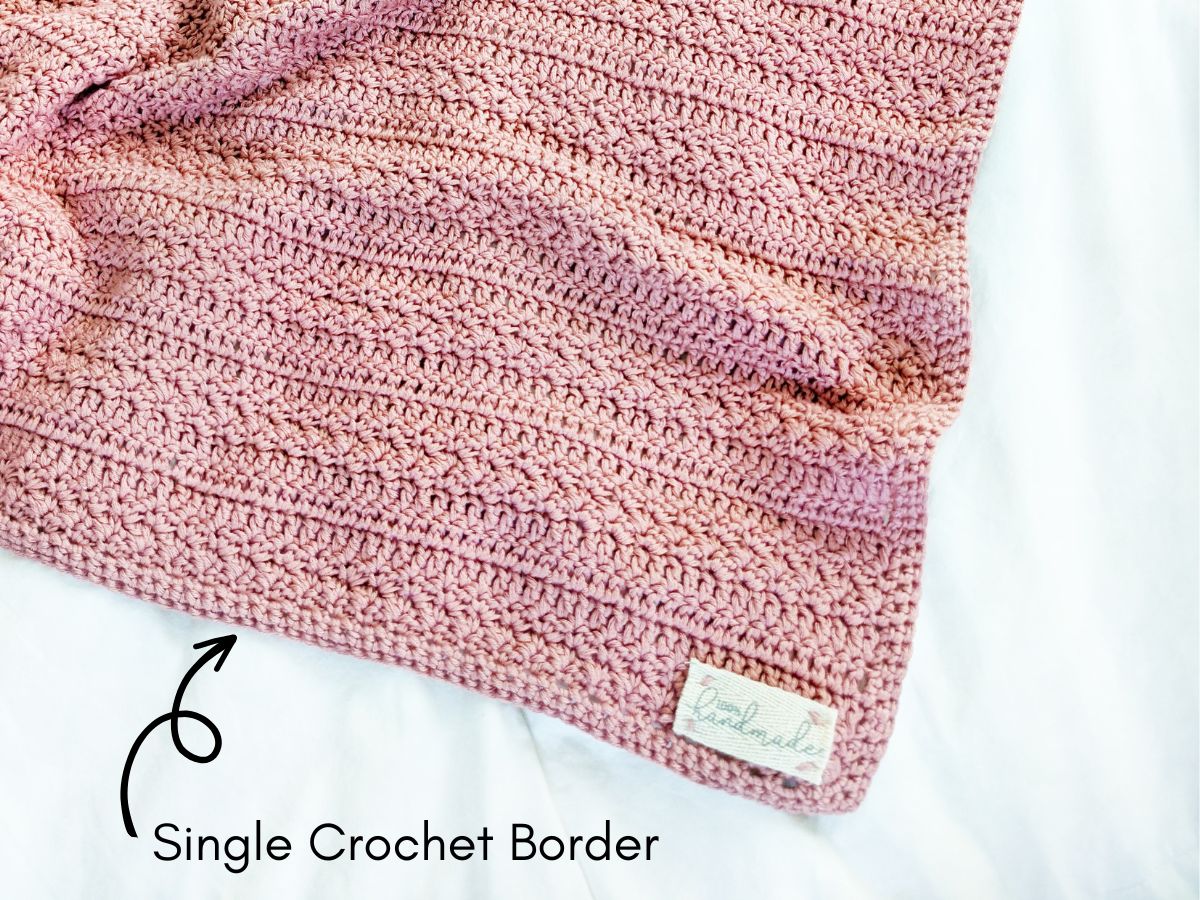
This free crochet baby blanket pattern has a single crochet border.
Materials You Will Need to Make This Stitch
Since this is just a practice swatch, there’s not much that you need. But here are the things that I used for this border tutorial.
- Cotton Yarn. I made a basic 4″ by 4″ inch swatch using the suzette stitch and my favorite cotton yarn by WeCrochet.
- 4.0 mm crochet hook. I used a basic wooden crochet hook for this tutorial.
Alright, let's get started!
Single Crochet Border Tutorial
Step 1: Insert your hook into the last stitch of your last row, and make a single crochet.
If you’re using a different color, reattach your yarn to the last stitch of your last row, chain 1, and make a single crochet in the same stitch you attached your yarn to.
Note - to make a single crochet: Insert hook into stitch, yarn over and pull through, yarn over and pull through last two loops on hook.

Step 2: Then continue to make 1 single crochet in each stitch across the row.

Step 3: Once you have finished one side and you've reached a corner, make 2 single crochets.
Note - if you find that your corner is rounding or looks tight, make a chain within the 2 single crochets (sc, ch, sc).

Step 3: Continue making a single crochet in each stitch on the side of your work.
Make sure you're putting just one stitch per row when working on the sides of your crochet project.

Now continue to repeat this sequence all the way around your crochet project. Once you have finished your border, slip stitch to the first stitch.
And that's it, you're finished! I hope you enjoyed this tutorial and don’t forget to save this post for future reference.
PIN IT for later

lorrie
Monday 21st of April 2025
I really appreciate your detailed step-by-step instructions. Your written out tutorial is exactly what I need to finish up my granny square throw project. I've been watching tutorials but, for some reason I seem to miss the part I needed to know (where EXACTLY to start the first sc). I know this is so basic, but it is an immense help in feeling confident I'm doing it right. Avoiding having to pull out all my crochet stitches is a priority at this point. lol Big gratitude! <3
Nicky
Monday 28th of April 2025
Aww thank you so much! I'm so glad the tutorial was helpful and that it helped you start your border. 😊
Kate
Thursday 27th of March 2025
Hi I’m having trouble doing a single crochet border on the baby blanket pattern of yours when it’s 3 rows Suzette stitch and 3 rows double crochet… particularly when starting the double crochet rows with 3 chains. I totally understand the border at the top and bottom… as the stitches are clear there… but having difficulty creating a neat border along the sides… In the 3 chains, seeing it creates a “gap”, do I just put one single crochet in the space? Or 2 in the same space? I hope my question makes sense. I’m looking forward to hearing back from you. Cheers Kate
Nicky
Thursday 3rd of April 2025
Hi there, thank you for your question. I would recommend making 2 single crochets on the side of your double crochet stitch. You could even try 3 single crochet stitches on the side, but I think 2 would work. I would make it in the same space as that's what I did. But if it doesn't look right or it starts to curl, I would evenly space the single crochets on the side of your work. I hope that helps! 😊