Do you want to make a border around your crochet project, but don’t know how to attach a new strand of yarn? Well, look no further, today’s easy tutorial will show you how to add yarn to your crochet project so you can make a border.
If you want to make a simple border after learning this, I would recommend making a single crochet border, and if you want to spruce it up a bit, then you might enjoy crocheting the picot stitch border.

This post contains affiliate links, which means I make a small commission at no extra cost to you. See my full disclosure here.
Whichever one you choose, I hope this tutorial is useful and helps with future crochet projects!
Beginner Crochet Tutorial
Before we move on to the tutorial, I just want to note that even though this post is focused on how to attach a new strand of yarn to a border. You can also use this tutorial when a pattern calls for a different color.
For example, my striped moss stitch blanket pattern is made using 3 different colors. In the pattern, I note how to change colors, but if you didn’t like that method, you can always use this method.
So it all comes down to personal preference.

Materials You Will Need for This Tutorial
Since this is a basic tutorial on how to add yarn, there’s not much that you need. But here’s what I used in the step-by-step photos down below:
- Practice Swatch or Current Project. I made a basic 4″ by 4″ inch swatch using the suzette stitch and my favorite cotton yarn by WeCrochet.
- 4.0 mm crochet hook. I used a basic wooden crochet hook for this tutorial.
Alright, let’s get started!
How to attach a new strand of yarn for the border?
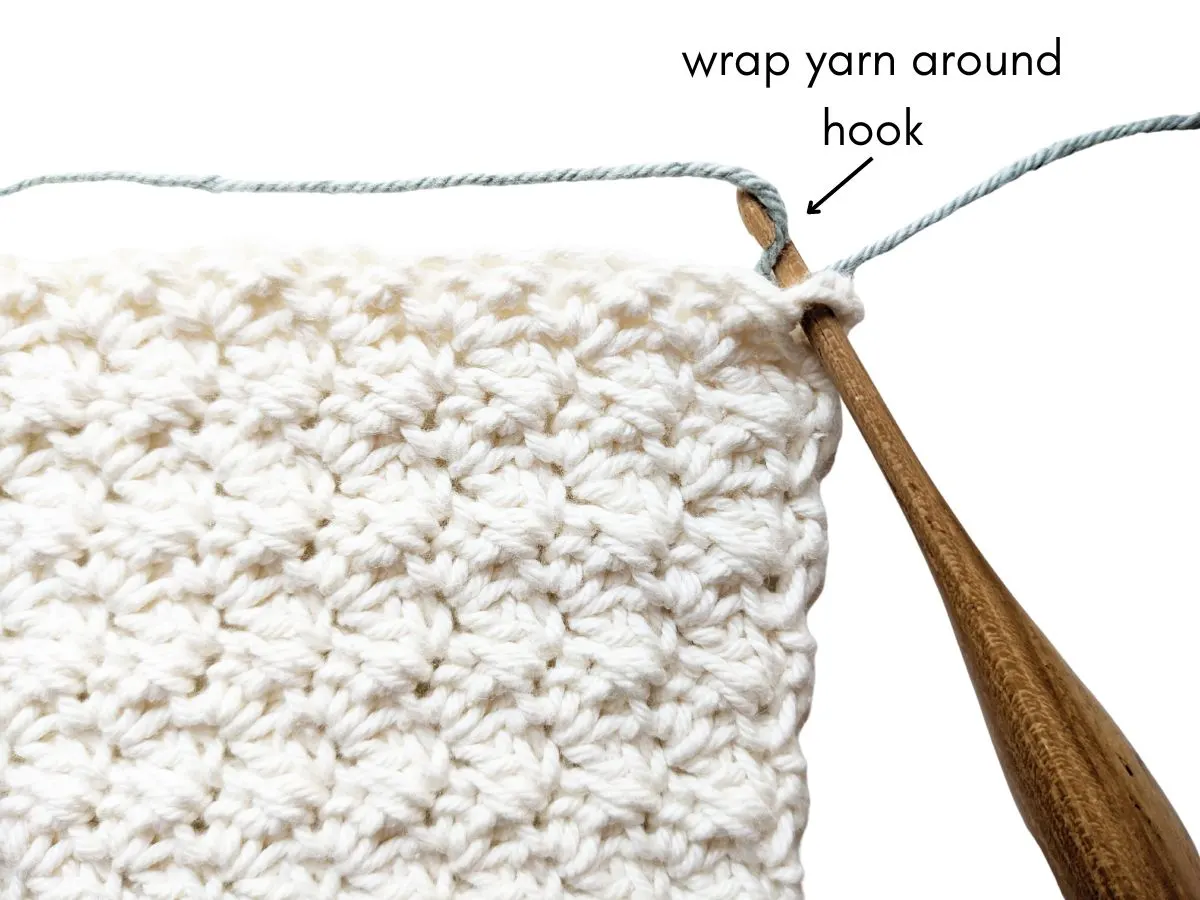
Step 1: Start by grabbing your hook and your other yarn color. Insert your hook into the last stitch of the last row on the right side of your project. Then wrap the yarn around your hook.

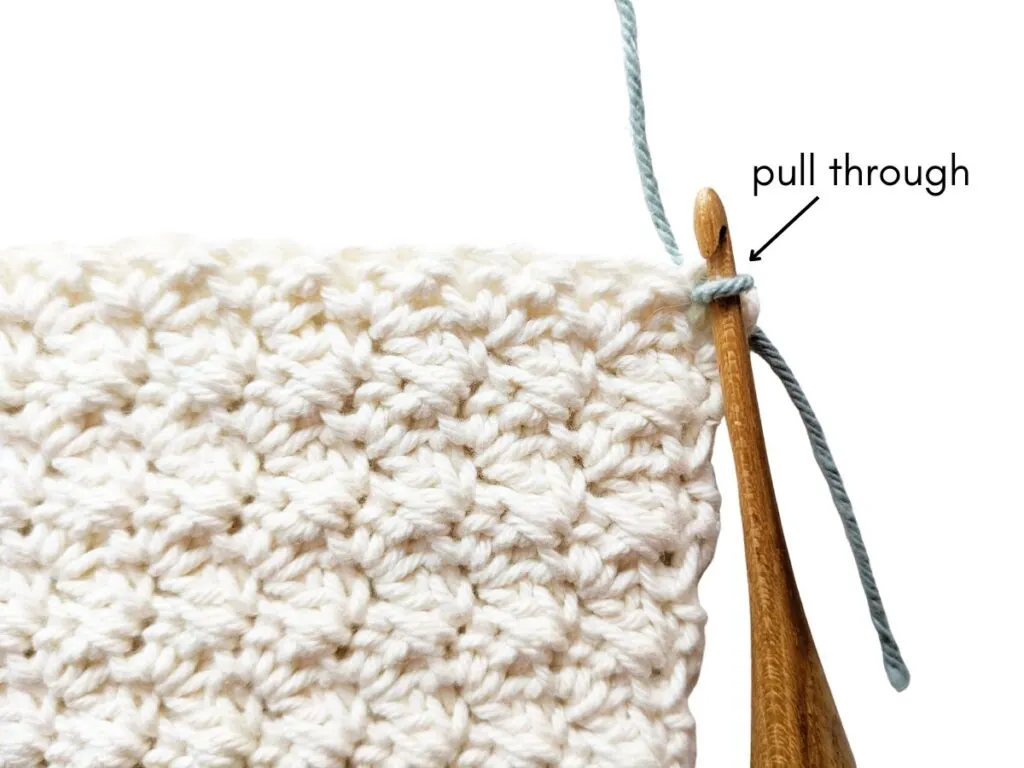
Step 2: Once you have wrapped the yarn around your hook, carefully pull through halfway.
You should have a short tail-end on the right, and your working yarn should be on the left. Your crochet hook should be through the loop that you just made.

Step 3: Now you want to make a chain to secure the new strand of yarn.

And that’s it! Now you have successfully added a new strand of yarn and you’re ready to make your border.
If you would like to learn some more crochet tips, make sure to check out these other tutorials.
Also, don’t forget to share and save this post for future reference!
