Learn how to make a slip knot for your crochet projects with this easy step-by-step photo and guided video tutorial. In this tutorial, I'm going to show you how to make a slip knot 3 different ways.
They are all very simple to make and take less than a minute! All you need for this tutorial is some yarn and a crochet hook.
This post contains affiliate links, which means I make a small commission at no extra cost to you. See my full disclosure here
Crochet Slip Knot Tutorial for Beginners
In today's tutorial, I'm going to show you 3 easy ways to create a slip knot when starting a crochet project. A slip knot is needed at the beginning of your crochet project because that's what holds all the stitches together. You can't start your standard chain, without a slip knot.
So if you're new to crochet and don't know where to start, this is the perfect place. A slip knot is the first thing you need to do before you start your chain. Now there are a couple of different ways to make a slip knot, but I personally like the three I'm going to show you down below.
I've also included a step-by-step video tutorial to help you along the way. So before we get started, let's go over some common questions when it comes to making a slip knot in crochet.
Does a slip knot count in crochet?
No, your slip knot does not count as a stitch in crochet. The chains that you make after your slip knot count as a stitch.
Is a slip knot the same in crochet and knitting?
Yes, a slip knot is the same in crochet and knitting. No matter which fiber craft you choose to do, a slip knot will always be worked the same way in projects.
Slip Knot Tutorial
For this tutorial, I used a 9.0 mm wooden crochet hook and Lion Brand Hue + Me yarn, which is a bulky weight yarn.
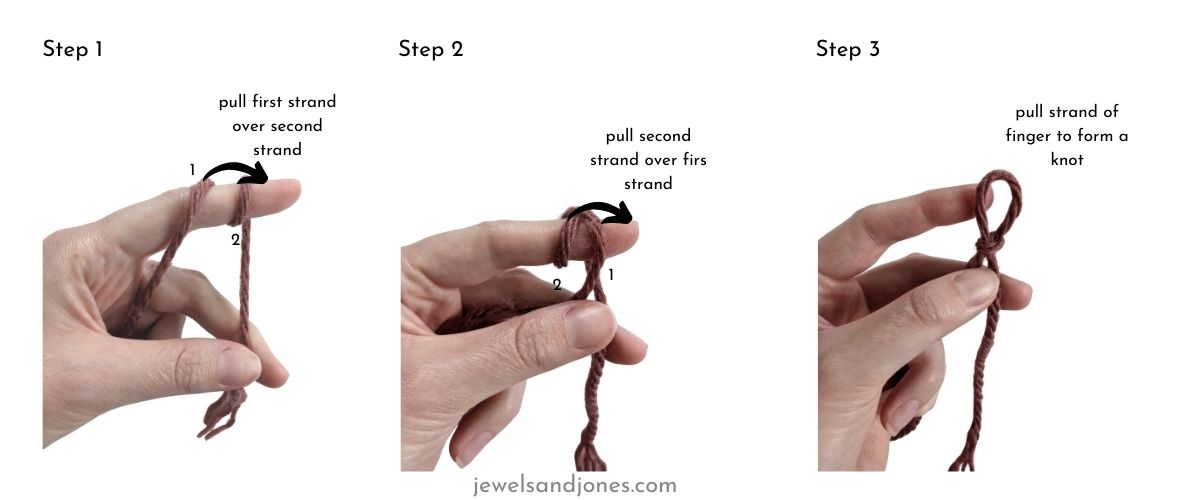
Method 1
Step 1: Wrap the yarn around your finger twice and pull the first strand over the second strand.
Step 2: Pull the second strand over the first strand so it's still on your finger.
Step 3: Slide the yarn off your finger and pull on the two strands to form a knot.
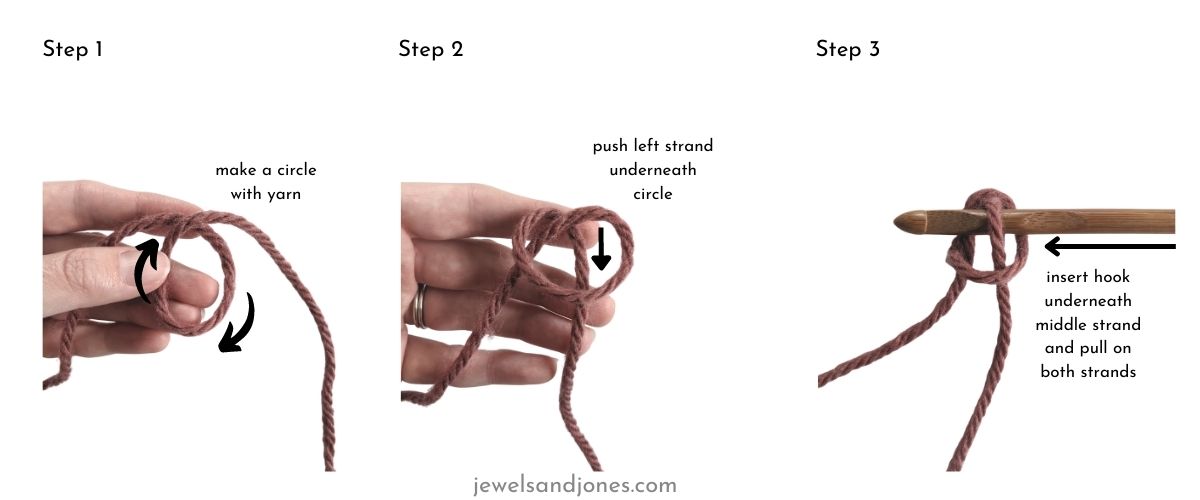
Method 2
Step 1: Grab your yarn and create a circle (loop).
Step 2: Push the left strand underneath the circle so that it's in the middle.
Step 3: Grab your crochet hook and insert it underneath the middle strand. Now pull on both strands until a slip knot forms.
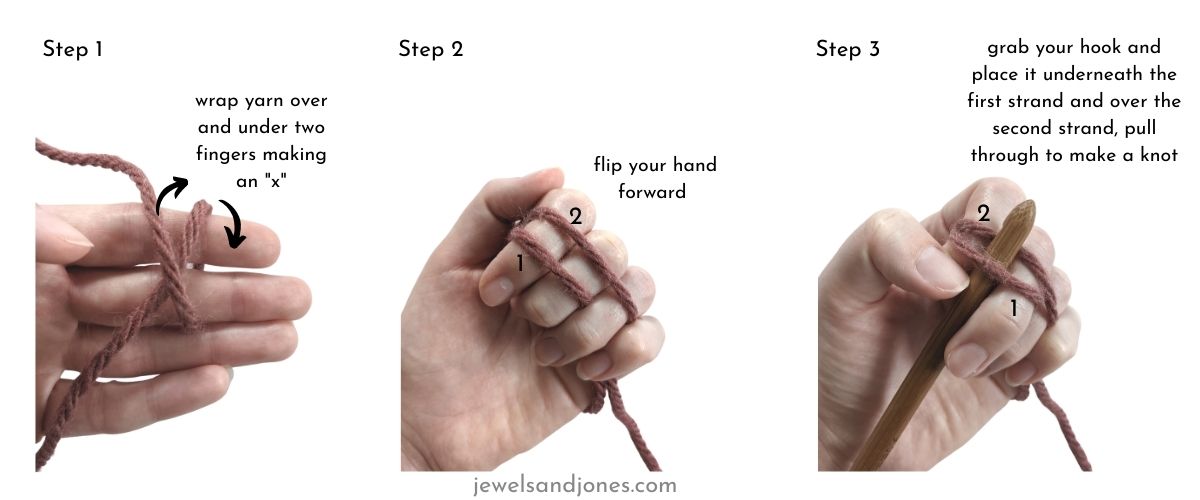
Method 3
Step 1: Hold out two fingers and wrap the yarn underneath and over your finger creating an "x".
Step 2: Flip your hand forwards so that you see the front of your fingers.
Step 3: Grab your crochet hook and place it underneath the first strand and over the second strand. Carefully, pull through and take the yarn off your hand. Pull-on both strands one more time to create a slip knot.
I hope you enjoyed this quick tutorial of how to make a slip knot in crochet and don't forget to PIN IT for later!