Learn how to crochet and seam an easy granny square blanket using the Circle of Friends crochet granny square motif.
In today's tutorial, I'm going to show you how I put together my granny square blanket using the Circle of Friends crochet granny square motif. You will learn some tips and tricks to crocheting the perfect granny square and you will learn about two different seaming methods. So let's get started!
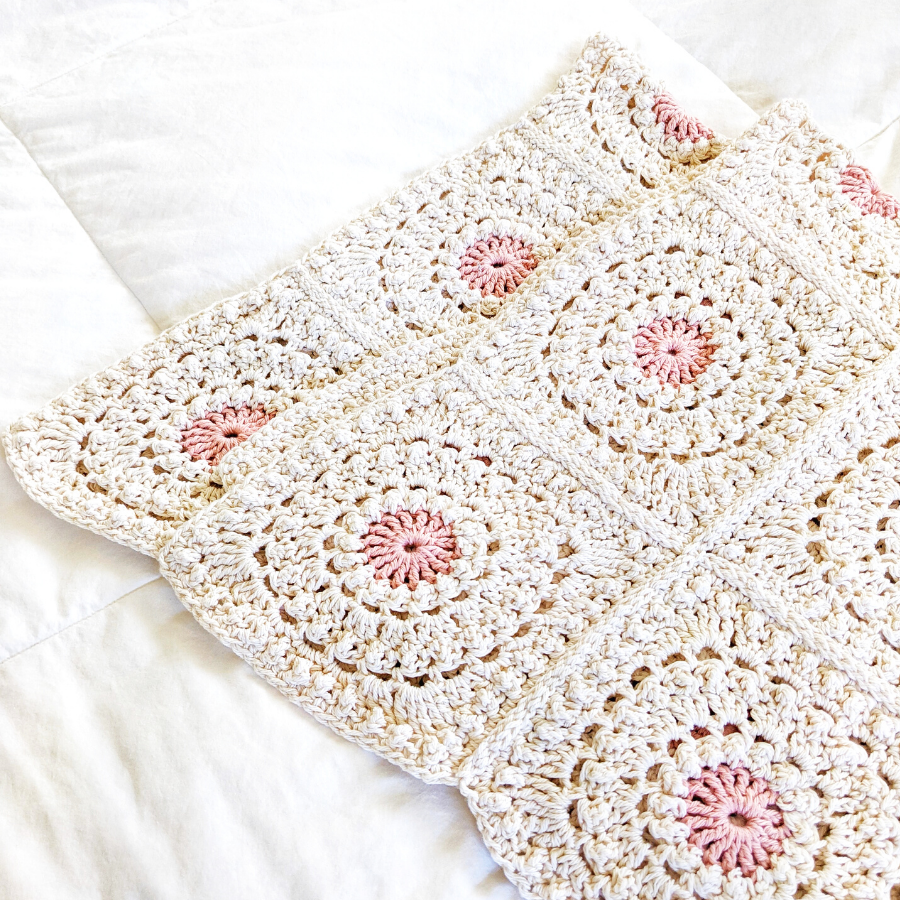
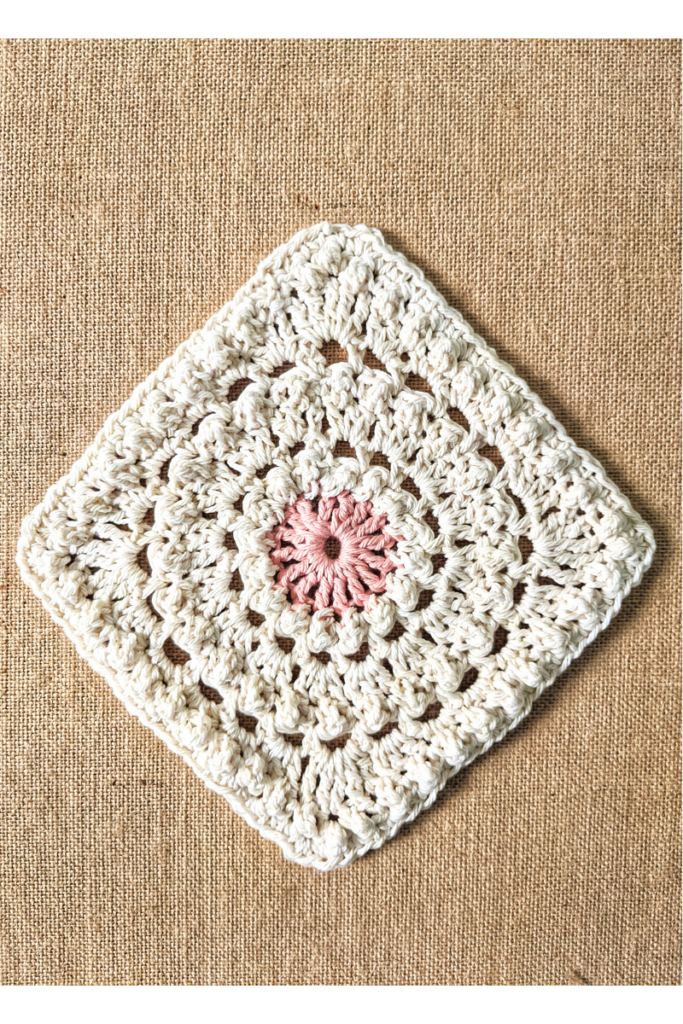
This lovely granny square motif was created by Priscilla Hewitt and is currently a free pattern on her website. If you're interested in finding out the inspiration, yarn choice, and where to find this pattern, be sure to check out this post here.
How to Crochet a Granny Square Blanket
If you've been crocheting for a while, there's probably a good chance that you've made a granny square. I know when I first started I made a basic double crochet granny square. How about you? But as I got more into crochet and spent way to much time on Pinterest, I saw many variations of granny squares. That's how I came across the Circle of Friends crochet motif. I absolutely loved the look of it and knew that I wanted to make my own version of it. If you haven't checked out that post, click here to read my review on the Circle of Friends Crochet Granny Square Pattern.
So as I was making all these squares and did loads of research on finding the best methods to crochet a granny square and how to seam them together. Here's what came up!
Tips for Crocheting a Granny Square
- Work in your ends when finished with your crochet granny square. All though a pain, this will save you loads of time in the end. Especially if you're working with multiple yarn colors.
- Check the best method to seamlessly join different colors together.
- Blocking is your friend! Block each crochet granny square to get the perfect square. This will ensure that each square matches perfectly in size with each other.
- Check to see which blocking method is best for you to use based on your yarn!
- Decide in the beginning if you want to seam them together one by one, or join as you go.
2 Different Ways to Seam Granny Squares Together
There are various methods to putting together or seaming a granny square blanket. The two that I will mention below are personally my favorite go to methods.
One of my favorite ways and most common ways in the crochet world is to crochet multiple granny squares and then seaming it together when you're done. I love using the slip stitch method for this, but you can also use double crochet or there is also an invisible seaming method. It all comes down to personal preference.
You can also join as you go, which basically means that as your crocheting a granny square, you can go ahead and add another square to it. So instead of crocheting them one by one, you continue to add one as you go. I've also seen granny squares being made within the join as you go method!
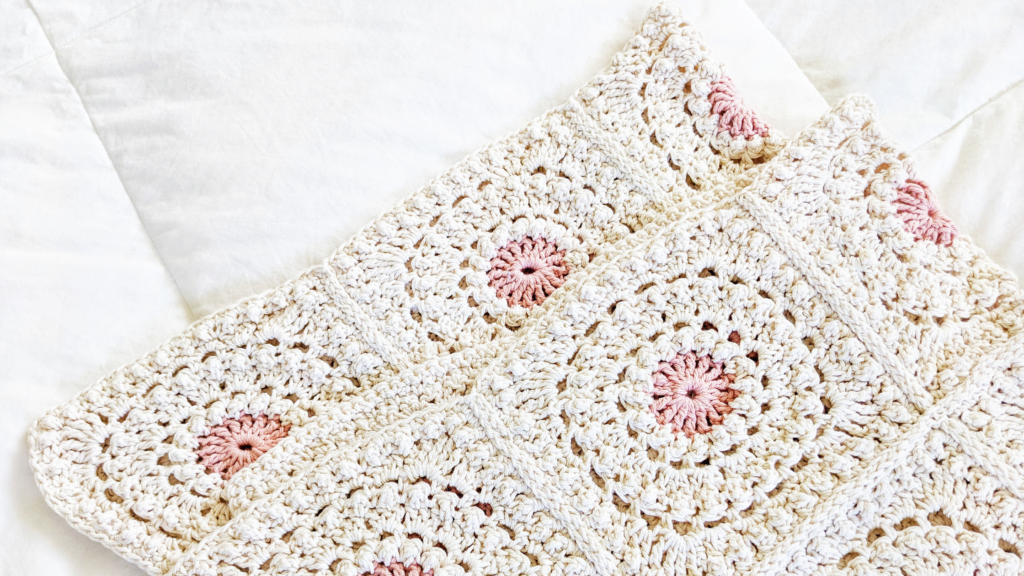
I personally love the first method because you get to see which seaming method you like best for your crochet granny square blanket. For the Circle of Friends granny square, I decided on the slip stitch seaming method. So you basically take 2 squares, put them together, and then seam the sides by crocheting a slip stitch. Its creates a lovely, very noticeable border in between each square. Plus, you get two different crochet textures on the front and back of your blanket.
So to roundup our seaming methods.
Roundup Crochet Seaming Methods
| Basic Crochet Method | Join As You Go Method |
| Crochet granny squares one by one and then seam individually together. | Joining another granny square to the last granny square just completed. |
| Longer method! | Time saver method! |
| Multiple different ways to seam: slip stitch, double crochet, invisible seam, etc. | Multiple different ways to seam: slip stitch, flat join, double crochet, etc. |
| Easy to understand. | Easy (+) |
So at this point you're probably thinking of all the things you can make with a granny square. I know that tons of ideas popped into my head when I was making loads of these squares. You can make anything from blankets to bags, there's really an endless amount of options! As this post is about how to make a granny square blanket and how many granny squares do you need to make a blanket. Here are some quick tips to help you decide on the size of your blanket.
Quick Tips to Decide Size of Your Blanket
- What type of blanket will it be? Lapghan, afghan, baby, etc. Check out this post here for a crochet blanket size guide.
- Once you know the size of your blanket, make a granny square, measure the size, and see how many squares will fit into the size you chose.
- If you're following a pattern, make sure to check your gauge. If your gauge is not correct, it may affect the size of your crochet blanket.
I hope these quick tips helped you in determining the size of your blanket. If you're not feeling a blanket, check out some of these other crochet granny square ideas.
Other Crochet Granny Square Ideas
- Pencil Pouch or Bags
- Pillow Cover, like this one here
- Scarves or Shawls
- Aprons
- Table Runner or Placemats
I always love hearing other people's ideas on crochet granny squares! What are some ideas that you have or have made in the past for these lovely squares? Want to share a tip as well, leave a comment below. I hope you all enjoyed this post and please let me know if their is anything else you would like to know about this topic.
Don't forget you can find the full details on the Circle of Friends Crochet Granny Square post HERE. It will list everything from yarn choice, sizing, inspiration, plus a little backstory on my first ever crochet blanket.
PIN IT FOR LATER
