Learn how to make a crochet granny square cushion cover with this step-by-step tutorial. This granny square pillow would look cute in any home! Pair it with this simple blanket and this crochet body pillow to create the perfect cozy atmosphere.
Grab a cup of hot cocoa, a book, and you're all set! To find out how to make this pattern, scroll down or continue to read through some of the inspiration behind this crochet cushion.
This post contains affiliate links, which means I make a small commission at no extra cost to you. See my full disclosure here
Granny Square Cushion Cover
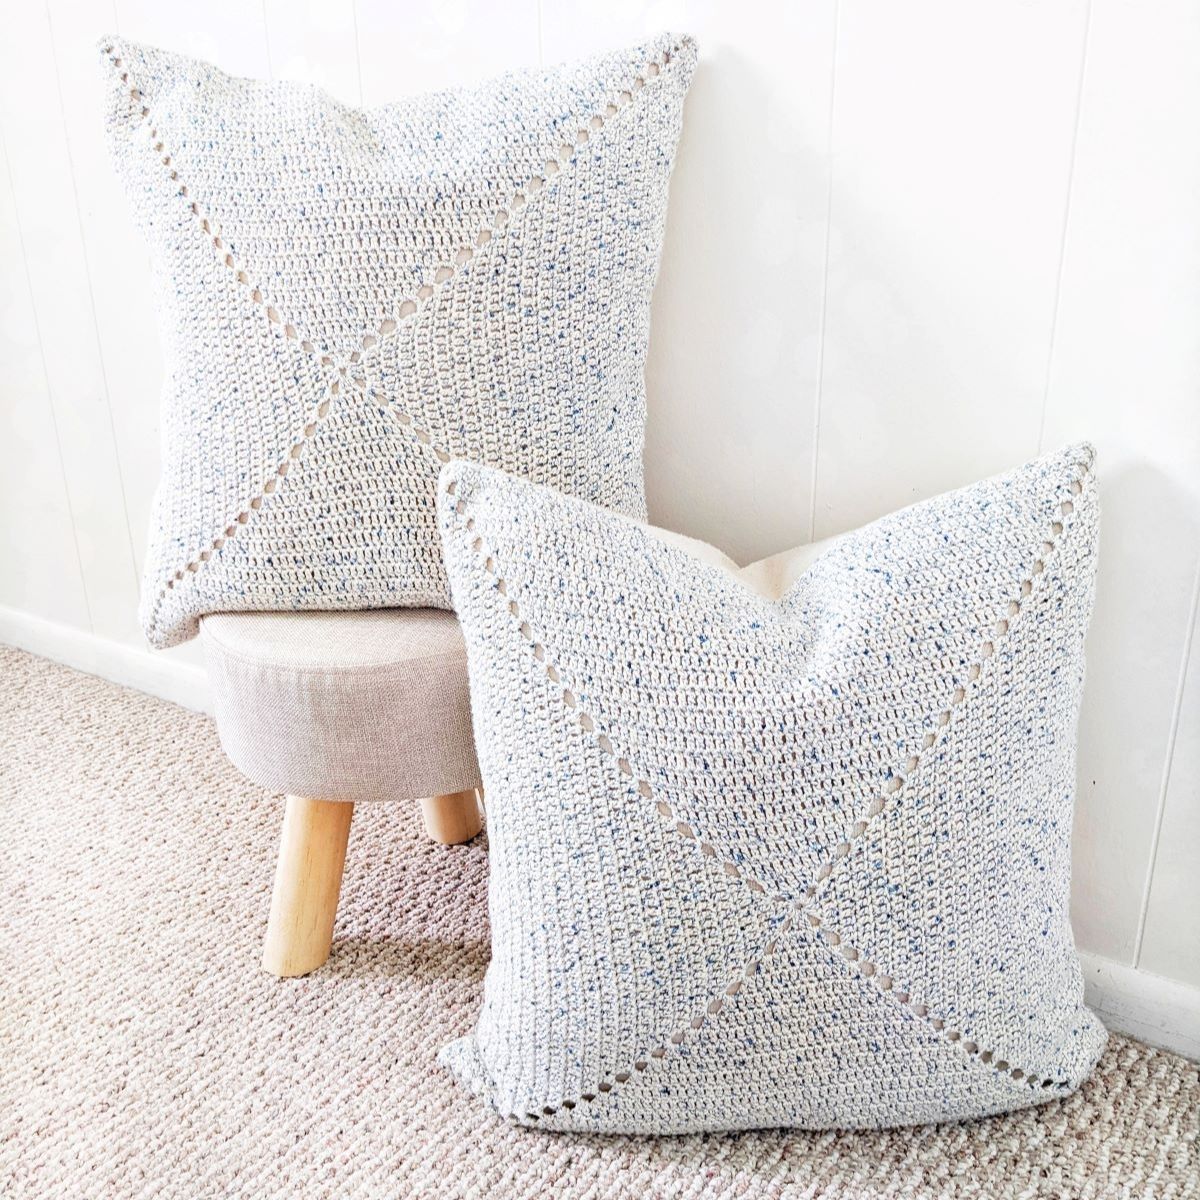
My latest free pattern on the blog is a granny square cushion cover. This adorable crochet pillow pattern is super simple to make and only requires a few things.
You will need some sport weight yarn (you can also use another yarn weight if you don't have sport weight on hand), a crochet hook, needle + thread, and an 18" inch zipper pillow cover.
Once you have all the supplies, it's time to get crocheting. Scroll down for the free pattern + step-by-step photos or continue to read through some of the inspiration behind my latest design.
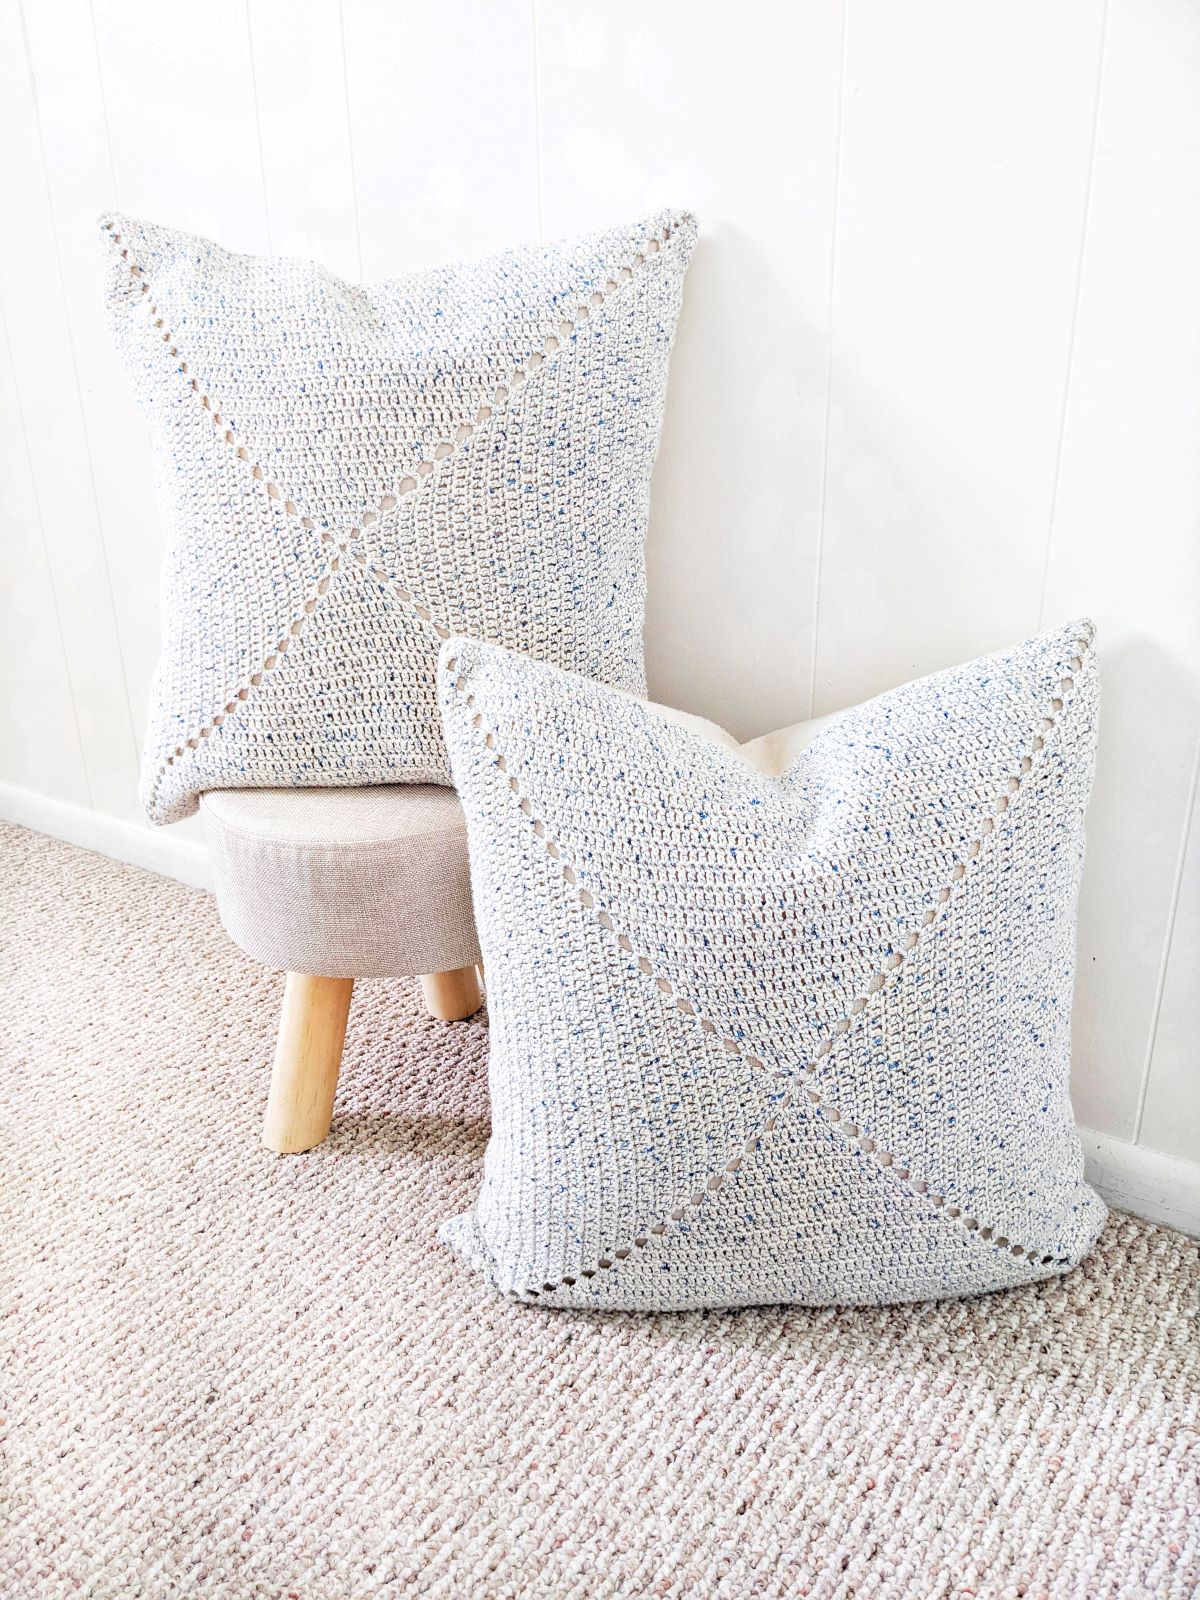
The inspiration behind my latest design came from me needing some new pillow for my couch. I love sprucing up my home and DIYing in general. So when I needed some new pillows for home, I thought why not make some fun crochet ones.
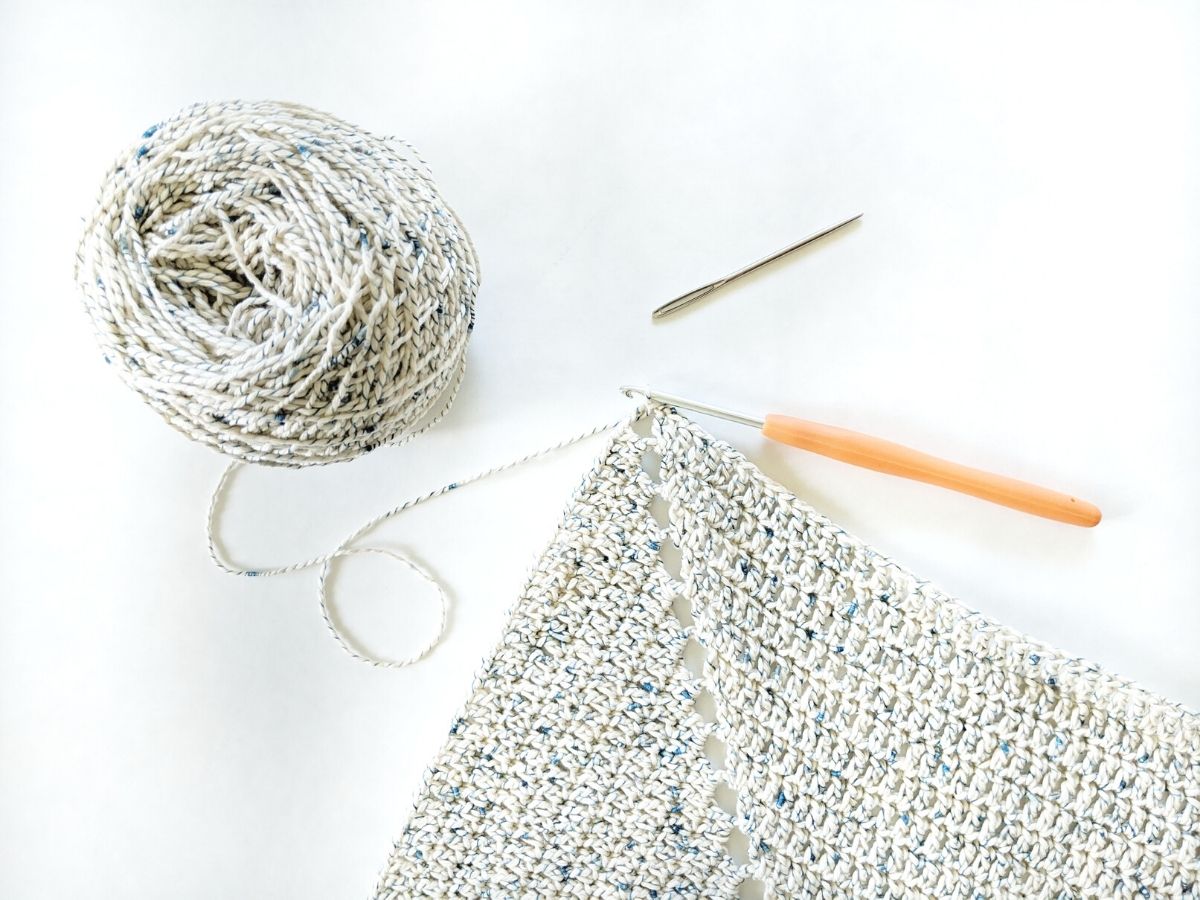
I've always loved the look of crochet granny squares and have been wanting to make some fun modern ones for my couch. So I ended up going to Hobby Lobby and picking out a beautiful sport-weight cotton yarn that has hints of blue and white.
I thought this would be the perfect yarn to use, as my house has a bit of a sea theme going on. So as I was crocheting a granny square, I thought why not sew this on a pillow cover. It makes the project fun + easy!
Plus, totally machine washable as I can remove the pillow and throw the pillow cover into the washing machine. So I hope you enjoy this crochet pillow tutorial and don't forget to let me know in the comments what you like making with granny squares.
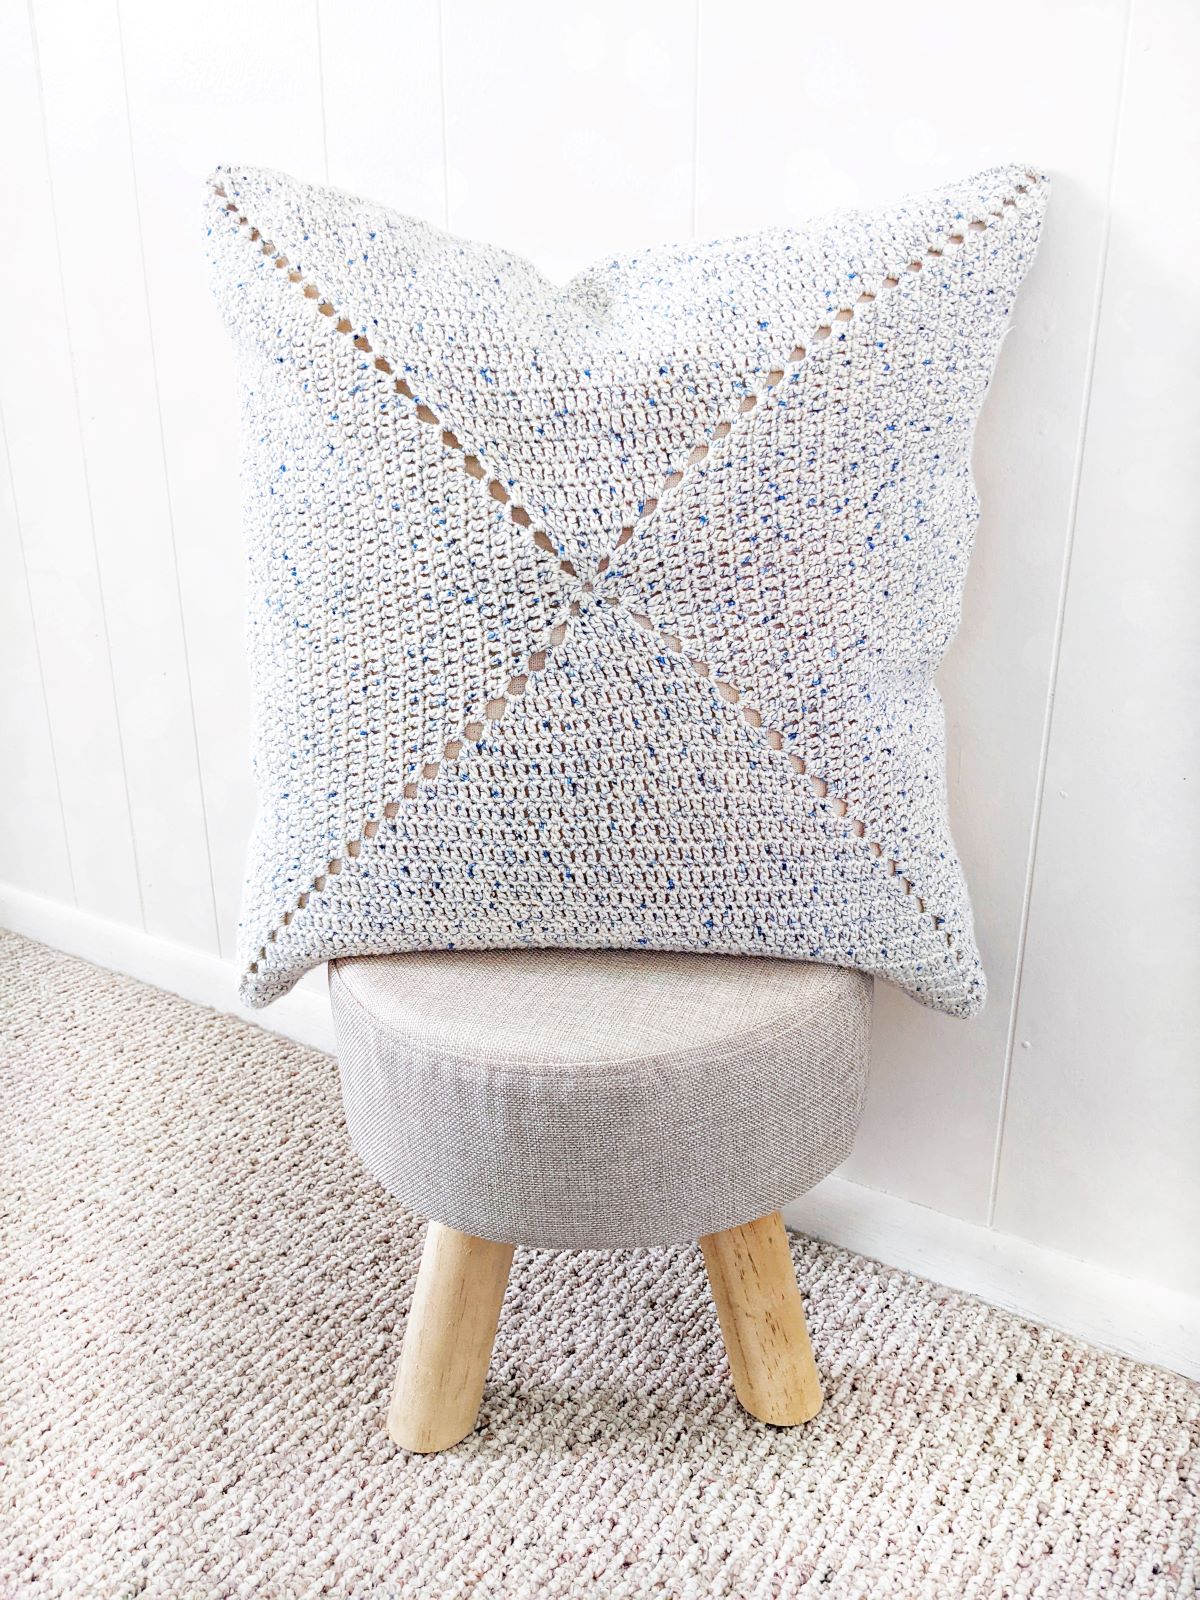
Double Crochet Granny Square
I love making crochet granny squares, there so much fun! Plus, there are so many different versions out there that you can never really get bored by a granny square.
But for this crochet cushion cover, I decided to keep it very simple. The type of granny square I made was a basic double crochet one. All you have to do is start off by making a couple of chains and then slip stitching it together to form a ring (you could also make a magic circle and continue on with round one).
Once you have your circle formed, You are then going to make double crochets within the circle until you have formed a mini square and then you continue onto the next row.
I love making a double crochet granny square because it's simple and quick. The height of the double crochet stitch makes this a pretty fast stitch to work up too. So once you have made several rows of your granny square, you will tie a knot, cut the yarn, and weave in your ends.
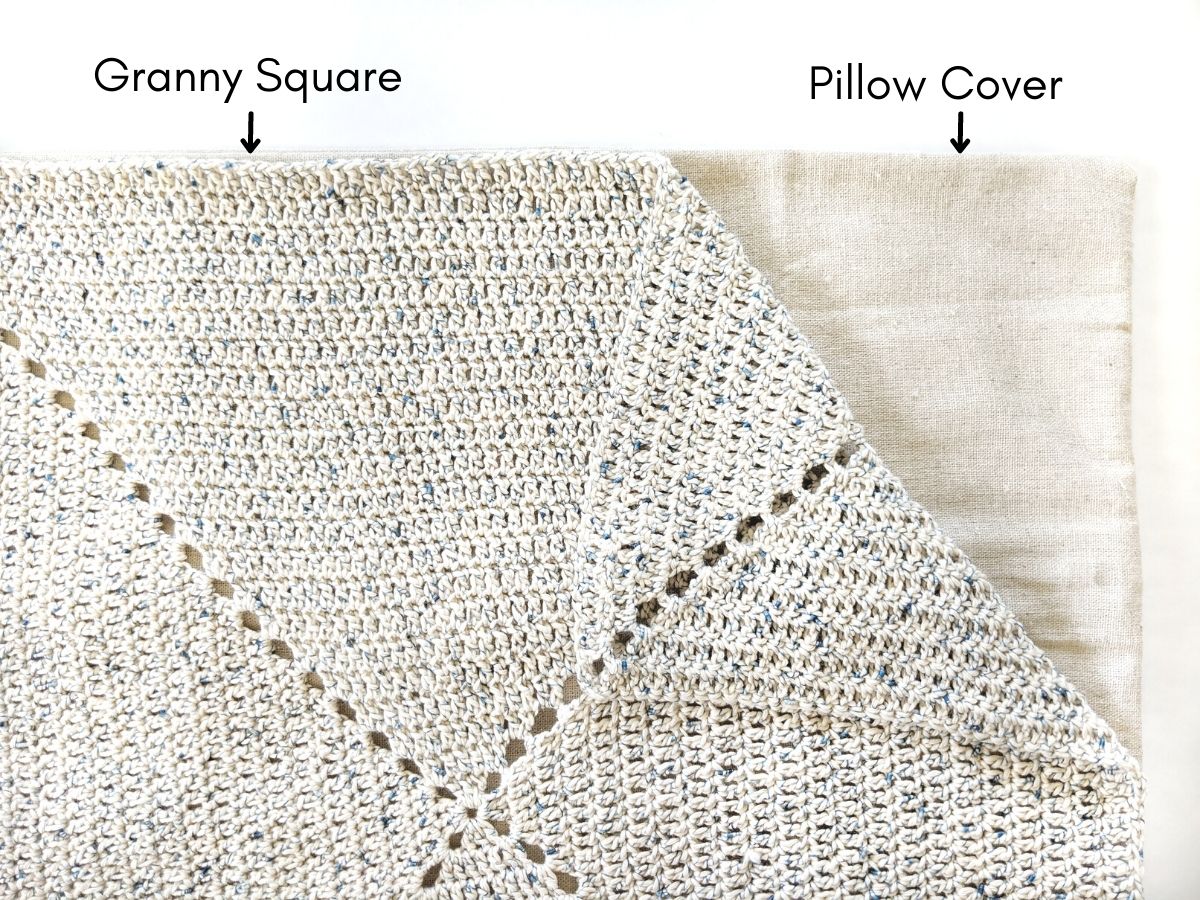
All that's left to do is sew your granny square onto your cushion cover.
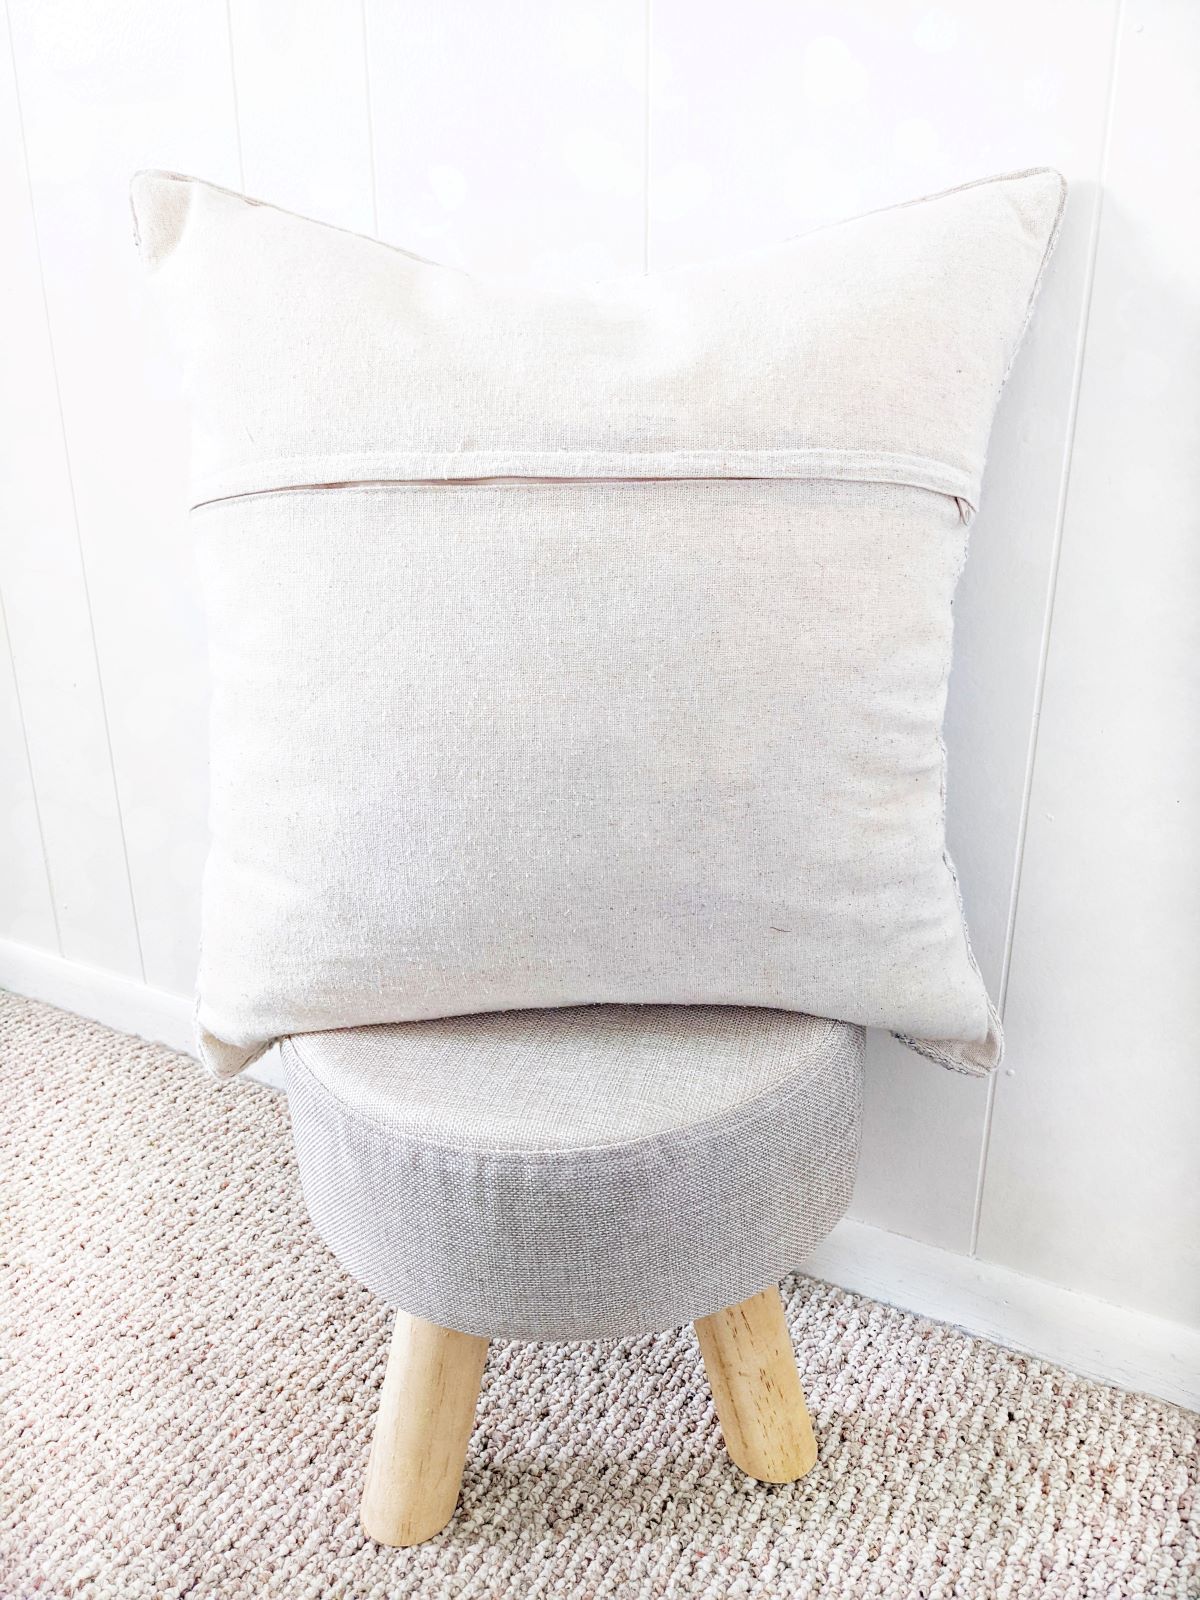
How to Sew Crochet to Fabric By Hand
Sewing your crochet project to fabric by hand is easy and fun! The whole process is very simple and just requires a few simple things. For this tutorial, I will be explaining how to sew your granny square onto a pillow cover, but you could easily use these directions for other crochet projects.
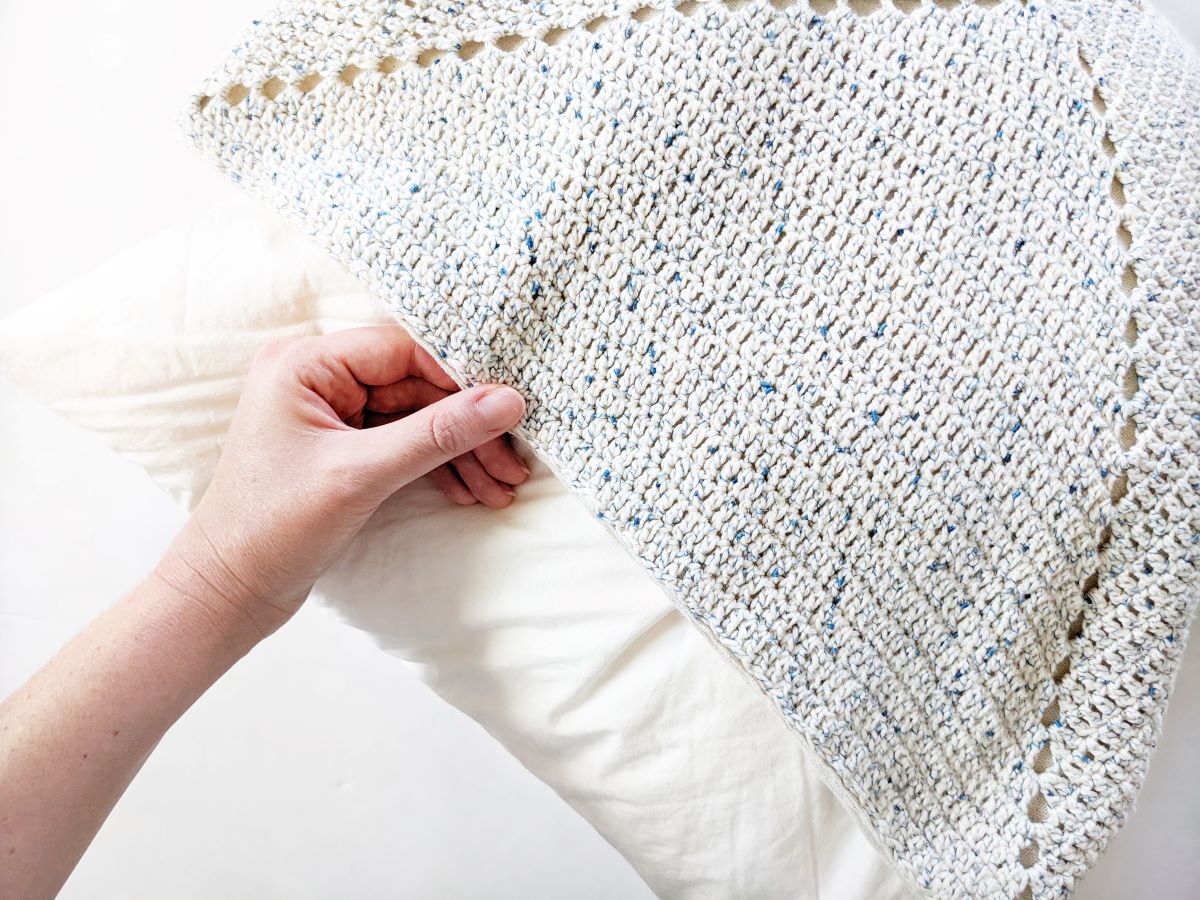
First, you will need to grab your pillow and lay it down. You want to make sure that you have the zipper part of the pillow cover facing down. Once you have done this, you will then grab your granny square and put it on top of your pillow (making sure that every corner matches the pillow cover).
Then you want to grab your needle and thread and insert it from the bottom of the pillow cover to the top of the granny square. Once this is done, insert it back through the top to the bottom. Then you want to continue sewing along the edges of the pillow.
Once you get to the end of the pillow, tie a knot, and cut the thread. Once you have done this, all that's left to do is insert the pillow into the cushion cover.
Pretty easy right? If you need a bit of extra help or are more of a visual person, check out this video I made of the Farmhouse Style Crochet Pillow and scroll to the middle to see how to attach your crochet to the fabric.
The Yarn You'll Use for This Crochet Pillow Cover
For this crochet project, I chose to work with Hobby Lobby Wrapology Hues yarn in the color Eternal Indigo. It’s a beautiful double twisted sport weight yarn that has different mixtures of blue and white. There are a couple of different colors in this line and one ball contains 524 yards of yarn.
Which is a lot of yarn, so you can definitely make quite a few things. For this granny square cushion cover, I used a little over half of the yarn, so if you were to make 2, I would recommend buying two balls.
If you're unable to buy this yarn or it's simply not available, any sport weight yarn would work for this project. You could even use a different yarn weight and crochet fewer rows for your granny square. That would totally work for this crochet pillow.

Other Crochet Pillow Patterns
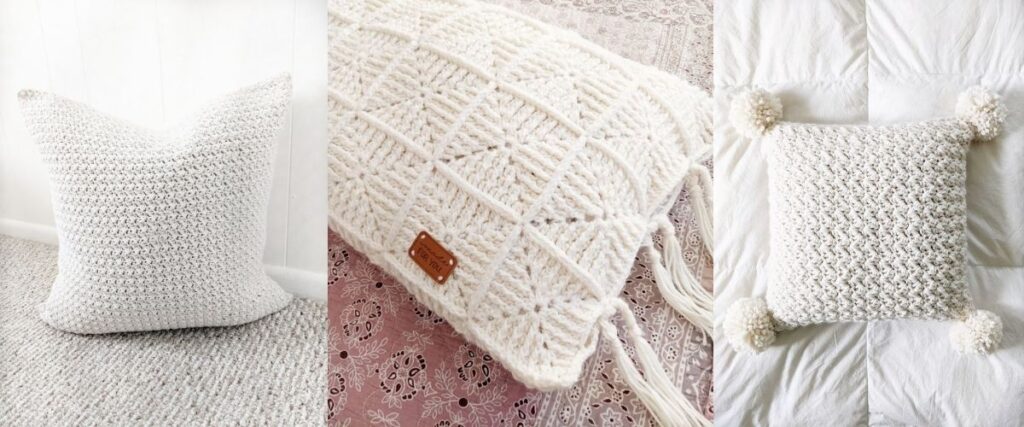
- Farmhouse Crochet Pillow - Add a little charm to your home with a cute farmhouse style crochet pillow. This pillow is made using an easy 1-row repeat and includes a helpful video tutorial.
- Granny Square Body Pillow - Want to make another granny square pillow? This pillow is made out of tiny granny squares and sewn together using a slip stitch border.
- Chunky Crochet Pillow with Pom Poms - If you love using bulky weight yarn, you're going to love this fun fast crochet project. Pattern comes together in about 2 hours and includes a guided video tutorial.
Granny Square Cushion Cover Pattern
Description:
Learn how to make a granny square cushion cover with this guided tutorial. You will first crochet a granny square that measures the length and height of your pillow cover. Then you will lay your granny square panel onto your pillow cover and start sewing the two panels together.
Once this is done, all that's left to do is add your pillow to your granny square cushion cover.
This pattern is fun and easy! It makes the perfect weekend project.
Materials:
- 1 Ball of Hobby Lobby Wrapology Yarn in the color Eternal Indigo (Weight 2/light, 7.0 oz, 524 yards) or another sport weight #2 yarn. ( used a little over a half of the 524 yards).
- 3.5 (E) mm Crochet Hook.
- 18″ inch x 18″ inch (45.72 x 45.72 cm) zipper pillow cover. I purchase a basic one (Merchant 41) from Hobby Lobby.
- Darning Needle.
- Needle + Thread.
- Scissors.
Pillow Size:
18" inches x 18" inches
Gauge:
One completed granny square should approximately be 18" x 18" inches.
Abbreviations:
ch – chain: Yarn over, pull through loop on hook.
dc – double crochet: Yarn over, insert hook into stitch and pull through, yarn over and pull through first two loops on hook, yarn over and pull through last two loops on hook.
sl st – slip stitch: Insert hook into stitch, yarn over, pull through stitch and loop on hook.
sp - space
Pattern Notes:
- Pattern written in U.S. terms.
- Granny Square panel is sewed by hand onto fabric pillow cover.
- To make a larger granny square for a bigger pillow, continue to repeat row 2 by adding double crochets within each row. For a smaller pillow, decrease the amount of rows.
Double Crochet Granny Square
ch 4 and slip stitch to first ch.
Row 1: ch 5 (counts as 1 dc and 2 ch sp), [3 dc in ring, ch 2] 3 times, 2 dc, join with a ss to 3rd of 5th ch at beginning of round.
Row 2: 1 ss in first sp, ch 7 (counts as 1 dc and 4 ch space), 2 dc in same sp, *1 dc in each dc to next sp, work [2dc, ch 4, 2 dc] all in next sp; rep from * twice more, 1 dc in each dc to next sp, 1 dc in same space as 7 ch, join with ss to 4rd of 7th ch at beginning of round
Continue to repeat 2 until round 22. For round 22, you will have a total of 87 double crochets on each side of the square.
- To make a larger granny square, add additional rows by repeating round 2.
- To make a smaller granny square, add fewer rows.
Once you're finished with all rows, cut yarn, and weave in ends.
How to Attach Crochet Panel to Fabric Pillow Cover
Once your granny square had been made, it's time to sew the granny square onto your pillow cover.
Step 1: Grab your pillow cover and lay it on the table, making sure that the zipper backing is facing the table. Once this is done, grab your granny square and lay it on top of your pillow cover.
Step 2: Grab your needle and thread and starting at the corner of your pillow, insert your needle through the granny square and the fabric. At this point, you want to sew along the edge of the granny square and the pillow cover.
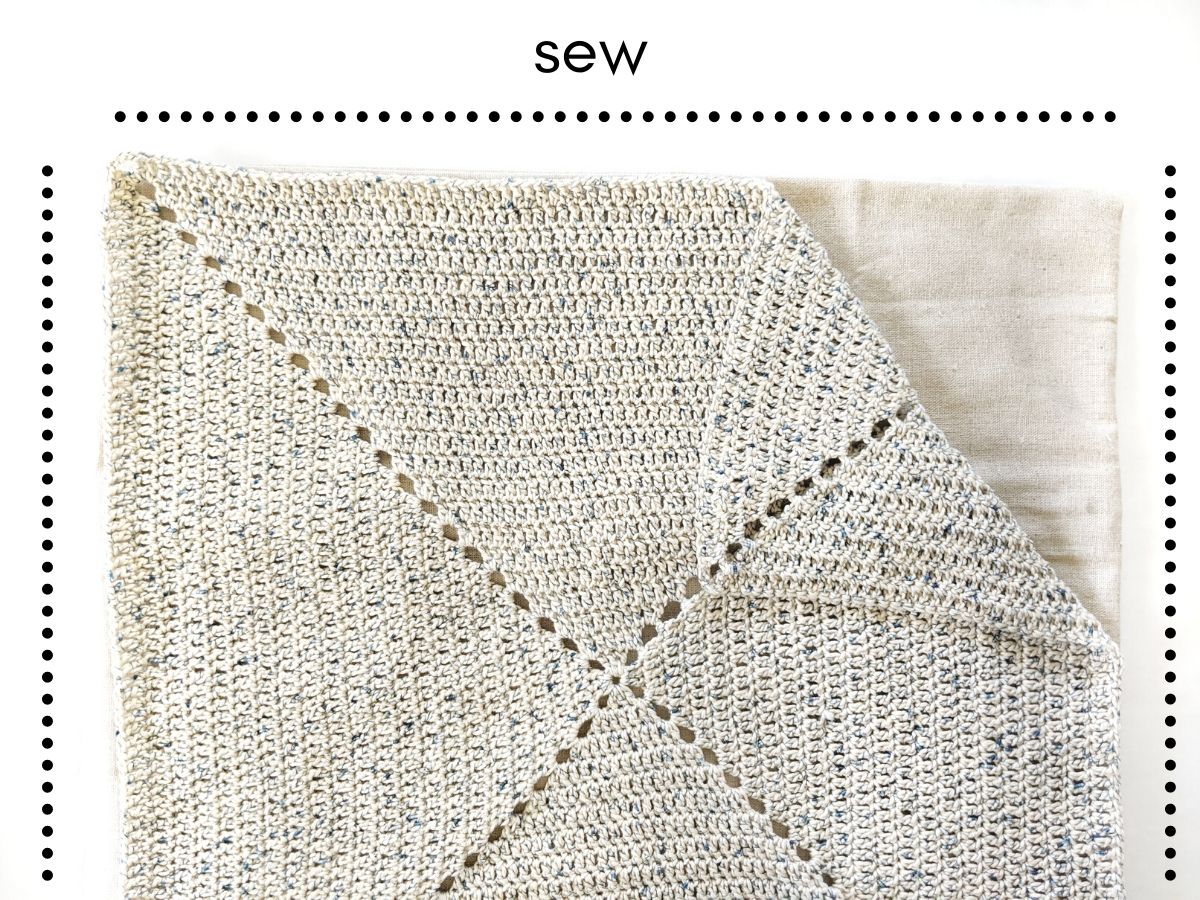
Continue to work your way around the pillow, making sure to stay on the edges.
Step 3: Once all edges have been sewed, tie a knot and cut the thread.
Step 4: Insert your pillow into your new granny square pillow cover.
And you're finished! I really hope you enjoyed this fun crochet pillow tutorial. Don't forget to share it with me, I would love to see your finished pillow.
PIN IT for later