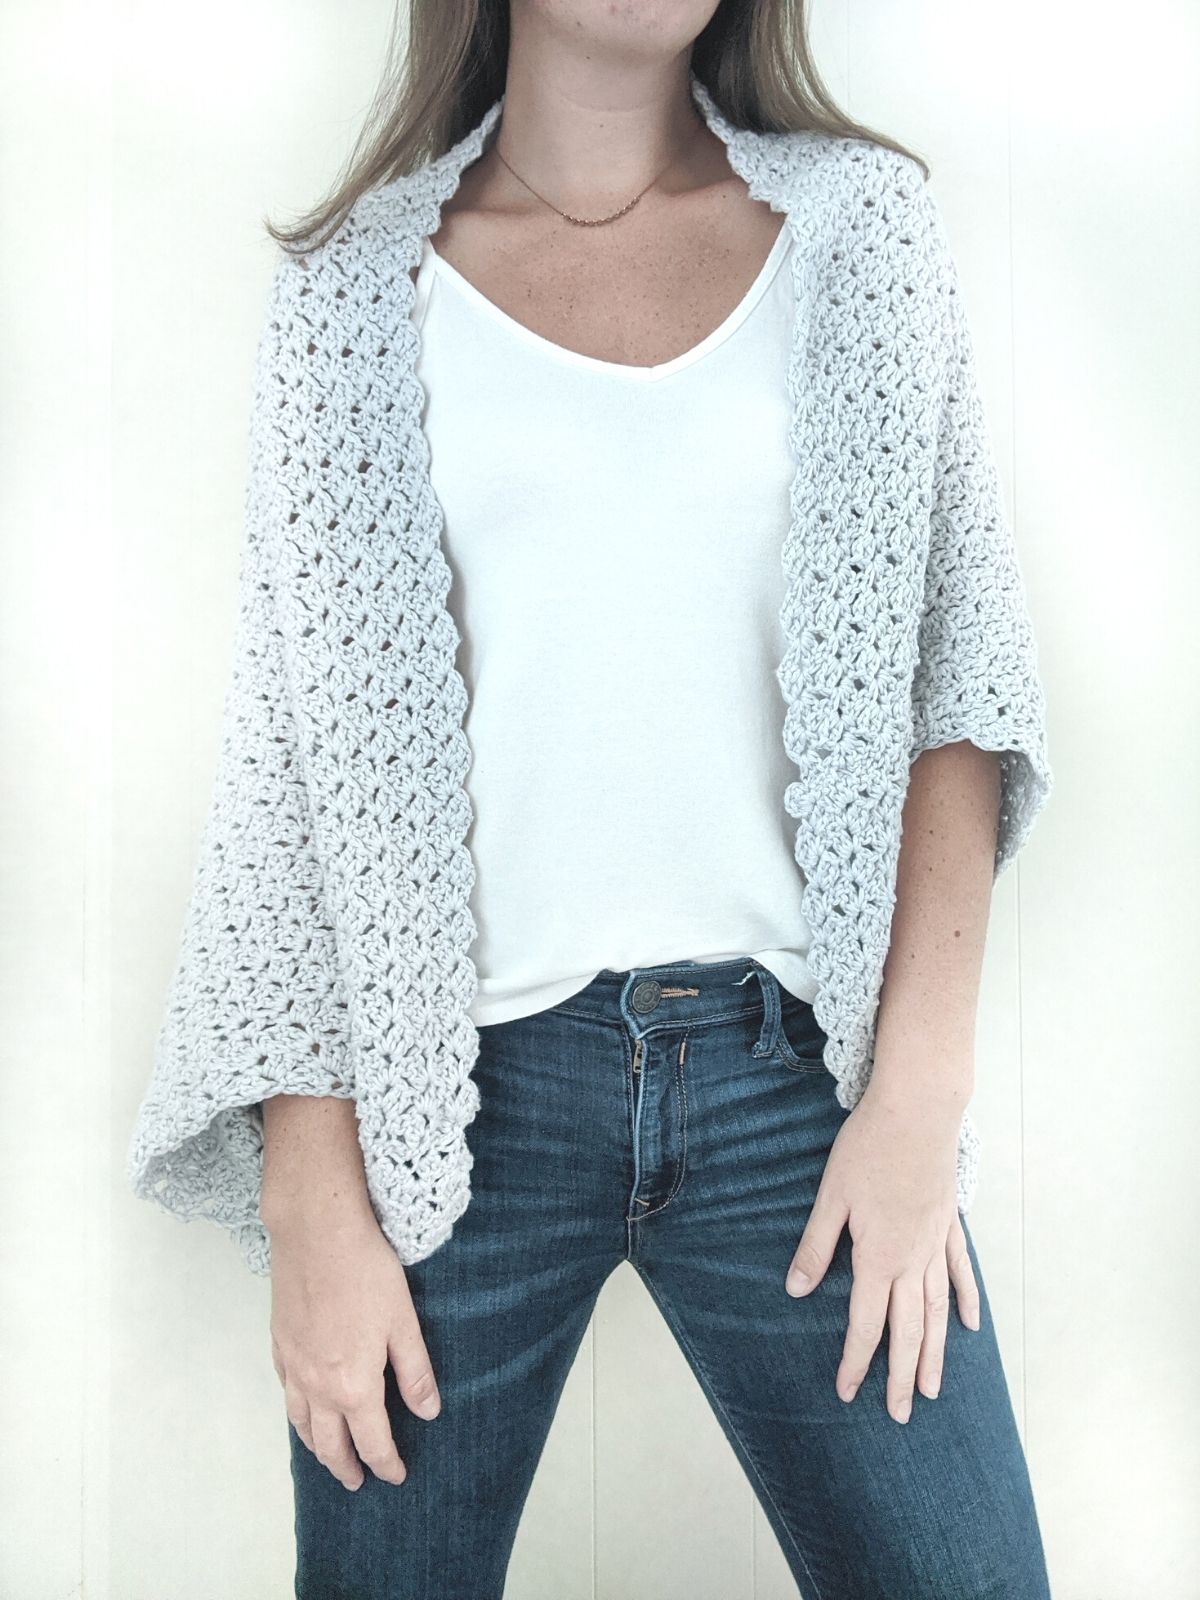
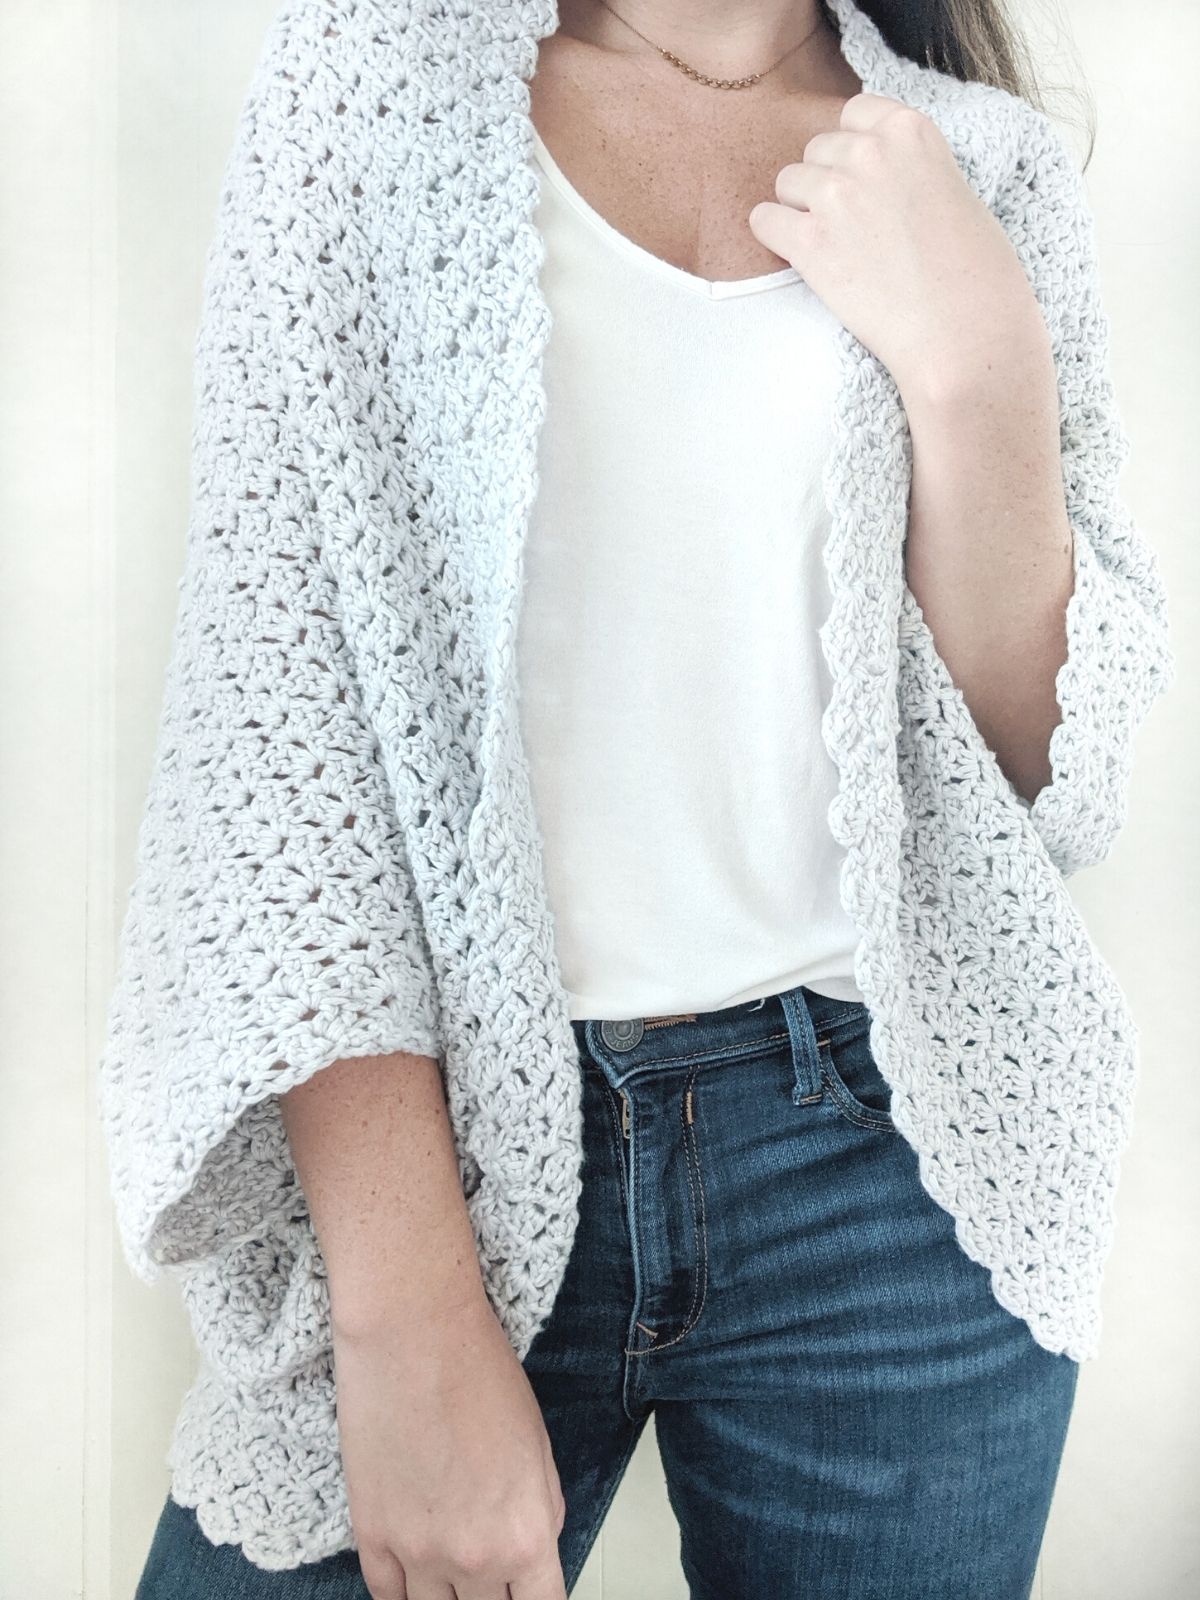
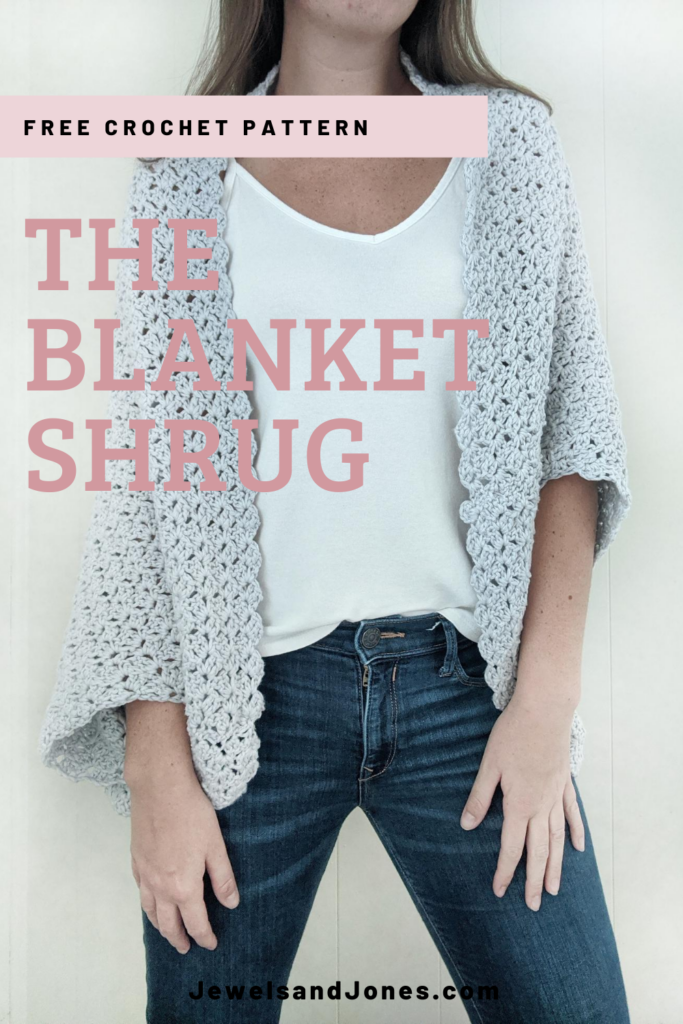
Spruce up your outfit with this easy beginner-friendly crochet blanket shrug pattern. This free crochet shrug pattern is cozy, comfortable, and made using a one-stitch repeat.
It's the perfect shrug to pair with some jeans and a top or wear over a dress.
Continue to read through for the inspiration behind this design or scroll down for the free pattern + guided video tutorial.
This post contains affiliate links, which means I make a small commission at no extra cost to you. See my full disclosure here
Crochet Blanket Shrug
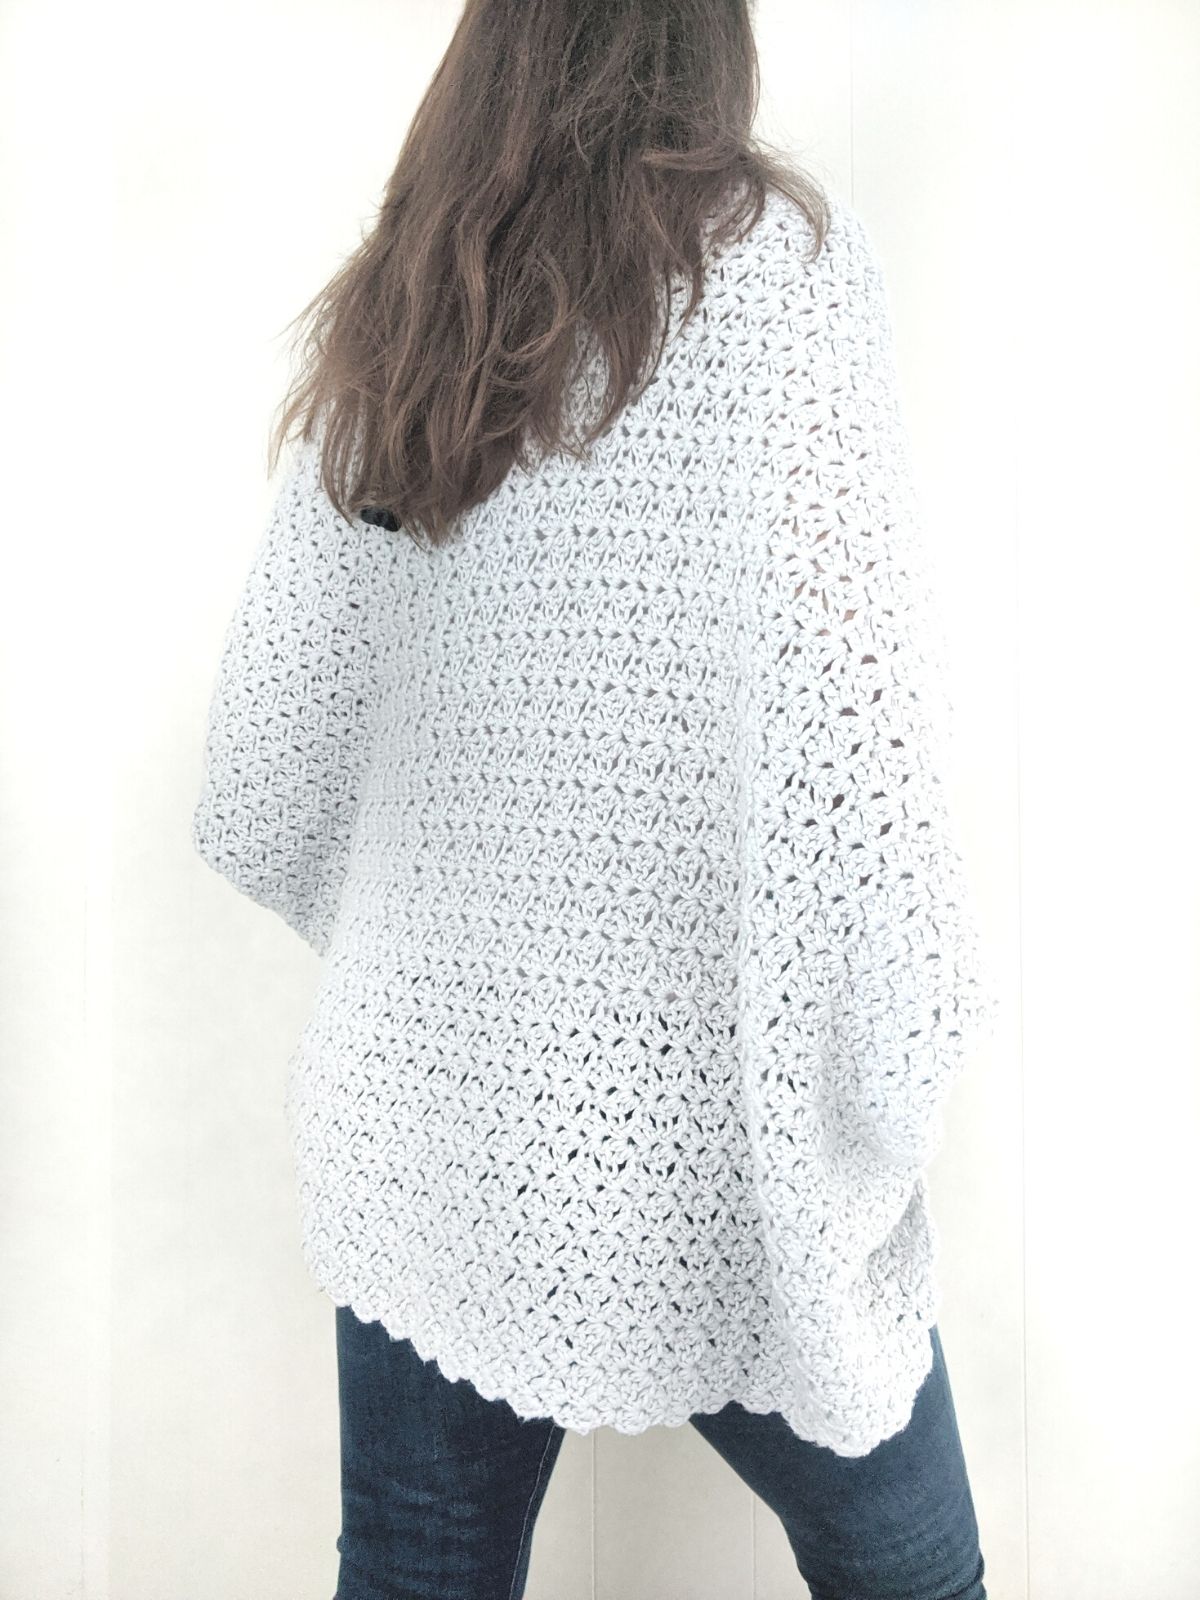
My latest design and free pattern is the crochet blanket shrug. This simple crochet cocoon is made from a rectangle and uses basic stitches.
It's the perfect weekend project as you can have this shrug done in a day! So if you're new to crochet or more advanced and looking for a quick project, this shrug pattern is perfect for you.
I've also included a guided video tutorial to help with any tricky parts.
Inspiration + Design
My inspiration behind this crochet cocoon came from one of my other crochet designs. If you guessed the simple crochet throw, you are right!
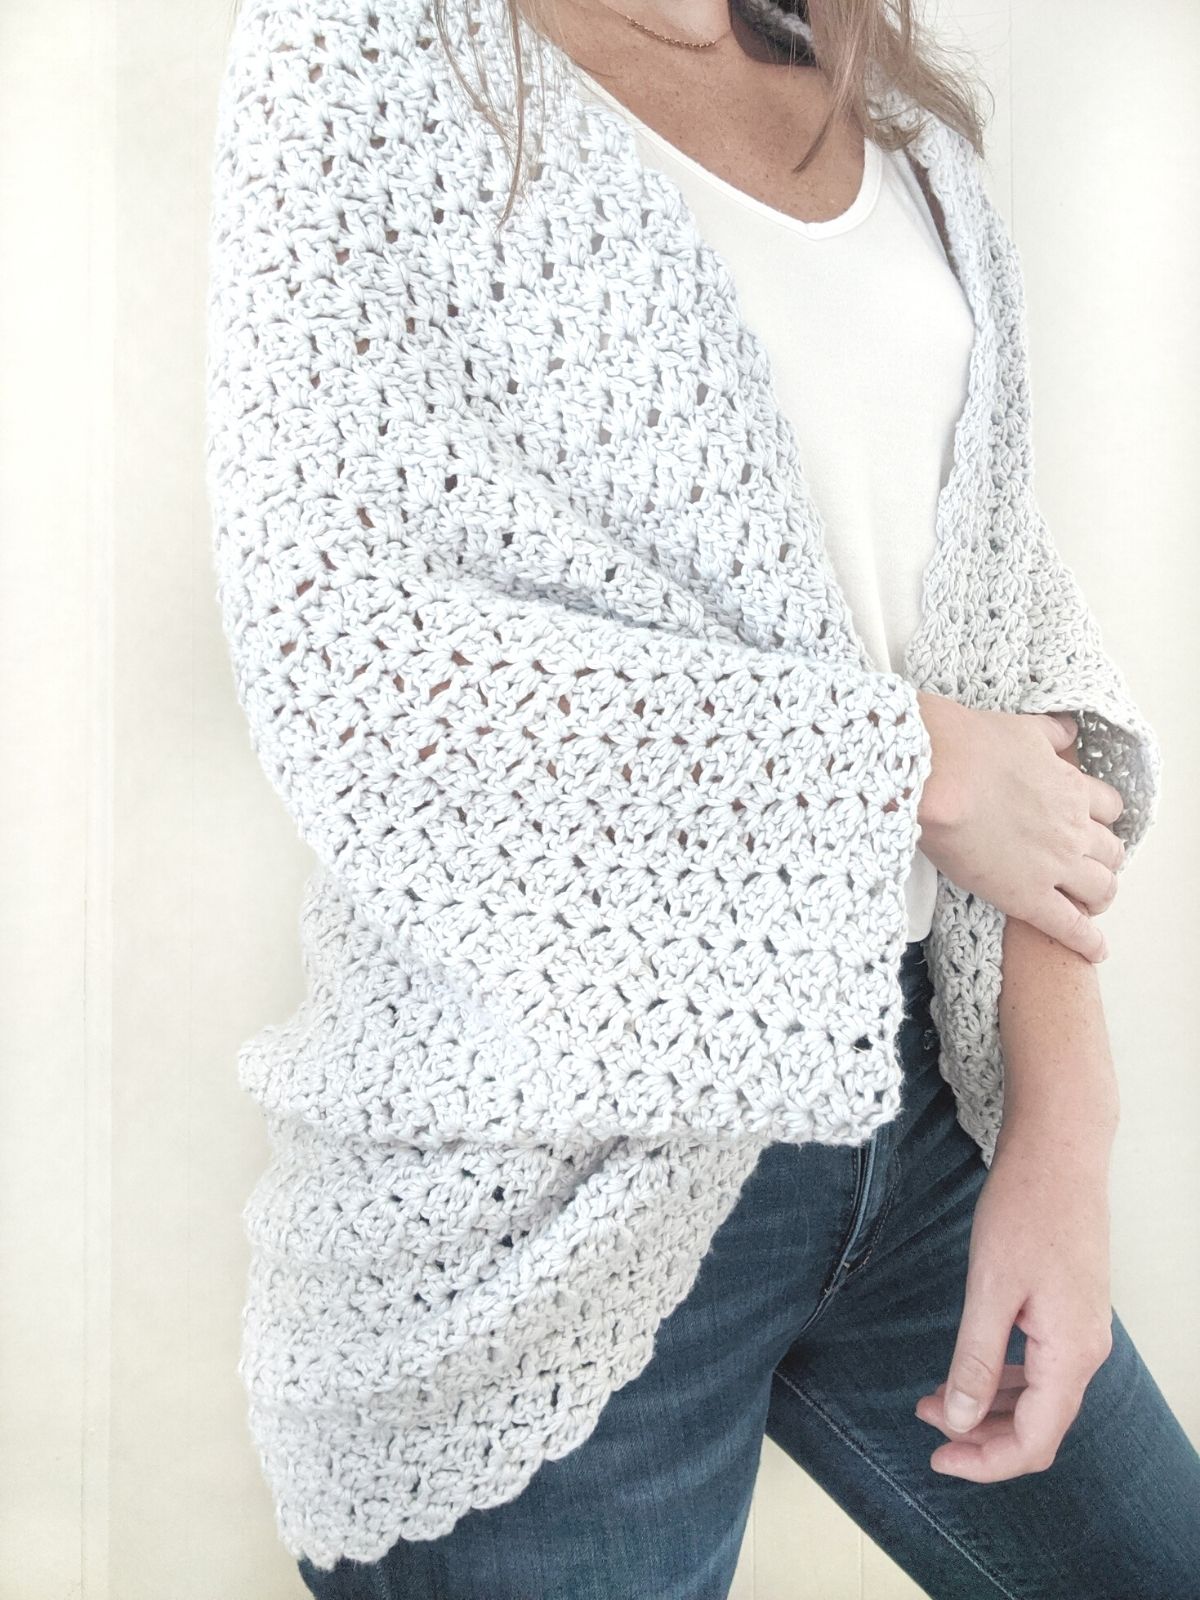
The simple crochet throw was one of my first crochet patterns and I loved the stitch that I used for that pattern. It's the reverse blanket stitch and it's made using only chain, single crochet, and double crochet.
Anyhow, as I was curled up on the couch with my new blanket. I thought about how this design would look so good as a shrug. So I grabbed my notepad and started sketching an idea for this design.
That's also how this shrug, got its name. It reminds me of my cozy blanket. Plus, imagine all the different outfits you can wear with this comfy shrug.
Yarn Choice
For this crochet pattern, I chose to work with Michaels Loops & Thread Crème Cotton yarn. It's a number 4 worsted weight cotton yarn that's so soft and comes in a variety of different colors.
I loved working with this yarn and highly recommend it for this project. However, you can easily substitute a different yarn for this project. Lion Brand Feels Like Butta or Lion Brand Wool-Ease would be a great alternative.
Some of my favorite colors in this line are cream and light blue. Which colors are your favorite?
Sizing of Crochet Blanket Shrug
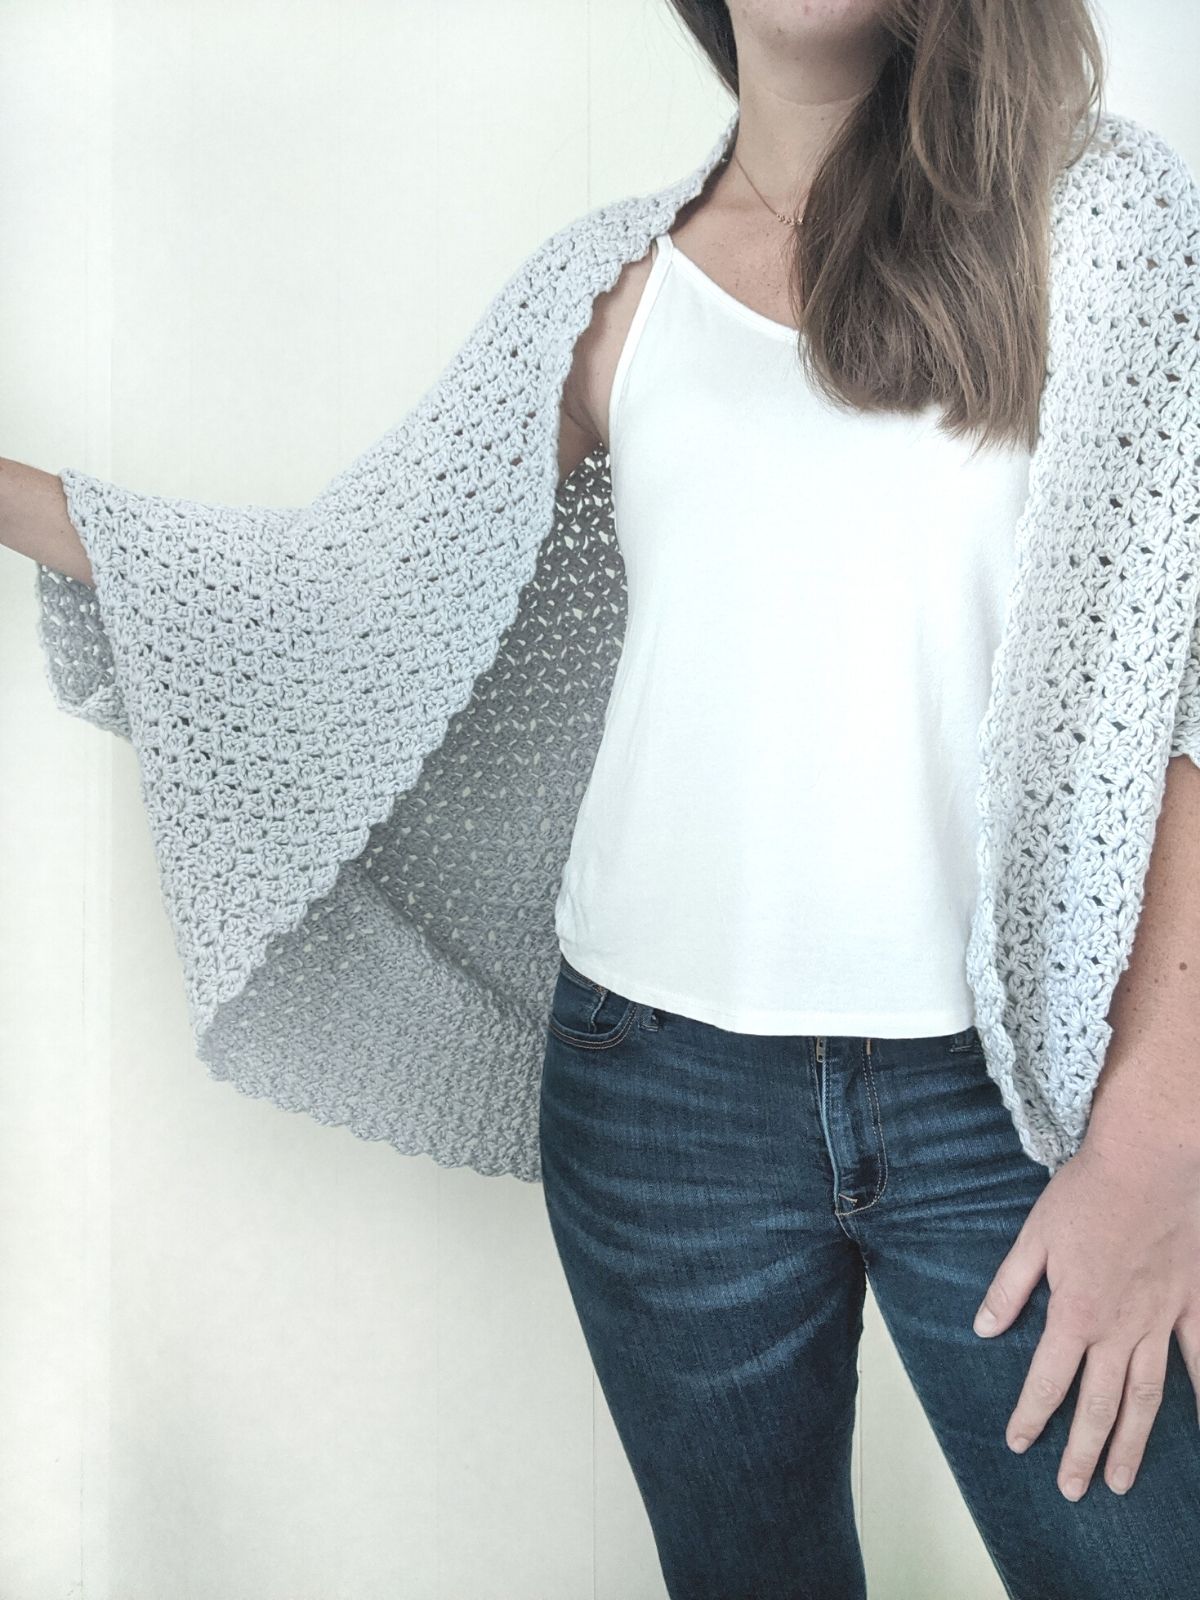
I chose to make this project one size, as I wanted a very open loose-fitting crochet shrug. The sides are not meant to close, but they can easily be closed by adding a button.
However, if you want to make a different size. You will need to adjust the initial chain and either subtract or add chains. You also need to take into account the multiple, which is four.
So to make it bigger, add additional chains, and to make it smaller, subtract chains.
How to seam the blanket shrug together?
The blanket shrug is made by crocheting one long rectangle. Once you have your panel made, you want to fold in the sides to the middle and whip stitch it together.
That's it! It's a super simple project and would be great for beginners who are getting into crochet garment making.
Other Patterns You Might Like

- Easy Crochet Cardigan - Learn how to crochet a simple oversized crochet cardigan with this free crochet pattern + guided video tutorial.
- Seaside Crochet Top - This tank top is made from only 2 rectangles! It’s made using only single crochet and double crochet + includes a guided video tutorial.
Free Crochet Shrug Pattern
Description:
Crochet an easy blanket shrug using a one stitch repeat. This beautiful and effortless shrug will keep you warm and stylish!
Materials:
- 5.0 mm (H) crochet hook.
- 4 balls of Loops & Thread Crème Cotton Yarn in the color cream (Weight 4/5.29 oz, 324 yds), a total of 1,296 yards or another worsted weight cotton yarn. Yarn Substitution: Lion Brand Feels Like Butta Yarn.
- Darning Needle.
- Stitch Markers.
- Scissors.
Gauge:
4 stitches x 8 rows = 4 inch square in reverse blanket stitch.
(stitches in 1 chain space count as 1 stitch when checking gauge)
Abbreviations:
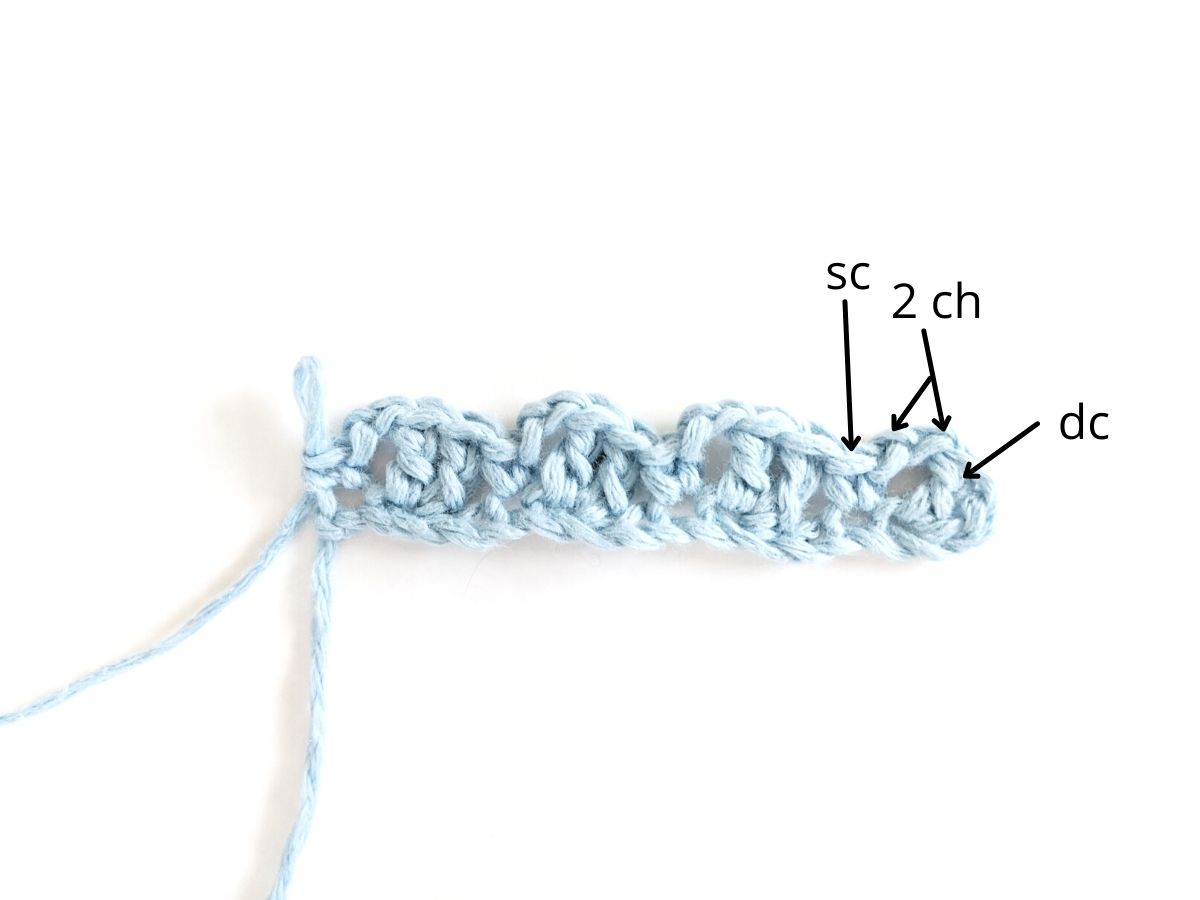
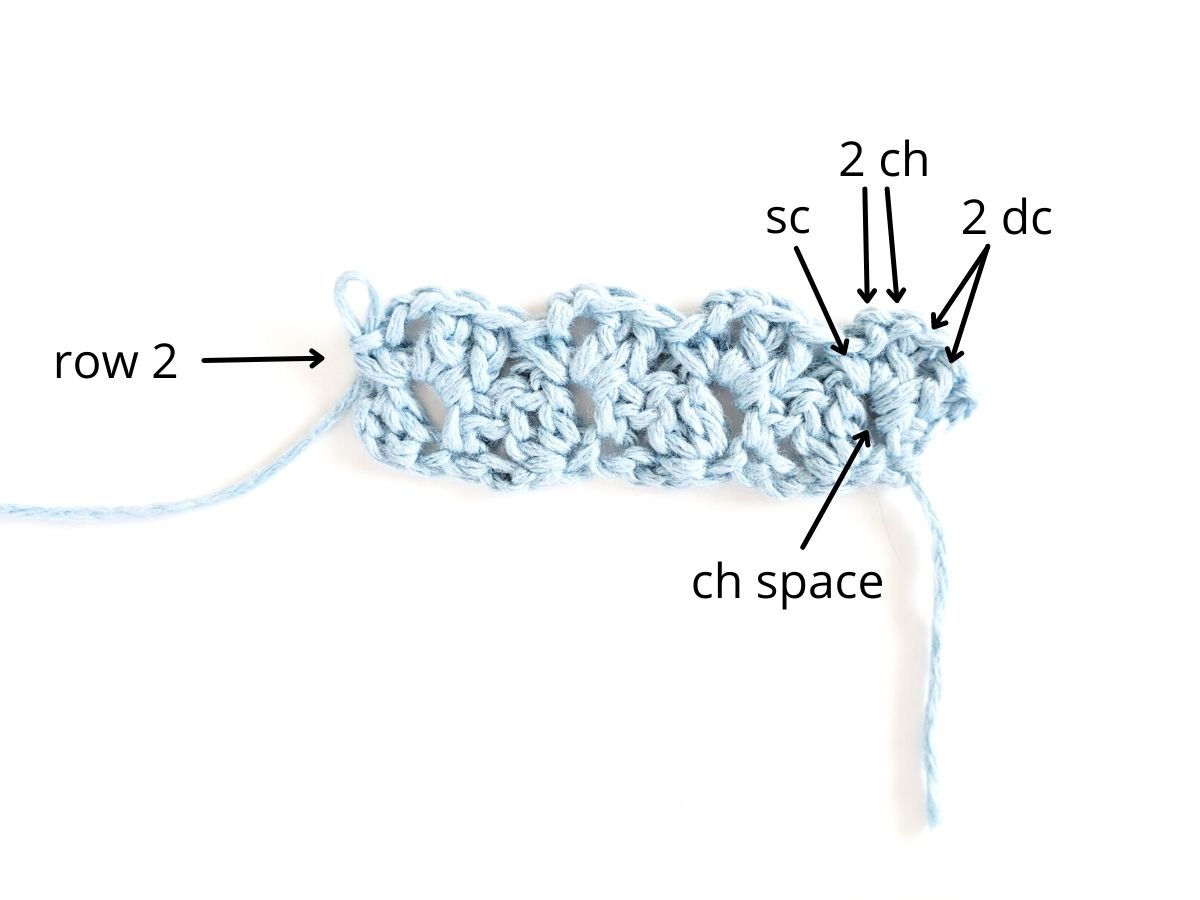
ch – chain: Yarn over, pull through loop on hook.
sc – single crochet: Insert hook into stitch, yarn over and pull through, yarn over and pull through last two loops on hook.
dc – double crochet: Yarn over, insert hook into stitch and pull through, yarn over and pull through first two loops on hook, yarn over and pull through last two loops on hook.
sp - space
Finished Size:
One Size (one size will fit most)
32 1/2 '' wide
42 '' long
Notes
- Pattern written in U.S Terms.
- Pattern is worked in one long rectangle.
- Sleeves are formed by seaming the sides together using the whipstitch method or any other method you prefer.
- Step-by-step video tutorial is included with pattern.
Crochet Blanket Shrug Pattern
ch 132
Row 1: dc in 3rd ch from the hook, ch 2, sc in the next ch. *skip 2 ch, 2 dc in the next ch, ch 2, sc in the following ch. Repeat from * across row. Turn.
Row 2: ch 2, skip the first stitch, make (2 dc, 2 ch, and 1 sc in the chain space). *skip next 3 stitches and make (2 dc, 2 ch, and 1 sc in the chain space). Repeat from * across row, turn.
Row 3 – Row 82: repeat row 2
Finish off and weave in ends.
Construction: Seaming
Step 1: Starting from the right, fold the top and bottom corners to the middle. Repeat this process on the left side.

Step 2: Using the whip stitch method, seam the two sides together on the right leaving a 5.5 inch opening. Repeat this process on the left side of the panel.
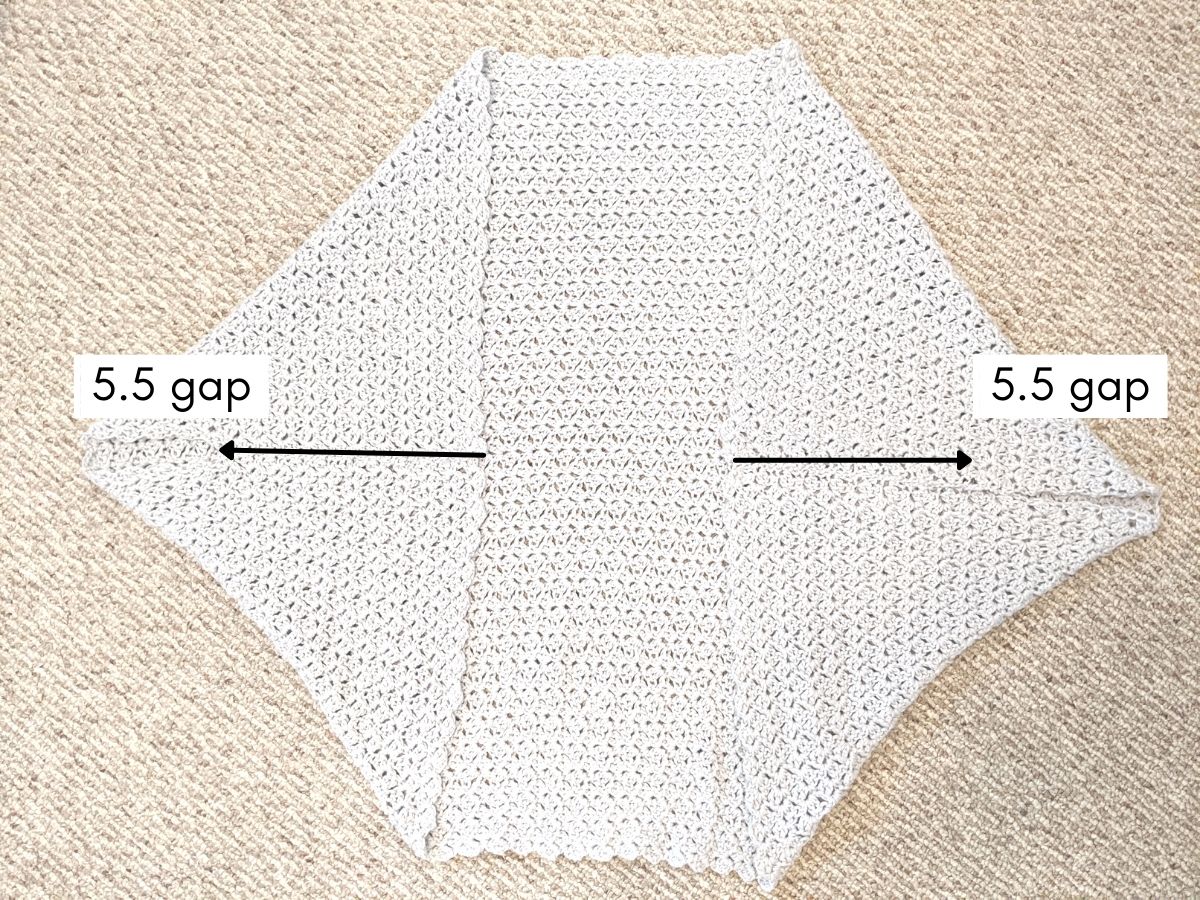
Step 3: Once edges are seamed together, flip your blanket crochet shrug inside out. This will hide the seams.
You're done with the Blanket Shrug!
I hope you enjoyed making this pattern and that the tutorial was helpful! Don't forget to share your project with me on Facebook or Instagram at @jewelsandjones.
If you have any questions about the pattern, be sure to check out the YouTube video or you can always leave them below.
PIN IT for later
Marie
Thursday 15th of January 2026
ABSOLUTELY GORGEOUS!!! fits perfectly and is so warm. What a beautiful stitch and so easy to make.
Nicky
Saturday 17th of January 2026
Aww, thank you so much! I'm so glad you love it. It's one of my favorite stitches.
Chero
Tuesday 13th of January 2026
I absolutely love this and the stitch, and especially the heaviness of it. I finished it but the only thing is it keeps falling off my shoulders. I have to keep pulling it back up. Any suggestions?
Nicky
Saturday 17th of January 2026
Hi there, I'm so glad you love it. I would recommend adding a button or some people have even added a cute brooch. You can also add a border around it, that should work as well. 😊
Cynthia
Tuesday 3rd of June 2025
So your beginning edge of the starting chain is straight but all other sides have the form of the double crochet to single. How do you hide that as being different?
Nicky
Monday 9th of June 2025
Hi there, It won't matter to much for this pattern as it wont be noticeable at the end. However, here is a tutorial where I show you how to make the foundation chain look like the other three sides: https://jewelsandjones.com/how-to-crochet-the-reverse-blanket-stitch/
Robin
Tuesday 1st of April 2025
Just finished - thank you for this lovely pattern! I really liked how intricate the pattern looks, even though it is so easy to make. Not a fan of full-length sleeves, so I like how these "sleeves" worked up. (But let's just say that it took me longer than a weekend to get this done :)
Robin
Thursday 8th of May 2025
@Nicky, I had some yarn that I want to use for a second shrug. The yarn is Lion Brand Heartland (weight 4/5oz), 100% acrylic. Though it's the same weight as what you used, this yarn is much "fuzzier." I realize that it won't look quite the same no matter what, but can you suggest a hook size? (I crochet loosely.)
Given the change in yarn, I assume I should chain in multiples of four until I get to 32.5." I didn't make a gauge swatch last time, but did you mean 4 clusters of 4 x 8 rows?
Thanks so much!
Nicky
Thursday 3rd of April 2025
You're welcome! I'm so glad you enjoyed making the pattern. 😊
Jill Parker
Saturday 28th of December 2024
Hi, Came across you on YouTube. Very good and helpful content! And I love this pattern, especially with the scalloped edges. I’ve made a couple lap blankets. Then, I found this shrug! I’m basically at the blanket and scarf level, but wanted to attempt some sort of shawl for working in front of a window. I think this will do nicely. I’m not sure how to ask this, but, about the sizing… I’m larger than the picture, about a size 18. I’m thinking I might have to add to the chain size a bit just to make sure it fits around and hangs properly. But I’m not sure how or where to measure in order to adjust the chain. (Clarifying that the chain is the measurement that goes around you) I’d hate to get half way through it and have it too tight. Any guidance would be appreciated. TY
Nicky
Thursday 9th of January 2025
Hi there, thank you for reaching out. Yes, this pattern is very forgiving in terms of sizing, since it's just one big rectangle. To adjust the size, I would recommend measuring your self first from shoulder to hip. This will give you a good estimate of how many extra rows you need to add since you're changing the width. Then for the width, I would recommend measuring from tip to tip (right hand to left hand). Once you have figured out your width, then you can make your foundation chain as long as your width. Just make sure your foundation chain is a multiple of 4 because the stitch used is a multiple of 4. I hope this helps, let me know how it goes! 😊