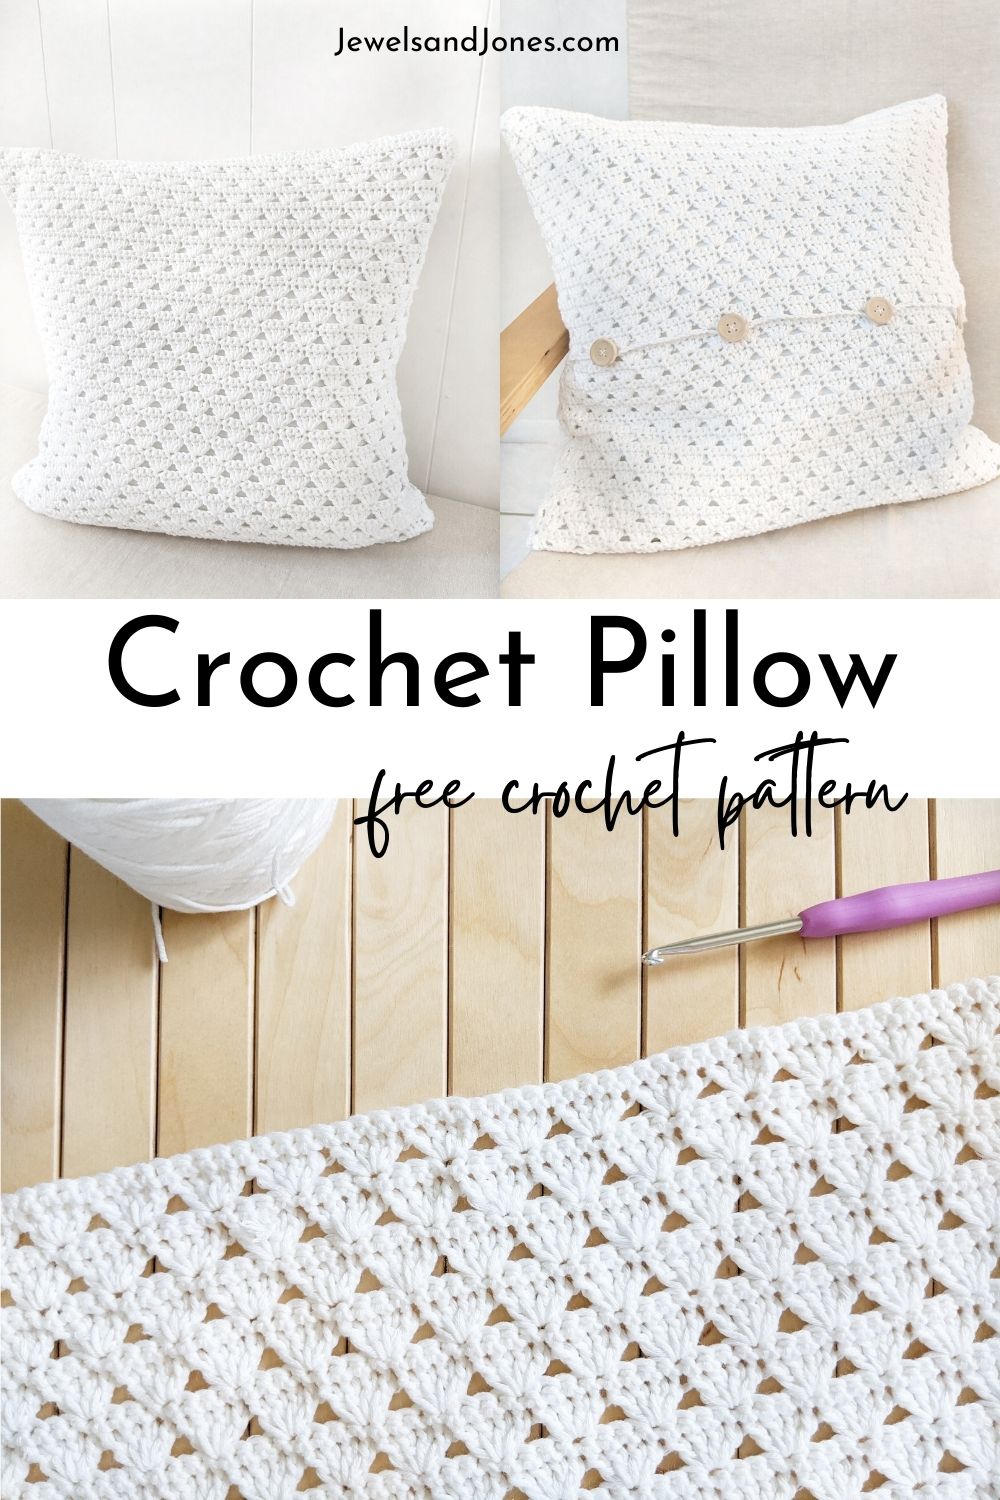
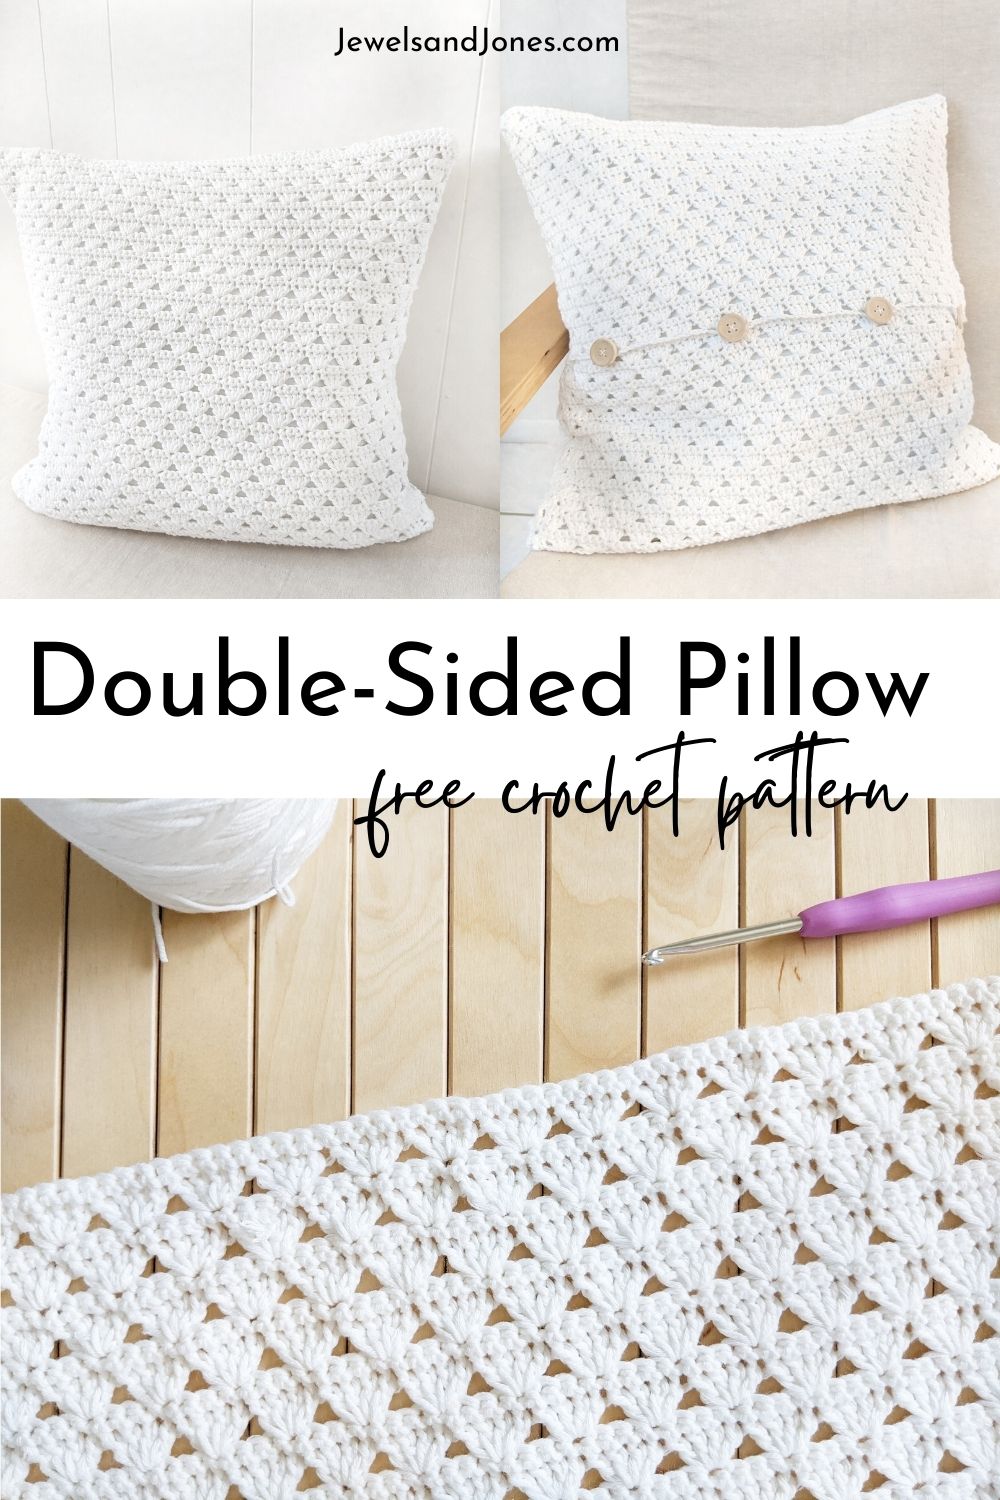
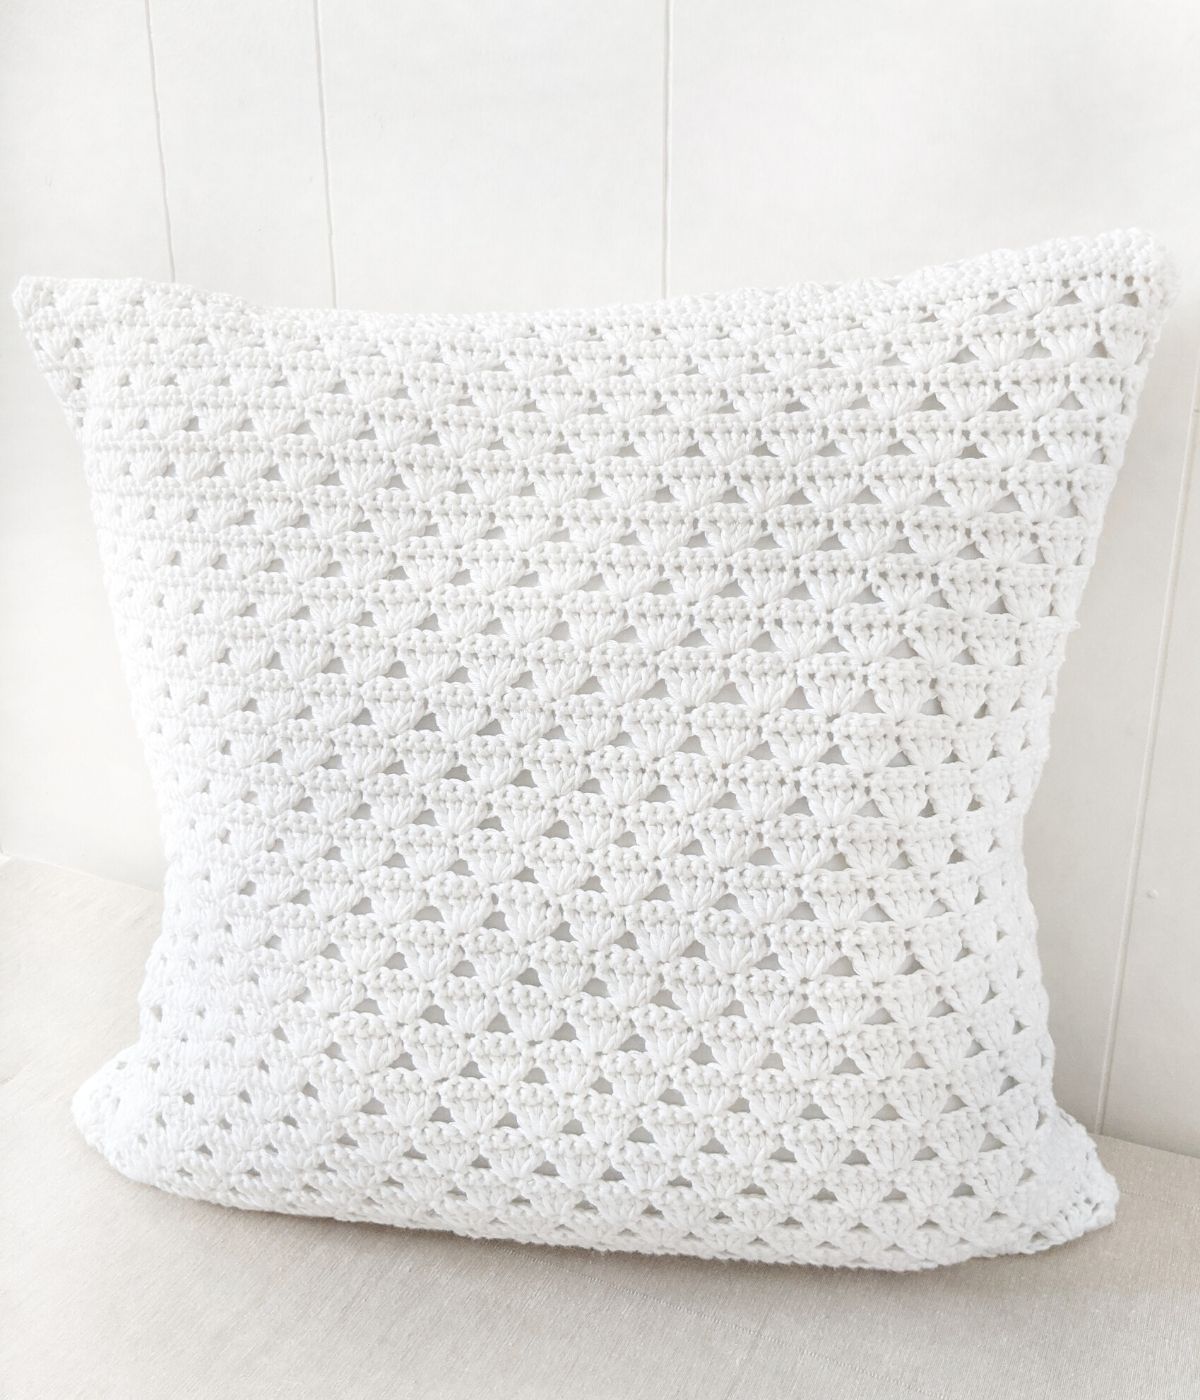
Adorn your home with these cute modern double-sided crochet pillows! This free crochet pillow pattern is beginner-friendly and made using the shell stitch.
Continue to read through the inspiration behind my latest design or scroll down for the free crochet pattern.

This post contains affiliate links, which means I make a small commission at no extra cost to you. See my full disclosure here
Modern Crochet Pillow Pattern
My latest design and free crochet pattern is a reversible pillow cover! I love making crochet pillows and have quite a few here on the blog. So if you like making crochet pillow covers as well, I think you'll enjoy today's free pattern.
It's a pretty easy pattern I would say, as the stitch used is just a series of repeats followed by some single crochet rows. Also, the construction of this pillow pattern is not too hard and there are lots of step-by-step photos to help you along the way.
There's even a guided video tutorial for the stitch as well, so make sure to click the link in the notes section of the pattern if you want to see it before you get started.
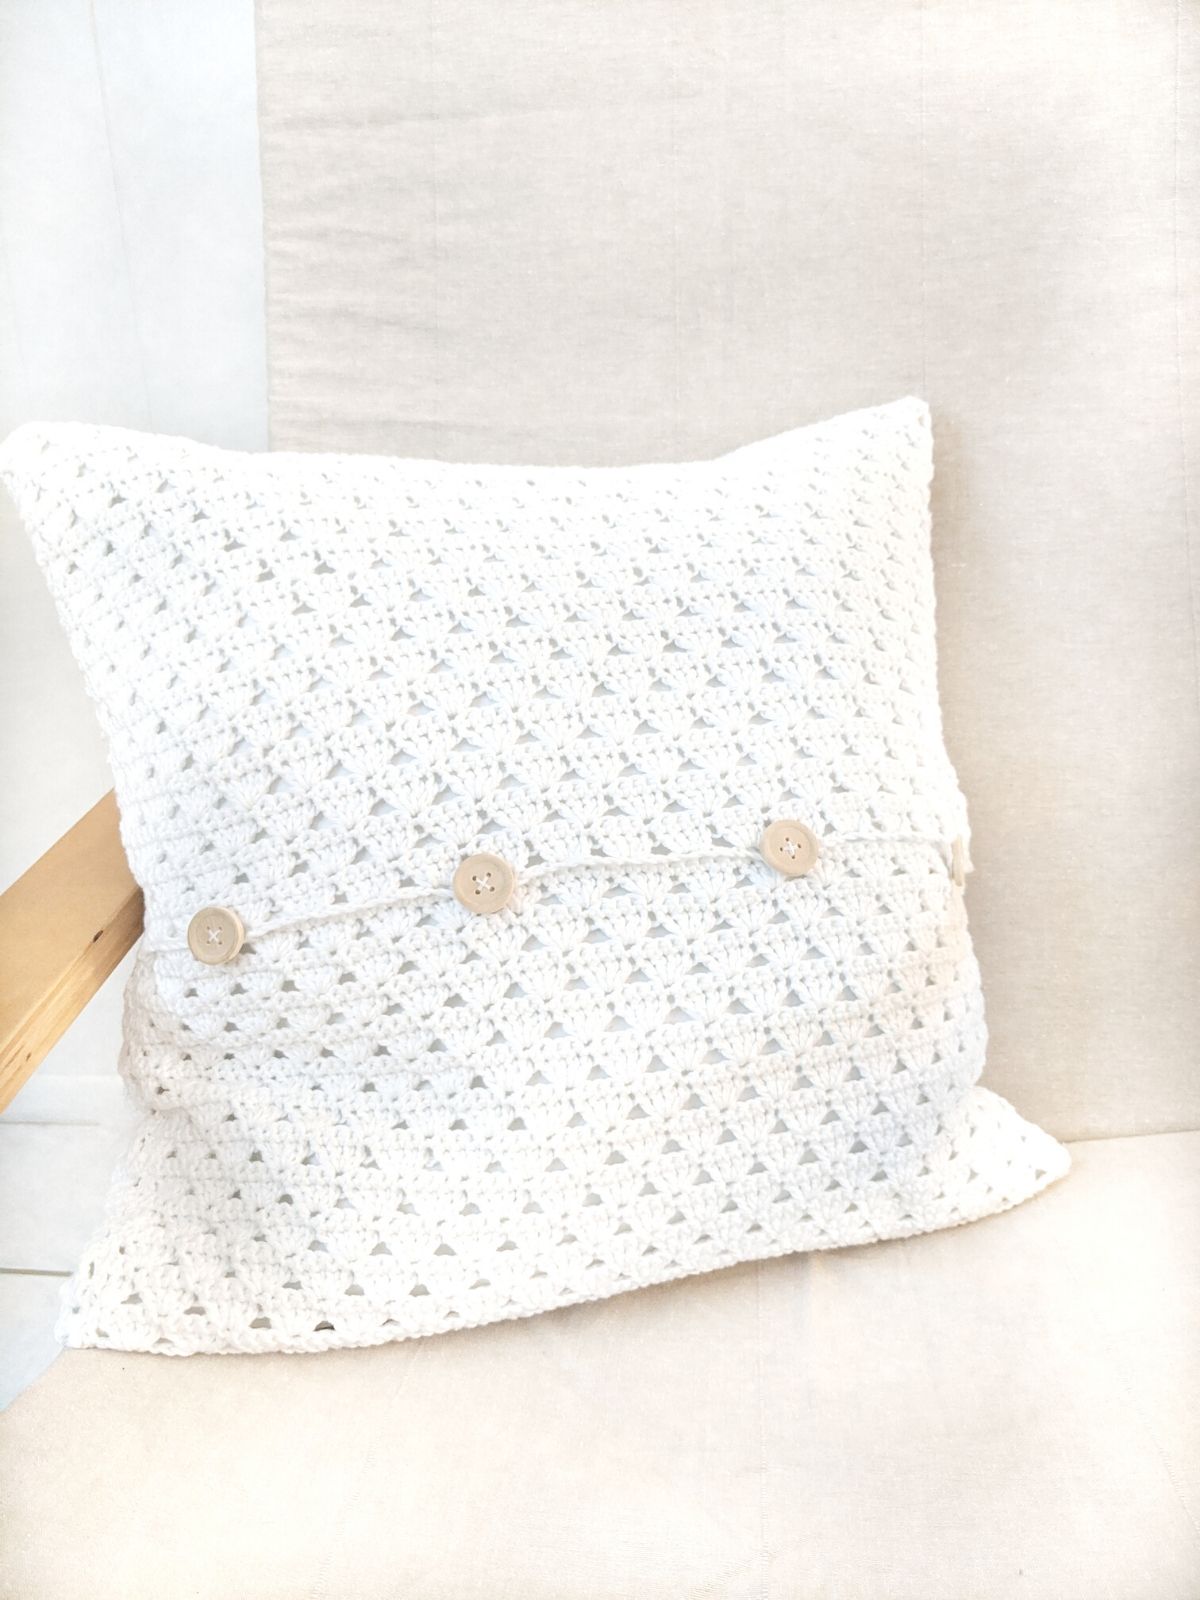
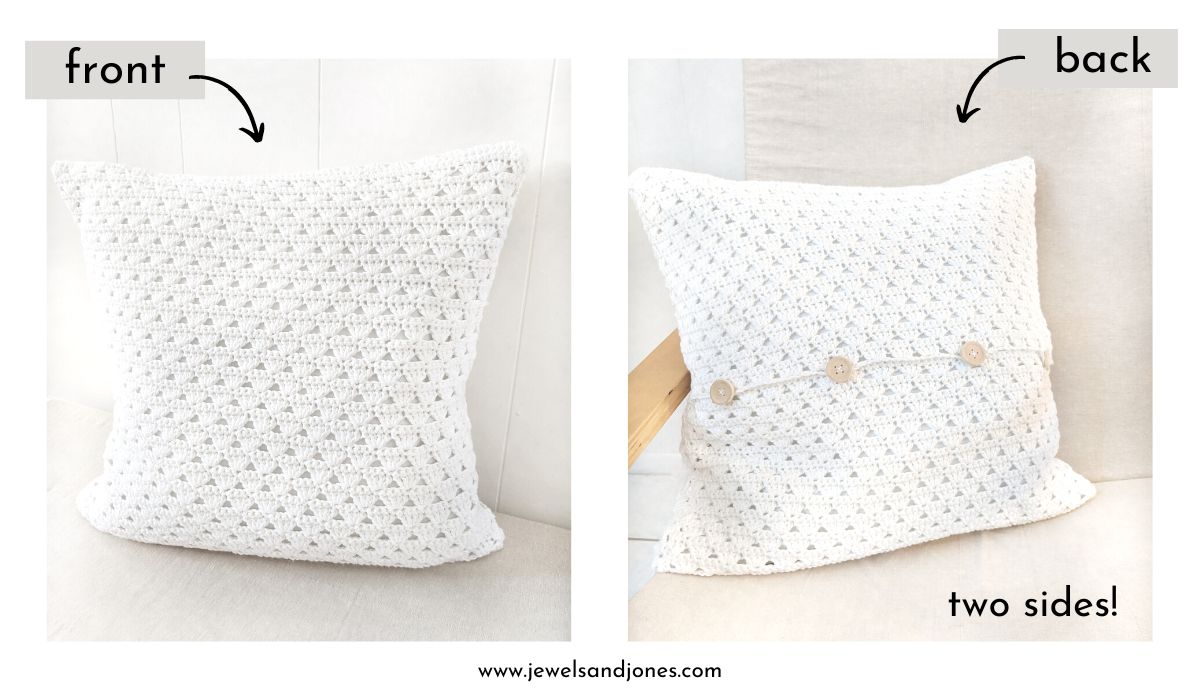
A Crochet Pillow That's Double-Sided
When I first was designing this pattern way back at the beginning of my crochet designing journey, I knew that I wanted to create a functional pillow. Something that you could just flip around if you got bored with one side and also something that was machine washable!
So that's why I decided to create two panels in the back because I wanted something different, but also something that I could pull off and wash easily.
I also love switching my crochet pillow covers around and only have so many pillows. So it seemed like the perfect choice.
So if you like that too, I think you'll enjoy making this pillow cover. I also have a few crochet pillows with a fabric backing, like this farmhouse-inspired one and this granny-square version one.
The picture down below show's the granny square pillow with a fabric backing!
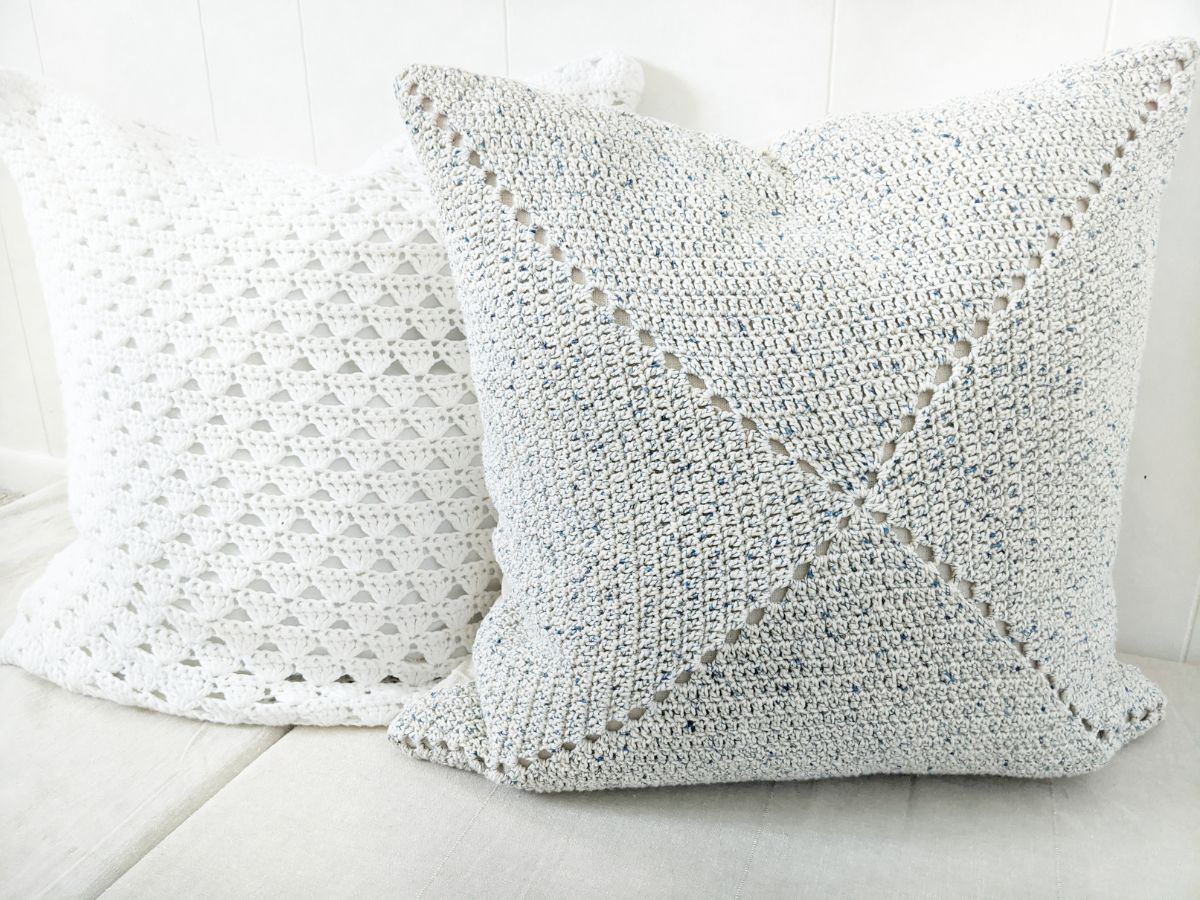
I think they look so nice together! Anyhow, let's talk a little bit about the yarn used for this pattern.
Yarn Choice for This Crochet Pillow Cover
The yarn I chose to use for this project is Lion Brand Coboo Yarn in the color white. It's a blend of cotton and bamboo. I love using this yarn because the stitch definition is amazing. It's also a great choice for crochet home decor projects, as it's made from a cotton blend.
The yarn also has a lovely sheen to it and it's offered in quite a few colors. So you've got lots of different options to choose from.
If you can't find this yarn or want to use another yarn, I would recommend Hobby Lobby's Yarn Bee Bamboo-Tiful or another lightweight number 3 cotton/bamboo blended yarn. You could even make this with cotton yarn, like WeCrochet Dishie's or Lily Sugar N' Cream Cotton yarn.
So no worries if you can't find the exact yarn, this pattern is very forgiving.
Furthermore, let's get started with our pillow pattern!
Free Modern Crochet Pillow Pattern
Description:
Adorn your home with these cute modern double-sided crochet pillows! This crochet pillow pattern is beginner-friendly and made using the shell stitch.
You will first crochet 3 panels, one front panel, and two back panels. Then you will assemble each panel, whipstitch it together, and add your buttons. That's it! It's a fun project and works up pretty quickly.
Materials:
- 3 balls of Lion Brand Coboo Yarn in the color White (Weight 3 light/ 3.5 oz, 232 yards), a total of 696 yards or another lightweight category 3 yarn.
- 4 (G) mm Crochet Hook.
- 20'' inch x 20" inch Pillow Insert.
- 4 Small to Medium Sized Buttons.
- Needle + Thread.
- Stitch Marker.
- Darning Needle.
- Scissors.
Gauge:
4 shell stitches x 6 rows = 4 inch square
Abbreviations:
ch – chain: Yarn over, pull through loop on hook.
sc – single crochet: Insert hook into stitch, yarn over and pull through, yarn over and pull through last two loops on hook.
dc – double crochet: Yarn over, insert hook into stitch and pull through, yarn over and pull through first two loops on hook, yarn over and pull through last two loops on hook.
rep - repeat: Repeat the row (stitches).
Finished Size of Pillow:
Size of finished pillow is approximately 20" inch x 20" inch.
Pattern Notes:
- Pattern written in U.S terms.
- Ch's at the beginning of each row do not count as a stitch.
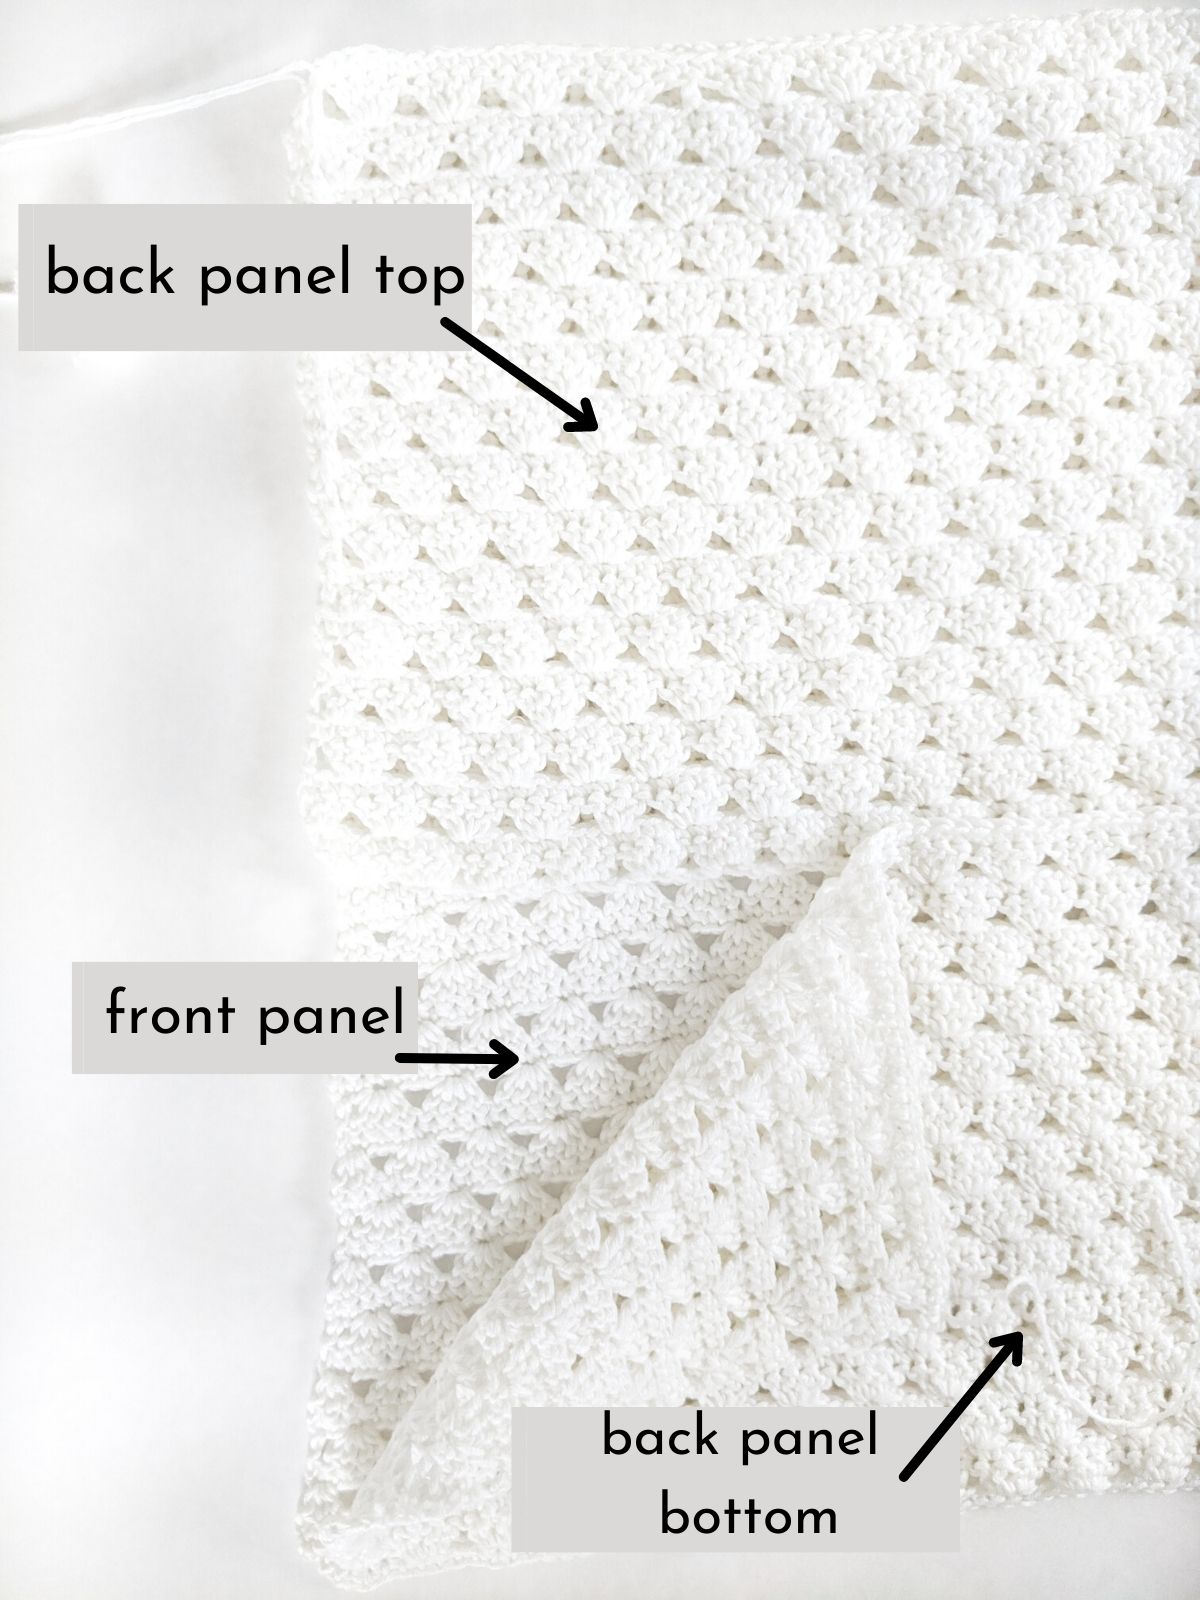
- Pillow cover is made in 3 pieces (1 front + 2 back panels).
- Pillow panels are seamed together using the whipstitch method.
- This pillow pattern is very customizable, for example, instead of making 3 panels, you can also just make 2 front panels and seam them together.
- Step-by-step tutorial is provided for the stitch used in the pattern and can be found here.
Front Panel (Make 1)
ch 81
R1: 4 dc in 5th ch from hook, *skip next 3 ch, 4 dc in next ch; rep from * across to within last 4 ch, skip next 3 ch, 3 dc in last ch, turn.
R2: ch 1, sc in each dc across, ending with last sc in top of turning ch, turn.
R3: ch 3 (counts as dc), skip first sc, 2 dc in next sc, *skip next 3 sc, 4 dc in next sc; rep from * across to within last 2 sc, skip next sc, dc in last sc, turn.
R4: Rep Row 2.
R5: ch 3 (counts as dc), skip first 3 sc, *4 dc in next sc, skip next 3 sc; rep from * across to within last sc, 3 dc in last sc, turn.
R6 - R51: Rep Row 2-5.
R52: sc in each dc across the row. (81)
Break yarn and weave in all ends.
Back Panel Top (Make 1)
ch 81
R1: 4 dc in 5th ch from hook, *skip next 3 ch, 4 dc in next ch; rep from * across to within last 4 ch, skip next 3 ch, 3 dc in last ch, turn.
R2: ch 1, sc in each dc across, ending with last sc in top of turning ch, turn.
R3: ch 3 (counts as dc), skip first sc, 2 dc in next sc, *skip next 3 sc, 4 dc in next sc; rep from * across to within last 2 sc, skip next sc, dc in last sc, turn.
R4: Rep Row 2.
R5: ch 3 (counts as dc), skip first 3 sc, *4 dc in next sc, skip next 3 sc; rep from * across to within last sc, 3 dc in last sc, turn.
R6 - R29: Rep rows 2-5
R30: sc in each dc across the row. (81)
Break yarn and weave in all ends.
Back Panel Bottom (Make 1)
ch 81
R1: 4 dc in 5th ch from hook, *skip next 3 ch, 4 dc in next ch; rep from * across to within last 4 ch, skip next 3 ch, 3 dc in last ch, turn.
R2: ch 1, sc in each dc across, ending with last sc in top of turning ch, turn.
R3: ch 3 (counts as dc), skip first sc, 2 dc in next sc, *skip next 3 sc, 4 dc in next sc; rep from * across to within last 2 sc, skip next sc, dc in last sc, turn.
R4: Rep Row 2.
R5: ch 3 (counts as dc), skip first 3 sc, *4 dc in next sc, skip next 3 sc; rep from * across to within last sc, 3 dc in last sc, turn.
R6 - R25: Rep row 2 - 5.
R26: sc in each dc across the row. (81)
Break yarn and weave in all ends.
Assembly: Seaming the Panels Together
Step 1: Grab your front panel and lay it down on a flat surface wrong side up. Then grab your back top panel and lay this wrong side up on the front panel. You want the back top panel to be aligned with the top half of your front panel.
Finally, grab your last back bottom panel and lay this wrong side up on top of the back front panel. Make sure this bottom back panel is aligned with the bottom half of your front panel.
Once you have completed this step, make sure to take a look at the photo down below to see if you've done it correctly. It's easier to change it now than later!
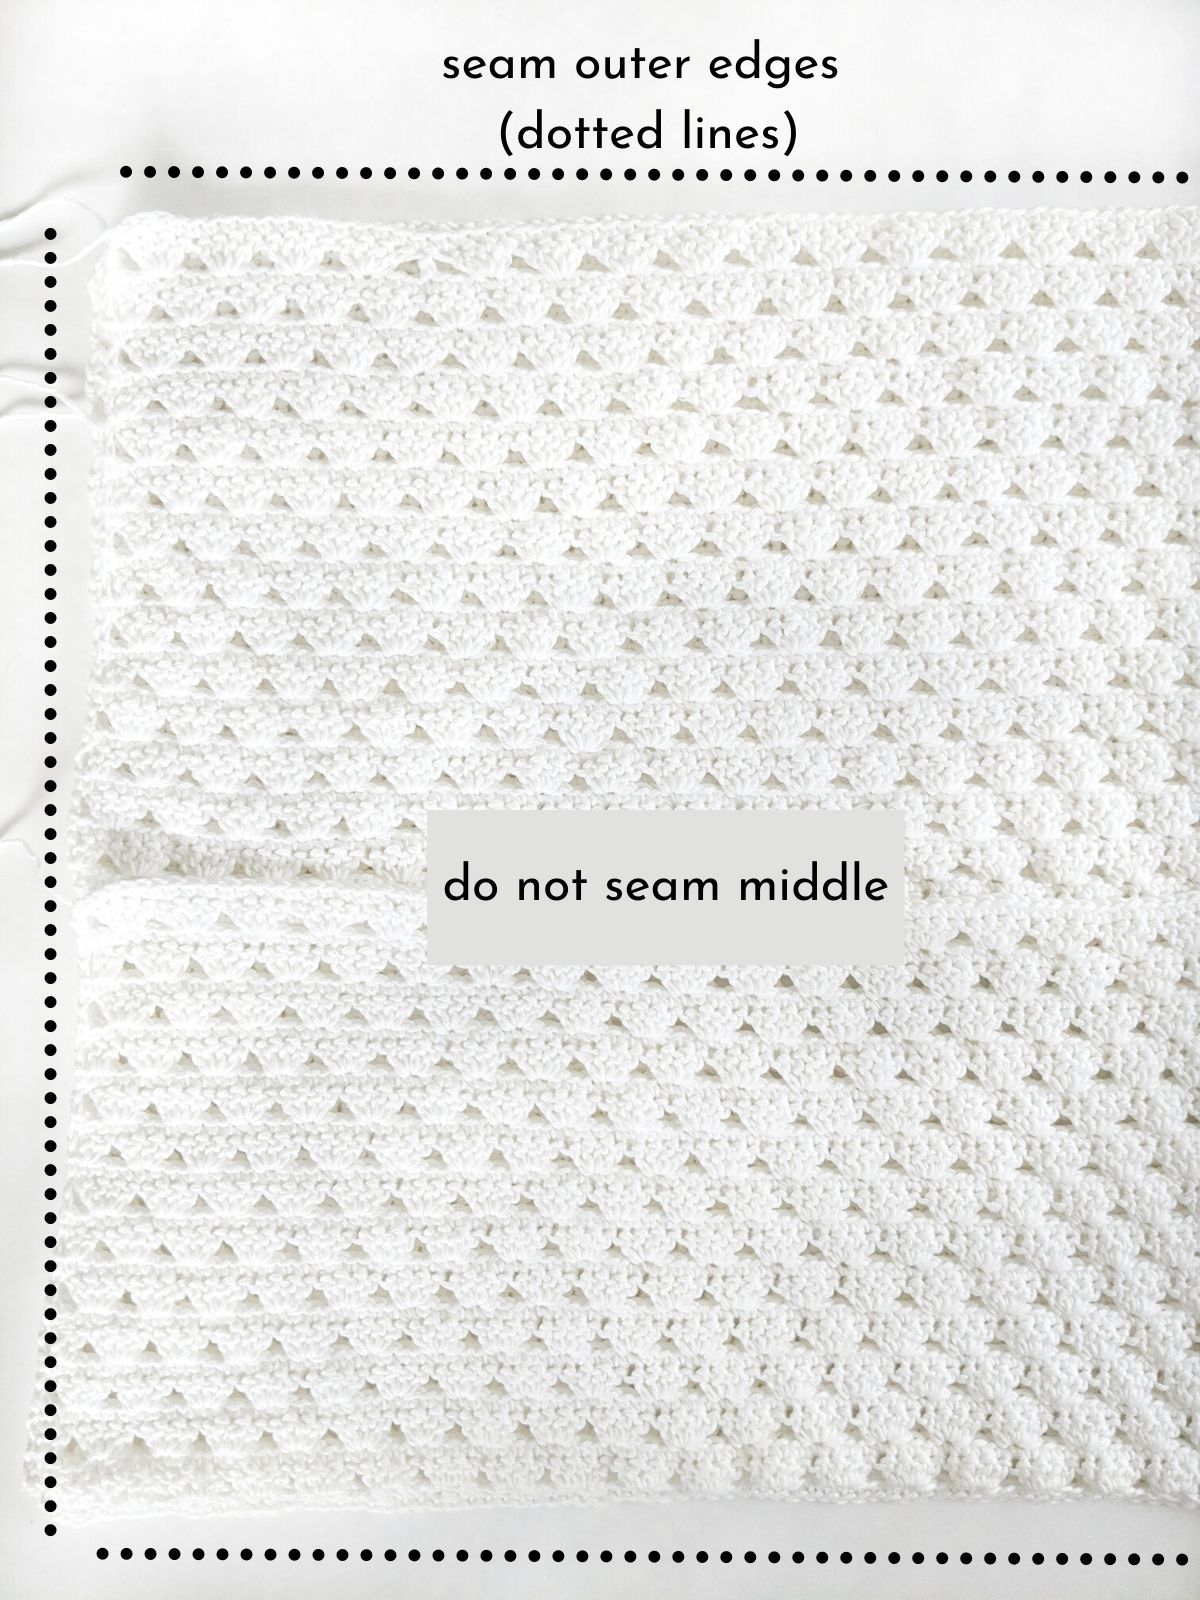
Step 2: Once you have all your crochet panels in the right place, grab your darning needle and some yarn. Go ahead and insert your yarn through the darning needle and starting from the bottom right, insert your darning needle through both panels.
Once you have done this, weave in and out between each stitch along the bottom edge. You want to continue this all the way around the pillow. When you reach the middle of the pillow, make sure that you go through all 3 panels.
Once this is done, tie a knot, cut your yarn, and weave in all ends.
Alright, you're almost done. Get ready to grab those buttons!
Step 3: The last step is to first flip your crochet pillow cover inside out, this will show the correct side of your pillow and lay it so you see the backside (2 back panels).
Then you want to grab your buttons and place the buttons 3 stitches apart on the back front panel (so you want to place them 3 shell stitches apart from each other starting from the right middle side of your panel).
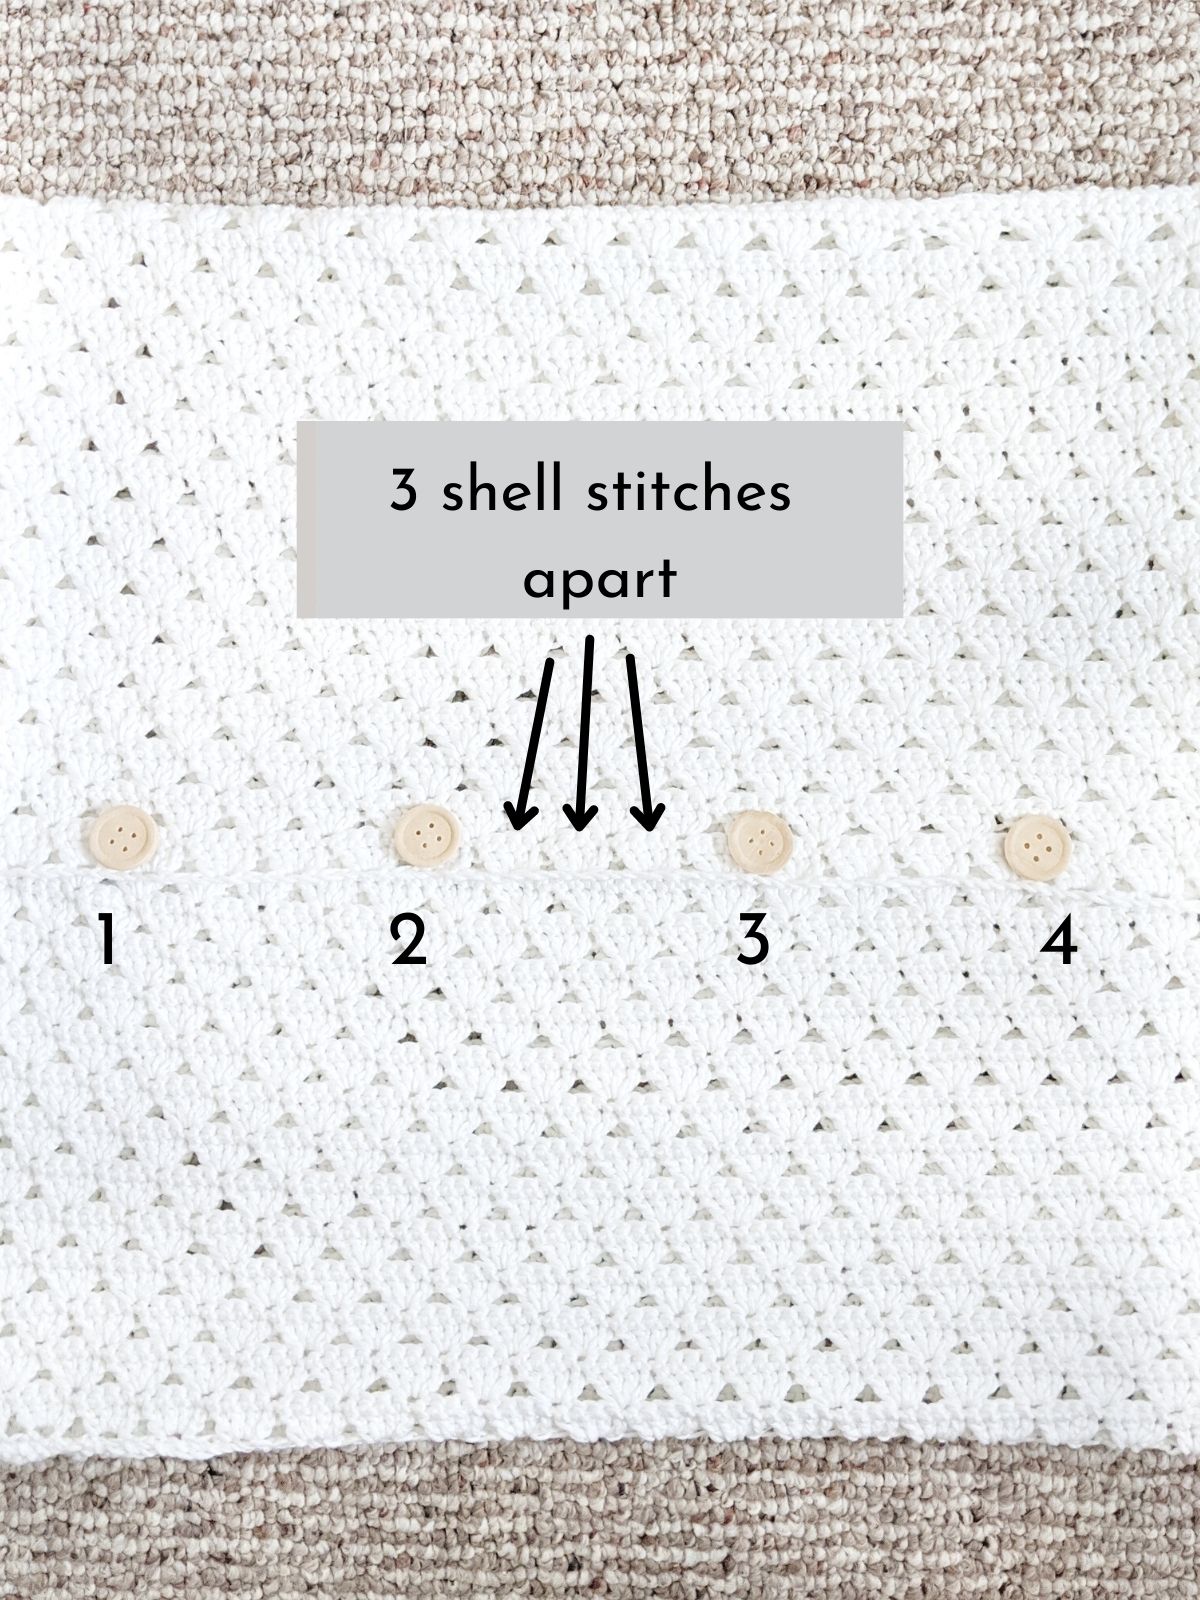
Step 3 is customizable, so if you want to add more buttons or sew on less, you can totally do that at this point. Ok, so once you have your buttons placed, grab your needle and thread.
Input the thread through the needle and sew on your buttons. Make sure you're sewing them only to the top back front panel.
Once this part is done, you're finished with your crochet pillow cover! So grab your pillow and insert it in your new homemade pillow cover.
I hope you enjoyed this fun pillow pattern + tutorial and don't forget to let me know your thought in the comment down below.
PIN IT for later