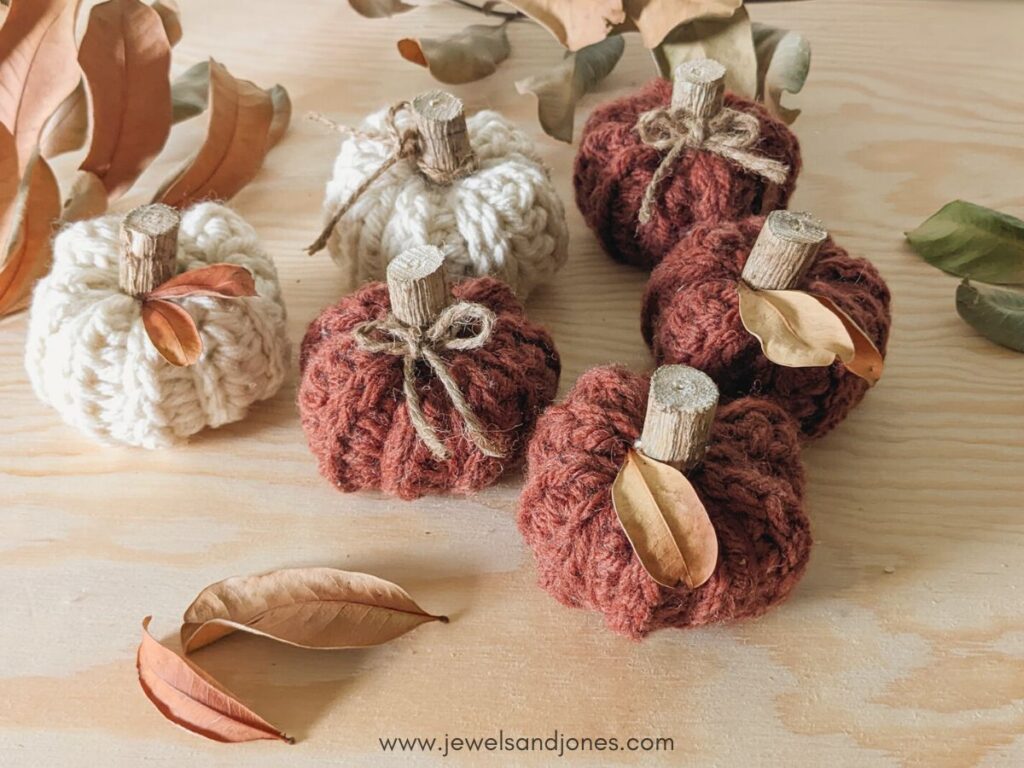
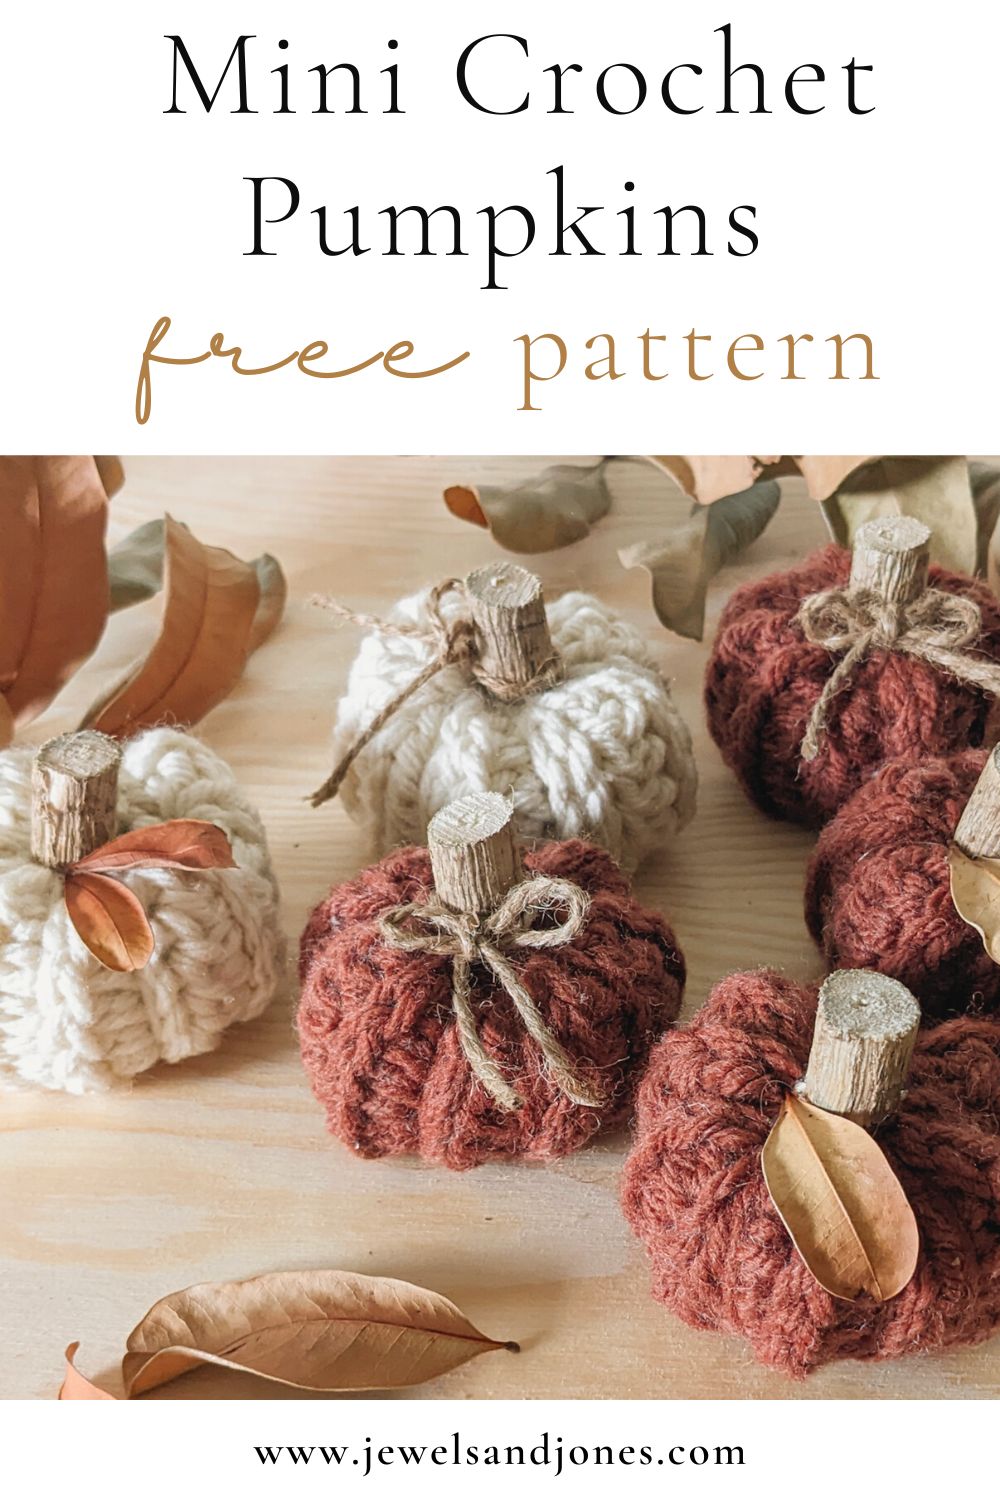
Learn how to make these cute mini crochet pumpkins for your home with this free pattern. These adorable chunky pumpkins are easy and fun to make. Plus, they make a wonderful addition to your fall decor!
You can find the free crochet pattern and video tutorial by scrolling down or continue to read through some of the inspiration behind my latest fall-time design.
This post contains affiliate links, which means I make a small commission at no extra cost to you. See my full disclosure here.
Free Crochet Pumpkin Pattern
My latest free crochet pattern is a cute little pumpkin for the fall time. With the seasons changing, I thought it would be the perfect time to start making some crochet fall-time decor.
So first on the list is this simple little crochet pumpkin pattern. It's made out of a basic rectangle and uses bulky weight yarn. It's a fun small quick crochet project!
This pattern also includes step-by-step photos, so if you've never made one, I think you'll find them really helpful. It's an easy beginner-friendly pattern.
How to Crochet a Mini Pumpkin?
For this crochet pumpkin pattern, you'll first start off by making a small rectangle and then you'll seam both ends together using the slip stitch method.
Once you have slip stitched your two sides together, you will then close one side of the mini tube and fill it with poly-fil. Then you will close the other side of the tube and start wrapping your yarn vertically around the pumpkin to create more defined ridges.
This part is optional, but I highly recommend it as it creates a cute short pumpkin. Then after this step is complete, all that's left to do is add some embellishments to your pumpkin.
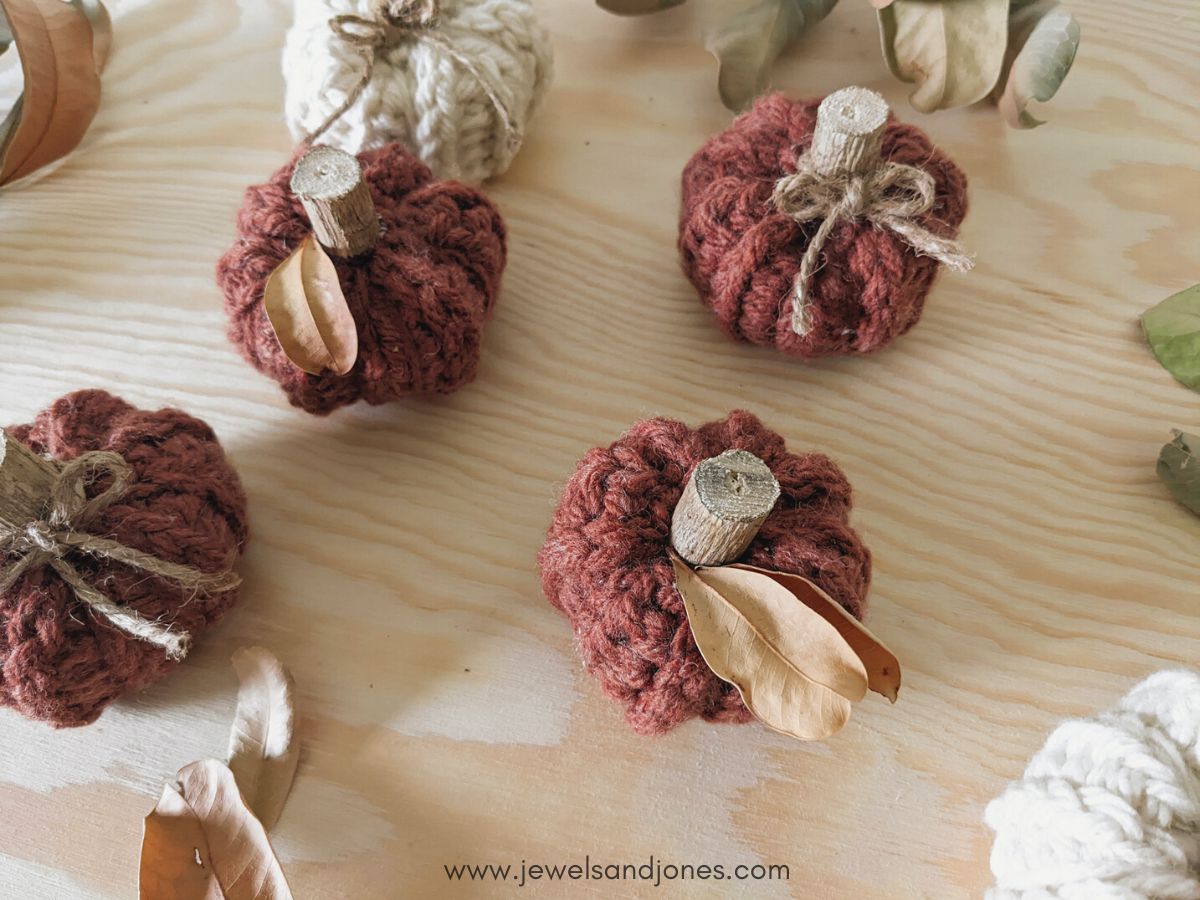
I added a stick for the stem and added some leaves. I also tied a bow from twine around the stem. So you can really decorate your pumpkin in any way you like!
Bulky Yarn Makes the Cutest Chunky Pumpkins
The yarn you'll be using for this mini crochet pumpkin pattern is Lion Brand Hue + Me yarn. It's a number 5 bulky-weight yarn that's made from acrylic and wool.
I loved using this yarn for this pattern and highly recommend it as there are so many color options, but any number 5 yarn will do. You can even double up a worsted-weight yarn to create a bulky yarn.
So just take a look in your yarn stash and see what you have.
Alright, let's dive into this pattern!
Pin It for later
Mini Crochet Pumpkin Pattern
Description:
Learn how to crochet some cute mini pumpkins for your home for the fall time. This crochet pumpkin pattern is made with beginner-friendly stitches, uses bulky-weight yarn, and it's made out of a basic rectangle.
Materials:
- 1 skein of Lion Brand Hue + Me in the color Spicy and Salt (Weight 5/ 4.4 oz, 137 yds), a total of 137 yards. I used about 30 yards per pumpkin.
- 6.5 mm (K) Crochet Hook.
- 1 bag of Poly-Fil.
- Decorations (wooden sticks, cinnamon sticks, leaves, twine).
- Darning needle.
- Scissors.
Gauge:
4 rows x 6 stitches = 2" inch square.
Abbreviations:
ch – chain: Yarn over, pull through loop on hook.
ss – slip stitch: Insert hook into stitch, yarn over, pull through stitch and loop on hook.
hdc – half double crochet: Yarn over, insert hook into stitch, yarn over and pull through stitch. Yarn over one more time and pull through last three loops on hook.
hdc blo – half double crochet back loop only: Yarn over, insert hook into back loop of stitch, yarn over and pull through stitch. Yarn over one more time and pull through last three loops on hook.
hdc 3blo – half double crochet 3rd back loop only: Yarn over, insert hook into 3rd loop of stitch, yarn over, and pull through stitch. Yarn over one more time and pull through last three loops on hook.
Pattern Notes:
- Pattern written in U.S Terms.
- Chain 1 at the beginning of each row does not count as a stitch.
- The pattern is written in 2 parts. Part 1 explains how to crochet the base of the pattern and part 2 explains how to turn your rectangle into a pumpkin.
- You can find a detailed photo tutorial of the knit-like crochet stitch used here.
- This mini pumpkin is made by first crocheting a small rectangular panel. This panel is then whipstitched together to create a tube. Once you have created a tube, you will then cinch one side of the pumpkin together and fill it with poly-fil. Then you want to cinch the other side together and wrap yarn around the pumpkin to create ridges. Lastly, you can decorate the pumpkin using sticks, leaves, or twine.
- This pumpkin pattern already has "natural" ridges do to the stitches used, but you can create more of a pumpkin look by wrapping the yarn around the pumpkin edges several times (explained in part 2: step 6).
- The decorations on the mini pumpkins are optional.

Pattern: Part 1
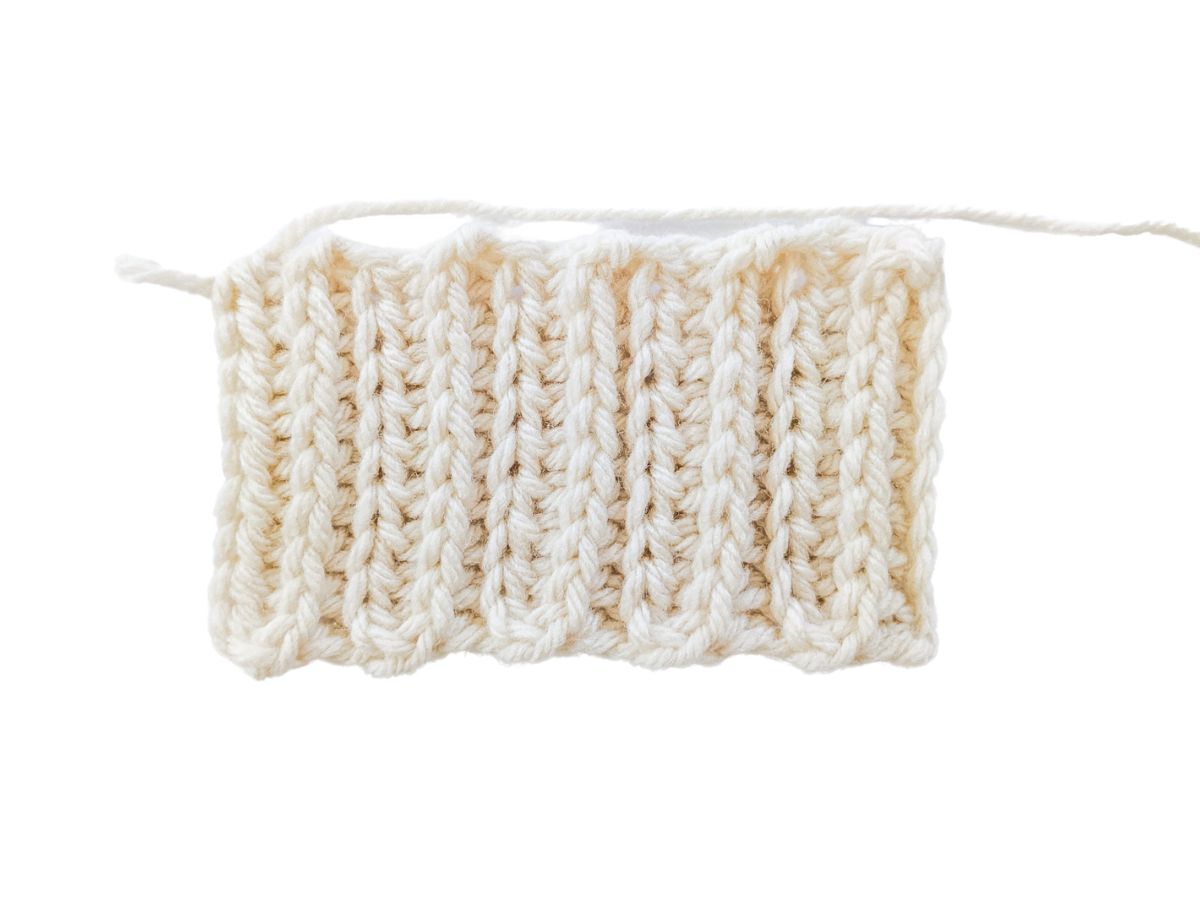
With your choice of yarn color (Spicy or Salt), chain 10. Then follow the pattern down below:
Row 1: In 2nd chain from hook, work 1 hdc, and continue to make a hdc in each chain till the end of the row (9).
Row 2: ch 2, turn, hdc 3blo in the first stitch, and across till the end of the row (9).
Row 3: ch 2, turn, hdc blo in the first stitch, and across till the end of the row (9).
Row 4: Repeat row 2.
Row 5: Repeat row 3.
Row 6: Repeat row 2.
Row 7: Repeat row 3.
Row 8: Repeat row 2.
Row 9: Repeat row 3.
Row 10: Repeat row 2.
Row 11: Repeat row 3.
Tie a knot when you have finished your last row, but leave a 60" inch tail end. The tail end is going to be used to close the pumpkin together.
So now that you have the base of your pattern done, it's time to turn it into a cute little pumpkin. The next set of instructions is explained in steps and they also include helpful photos!
Part 2: How to Turn Your Crochet Rectangle Into a Pumpkin
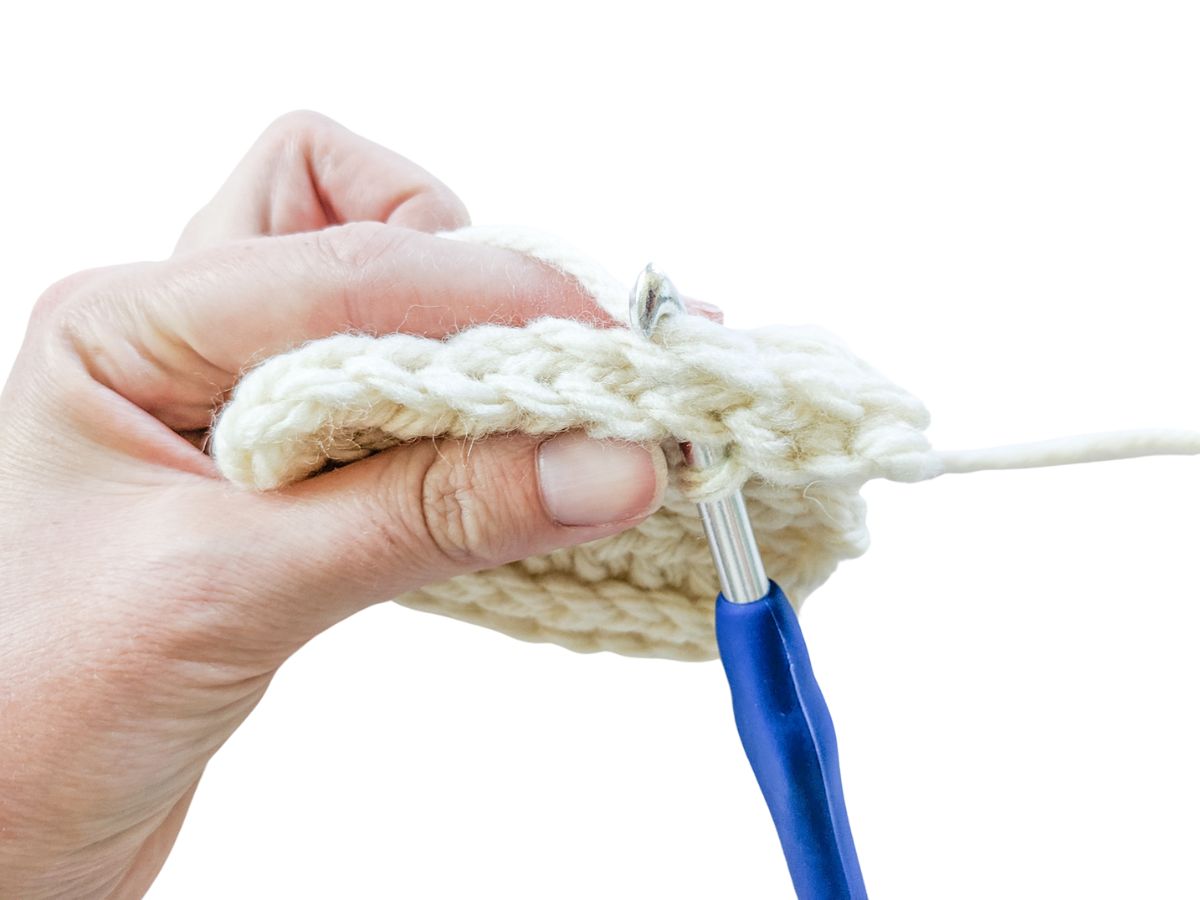
Step 1: Grab the two edges of your crochet rectangle and put them together. Then grab your crochet hook that you used to make the rectangle and slip stitch the two sides together.

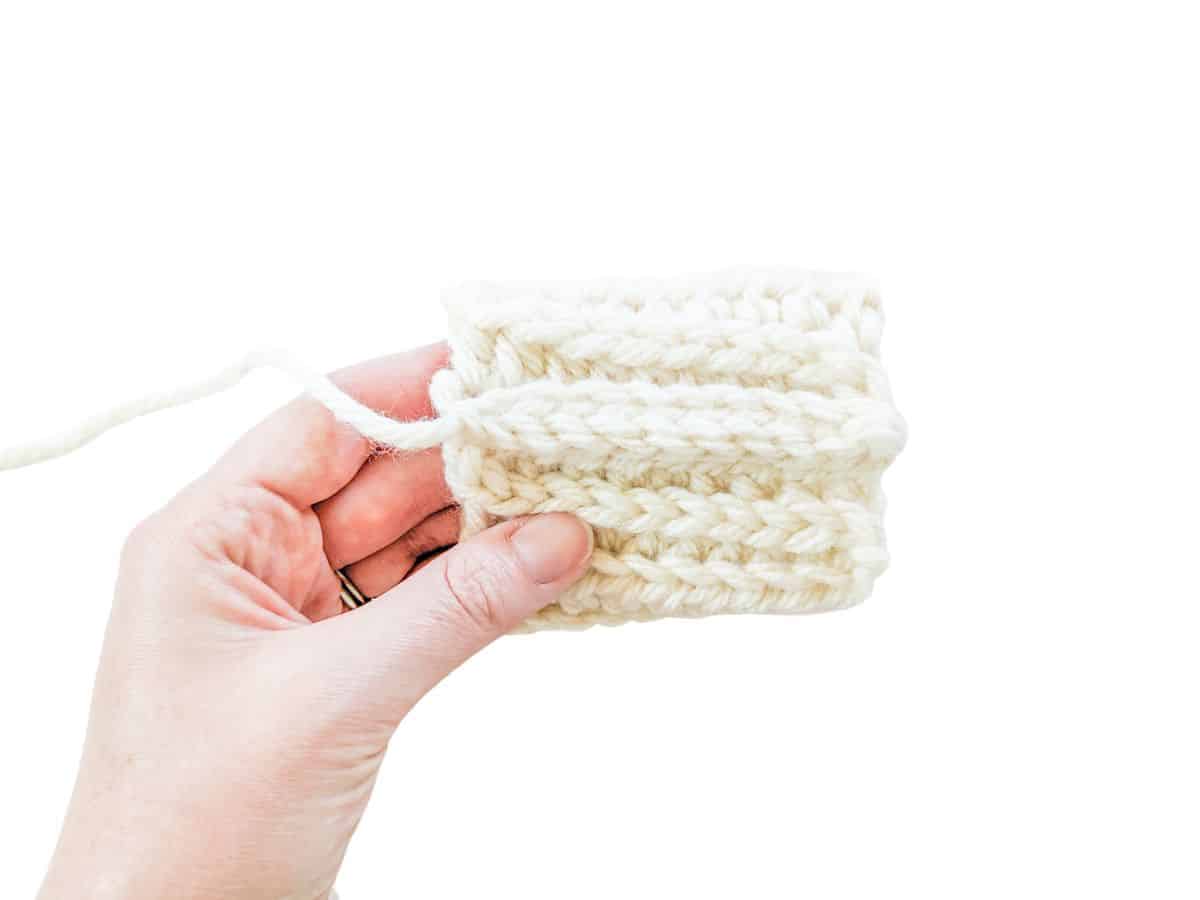
Step 2: Once you have slip stitched your two sides together, tie a knot, but do not cut the long tail end.
Now grab your darning needle and insert it through the tail end. Then grab the mini tube that you just created and start weaving in and out on the top part of the tube.
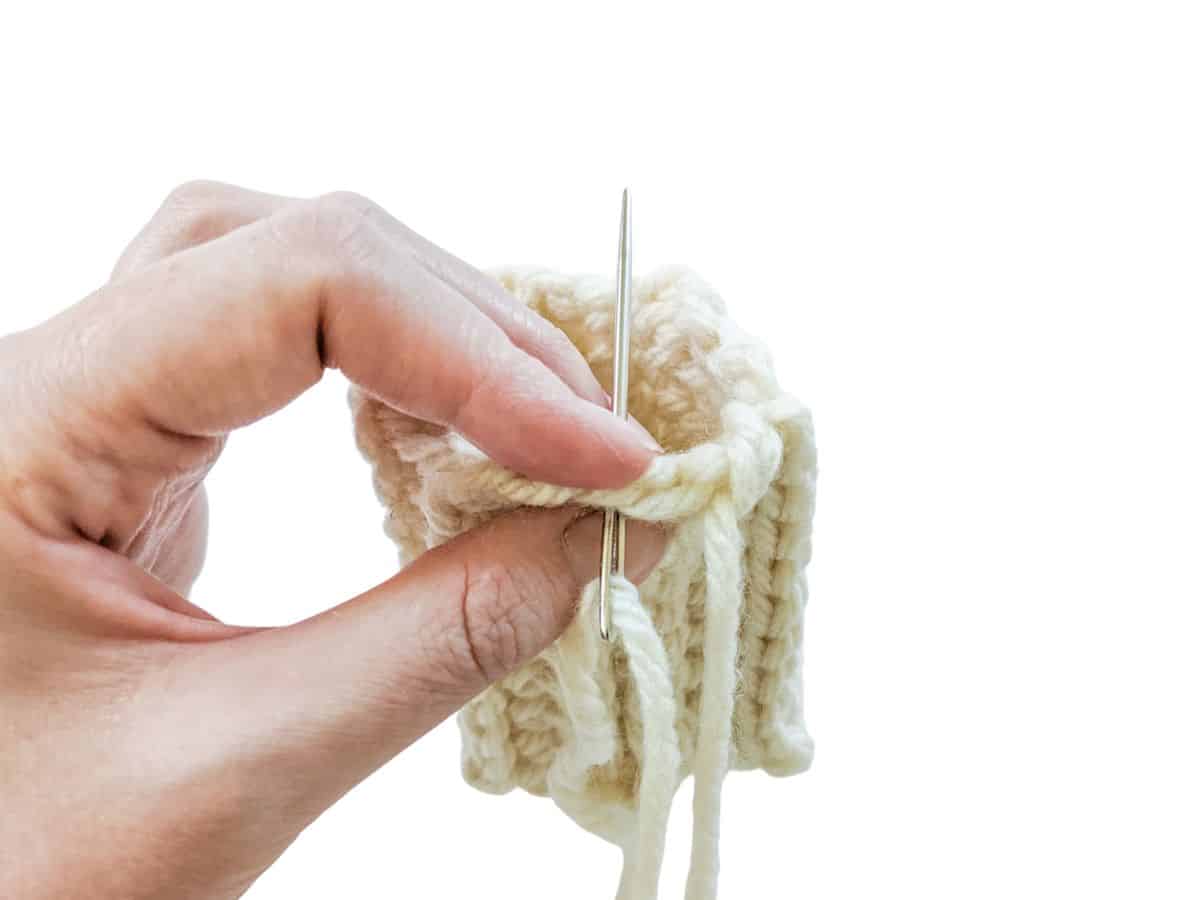
Continue to do this all the way around the tube.
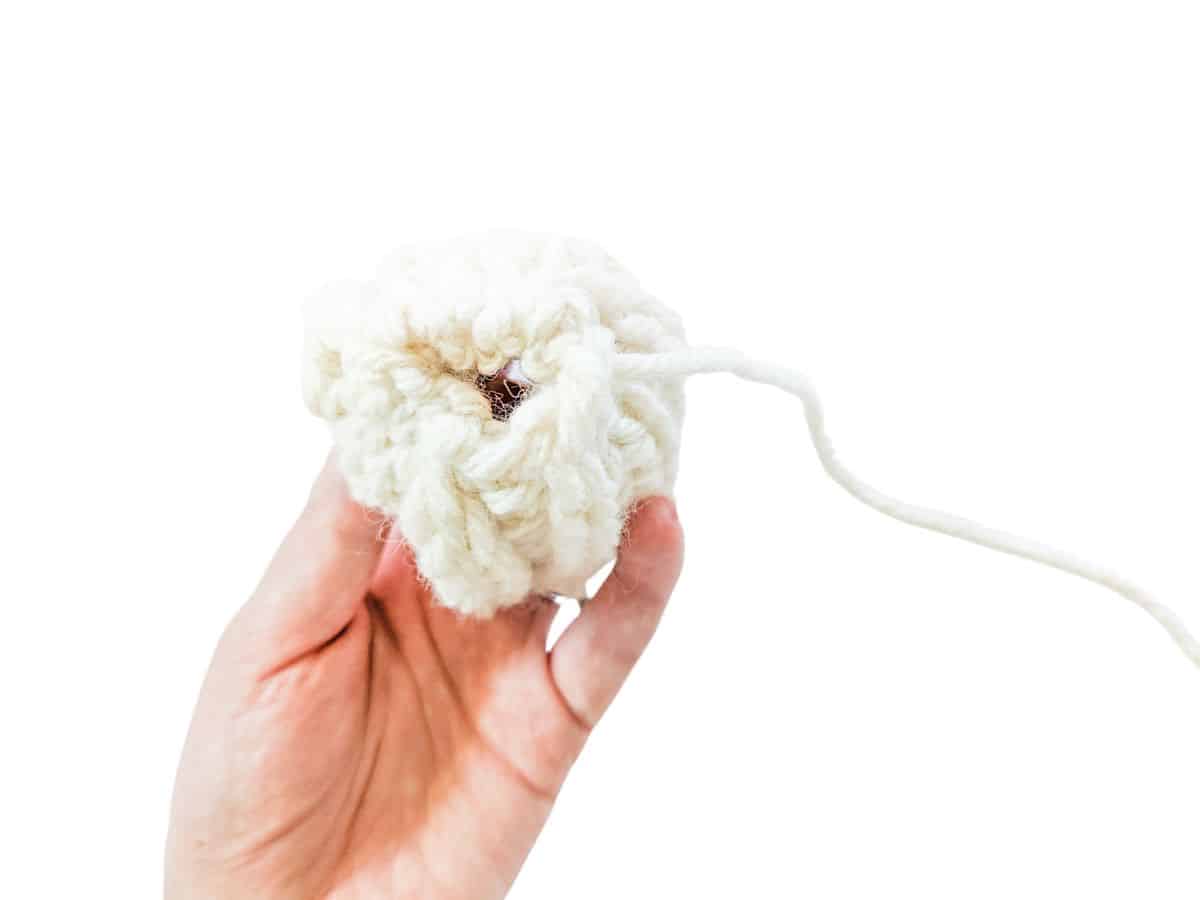
Step 3: Once you have finished weaving the top part, grab your tail end and pull tight. The top should close together.
Step 4: Now flip over your pumpkin so the opening is facing you and insert the darning needle through the bottom and out the top.
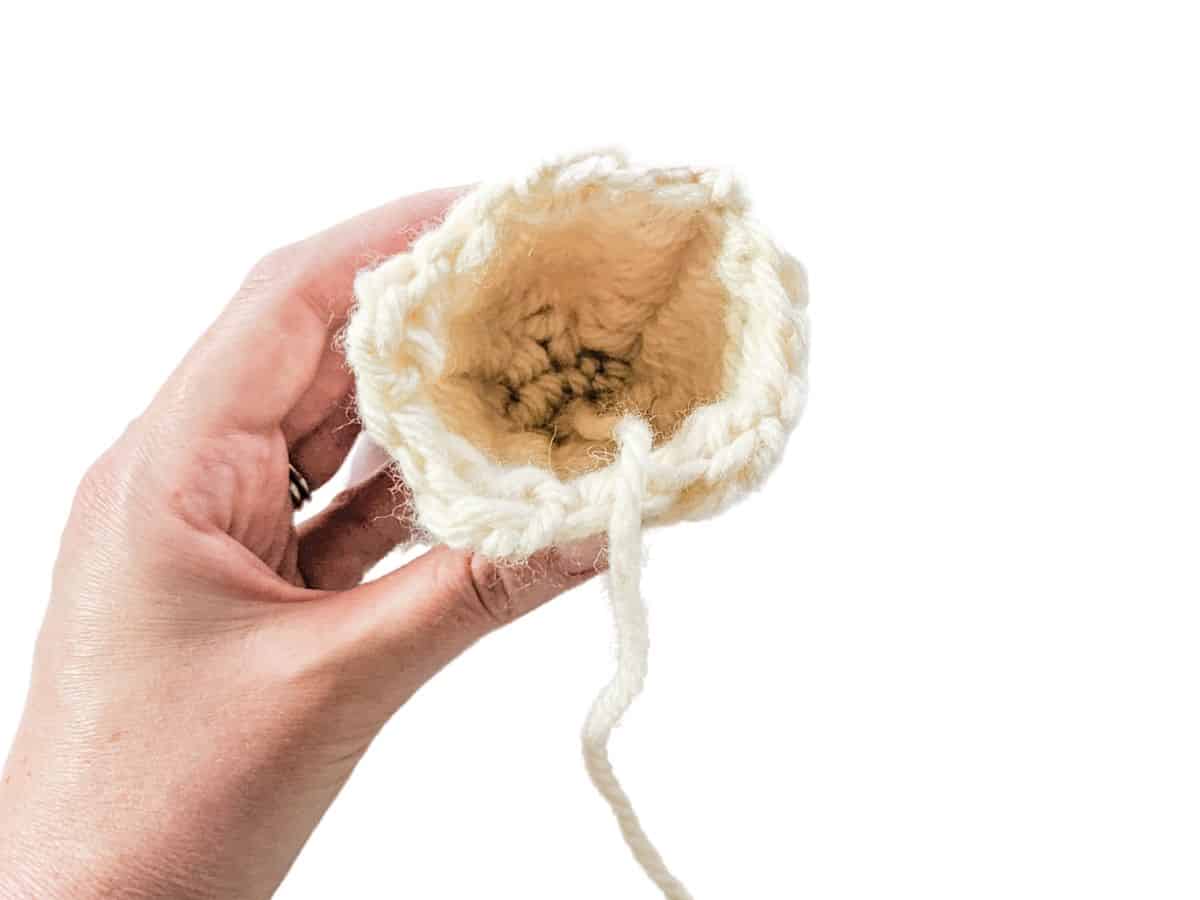
Then grab your poly-fil and start filling your mini tube up.
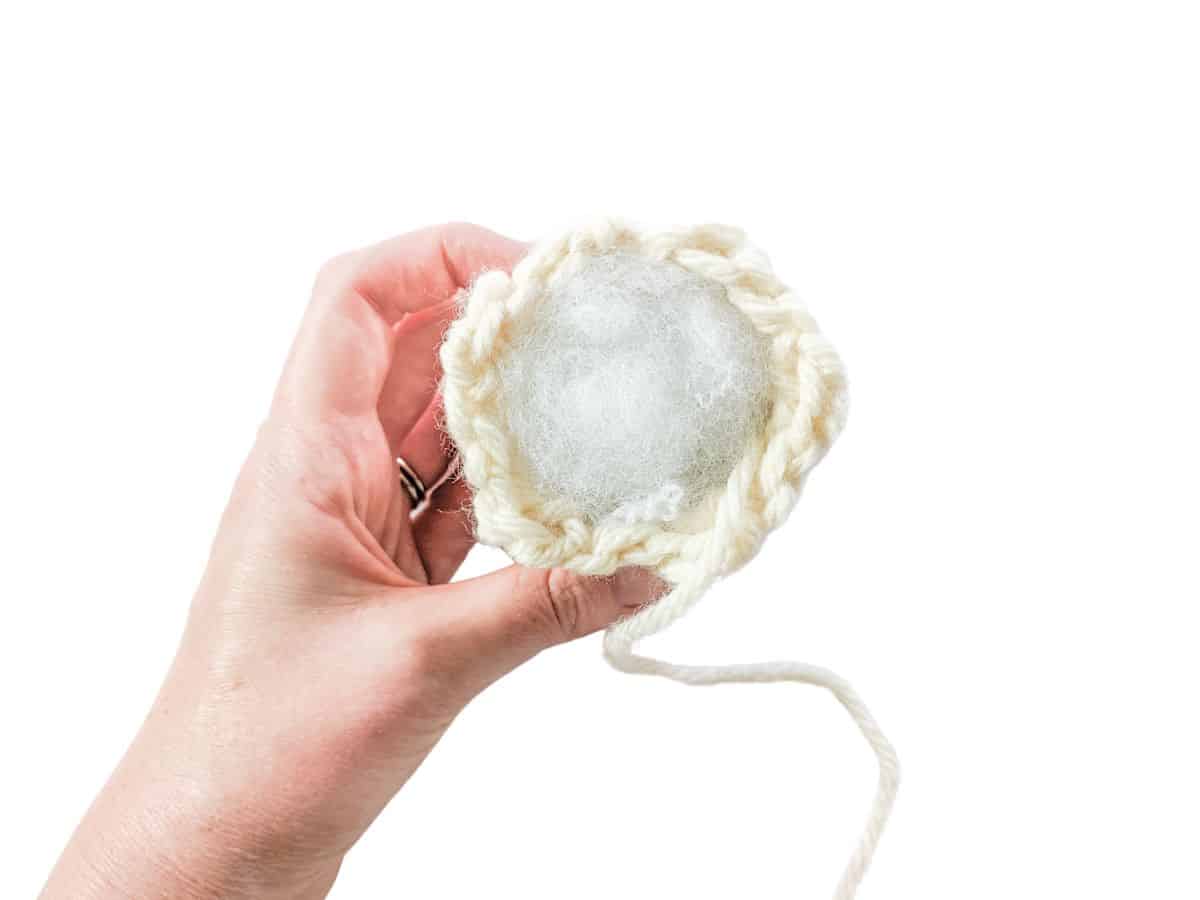
Step 5: Once you have stuffed your mini tube with poly-fil, grab your darning needle, and weave the top edge of the tube again.
Once this is done, pull it tight and secure it with a knot.
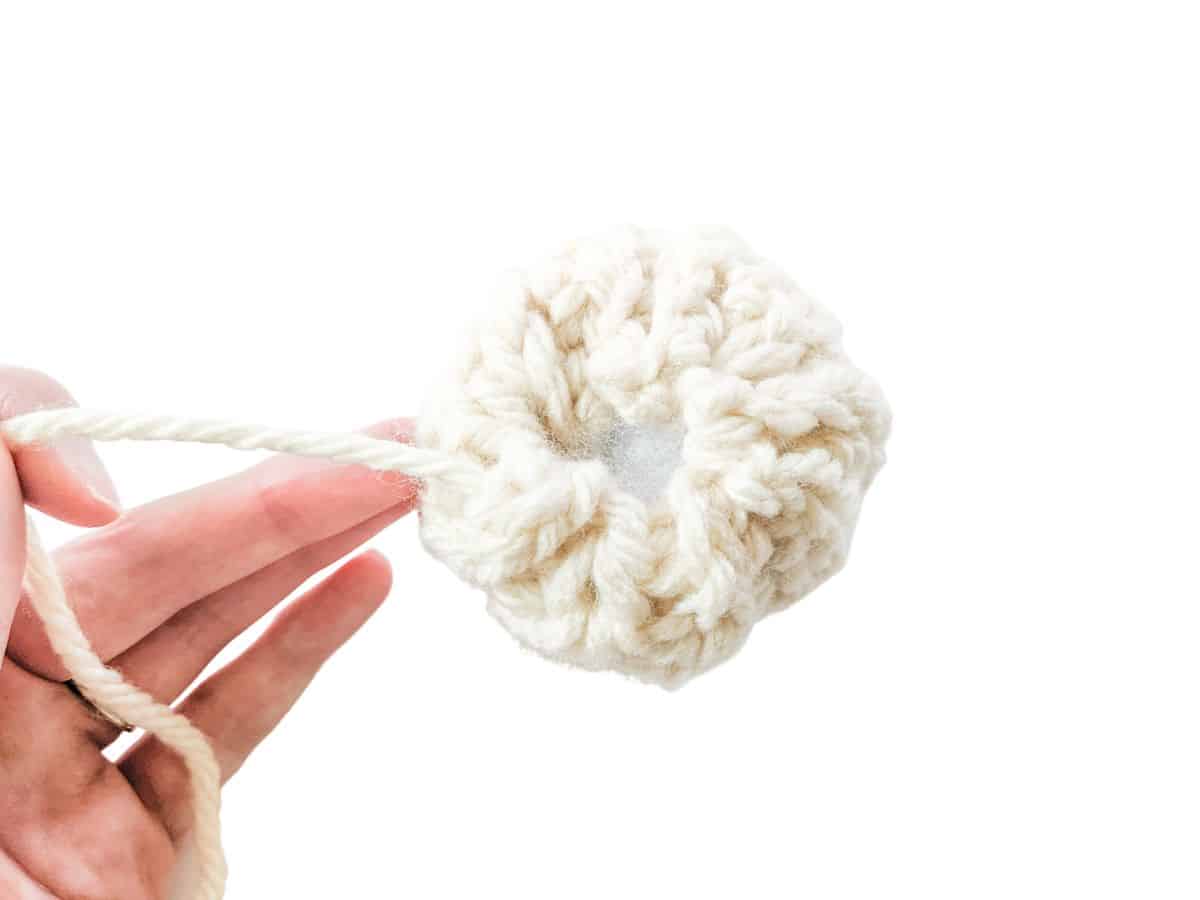
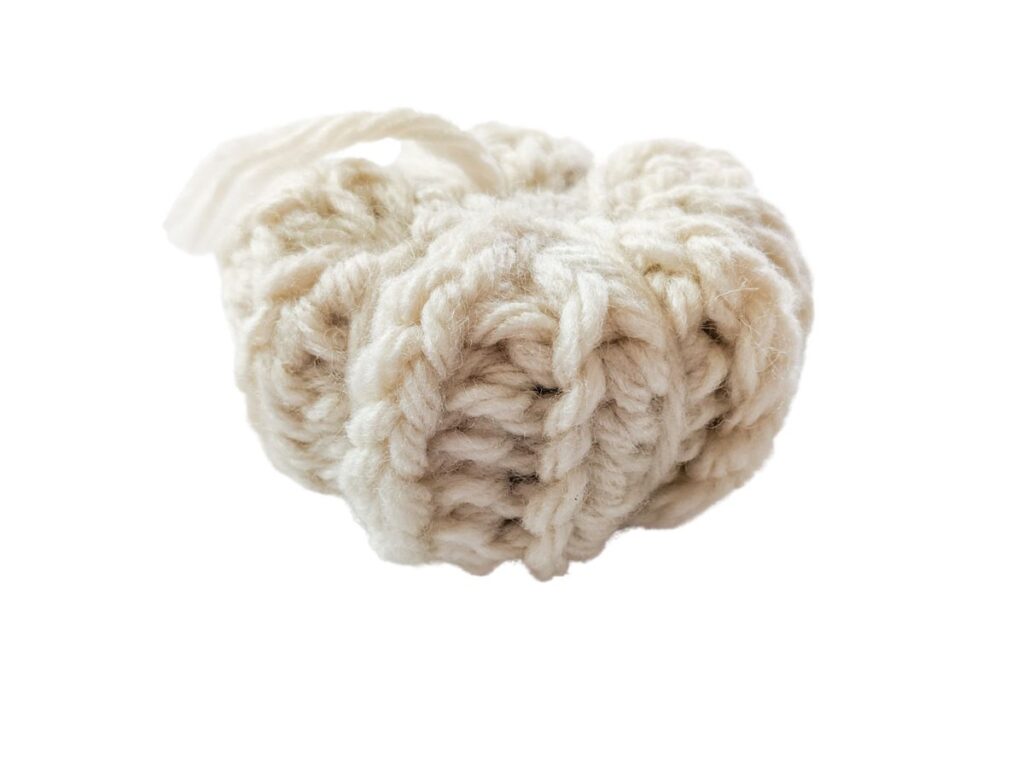
Now you should have something that resembles a pumpkin!
Step 6: The last step is to grab your darning needle once more and insert it through the tail end. Then carefully wrap the yarn down (vertically) along each edge, and push through the bottom and out the top.
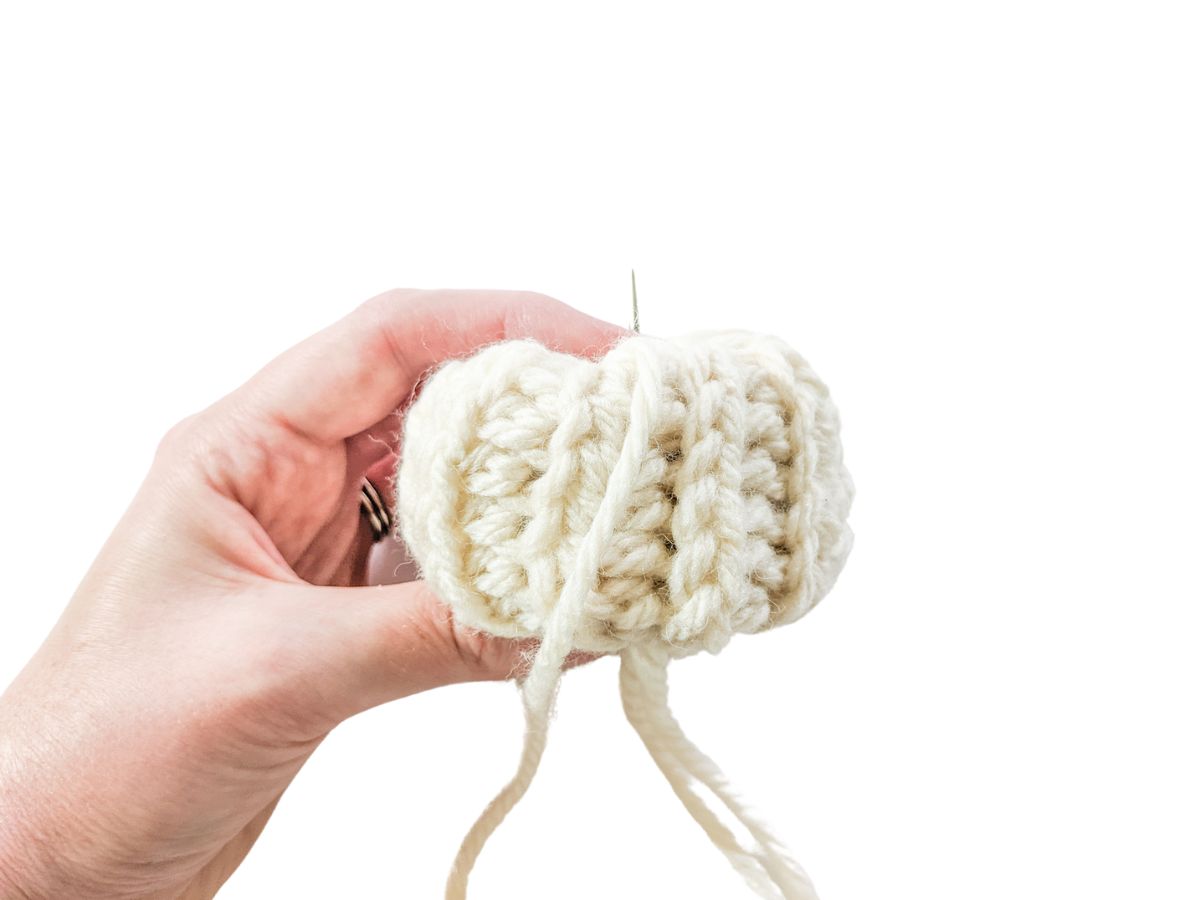
Continue to do this until you've wrapped it a total of 5 times (this will create those defined ridges on your pumpkin).
Finally, tie a knot, and work in your remaining end. You’re finished with making the pumpkin!
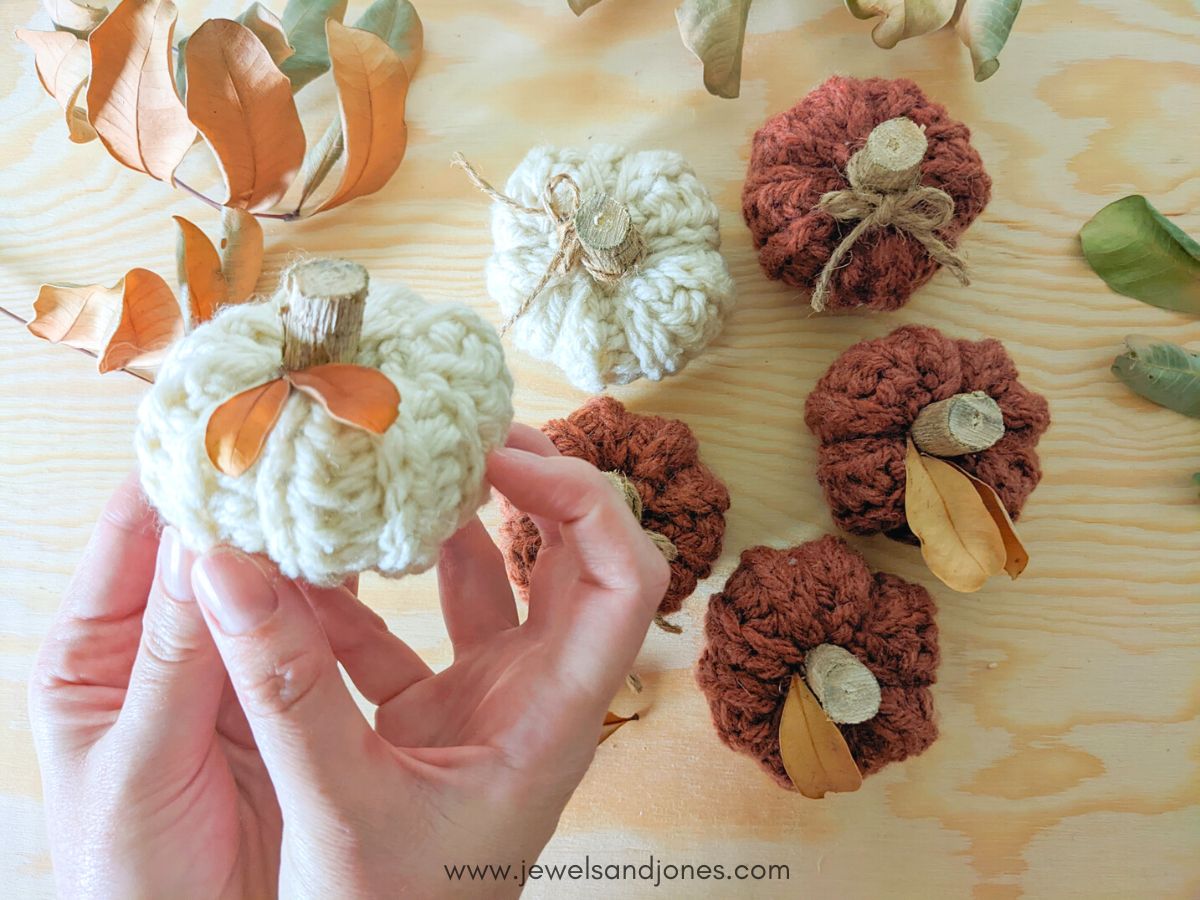
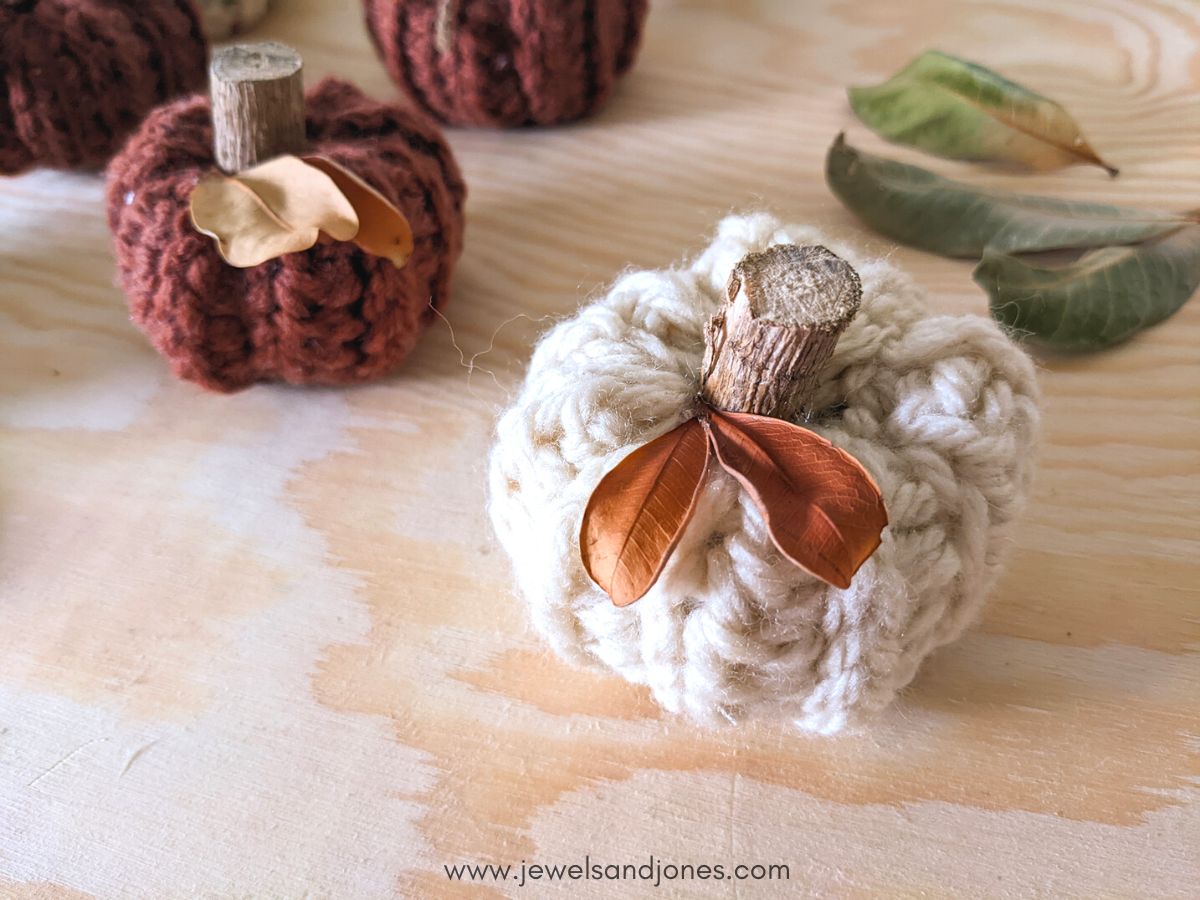
All that’s left to do at this point is to either glue a mini stick or cinnamon stick to the middle of your pumpkin for a stem. You can also make a mini yarn hank and use that as your stem.
Once you've added your stem, you can add some embellishments to your pumpkin. You can add a tiny bow from twine or glue some leaves on. Either way, it'll look adorable with your fall decor.
I hope you enjoyed making these cute little crochet pumpkins!
SimplyCrochetCanada
Friday 14th of October 2022
whoever came up with tthis pattern its sooooooooooooooooooooooooooooooooooooooooooooooooooooooooooooooooooooooooooooooooooooooooooooooooooooooooooooooooooooooooooooooooooooooooooooooooooooooooooooooooooooooooooooo cute
SimplyCrochetCanada
Friday 14th of October 2022
@SimplyCrochetCanada, it is so adorble i love it
SimplyCrochetCanada
Friday 14th of October 2022
wow this looks so cute i think it just convinced me. I might try it!