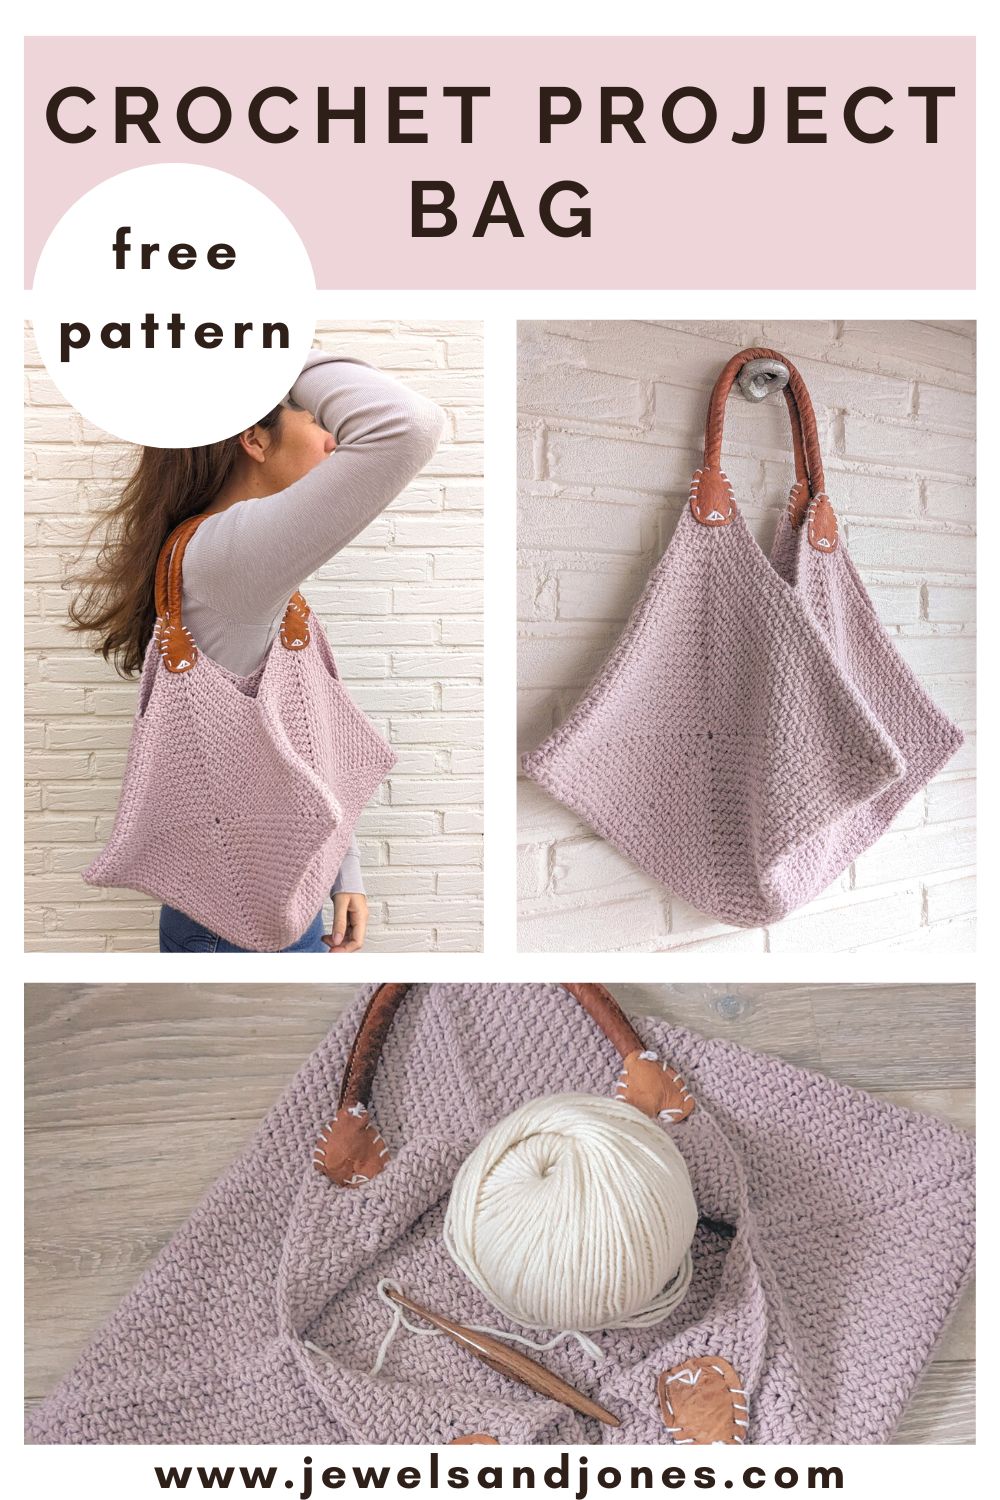
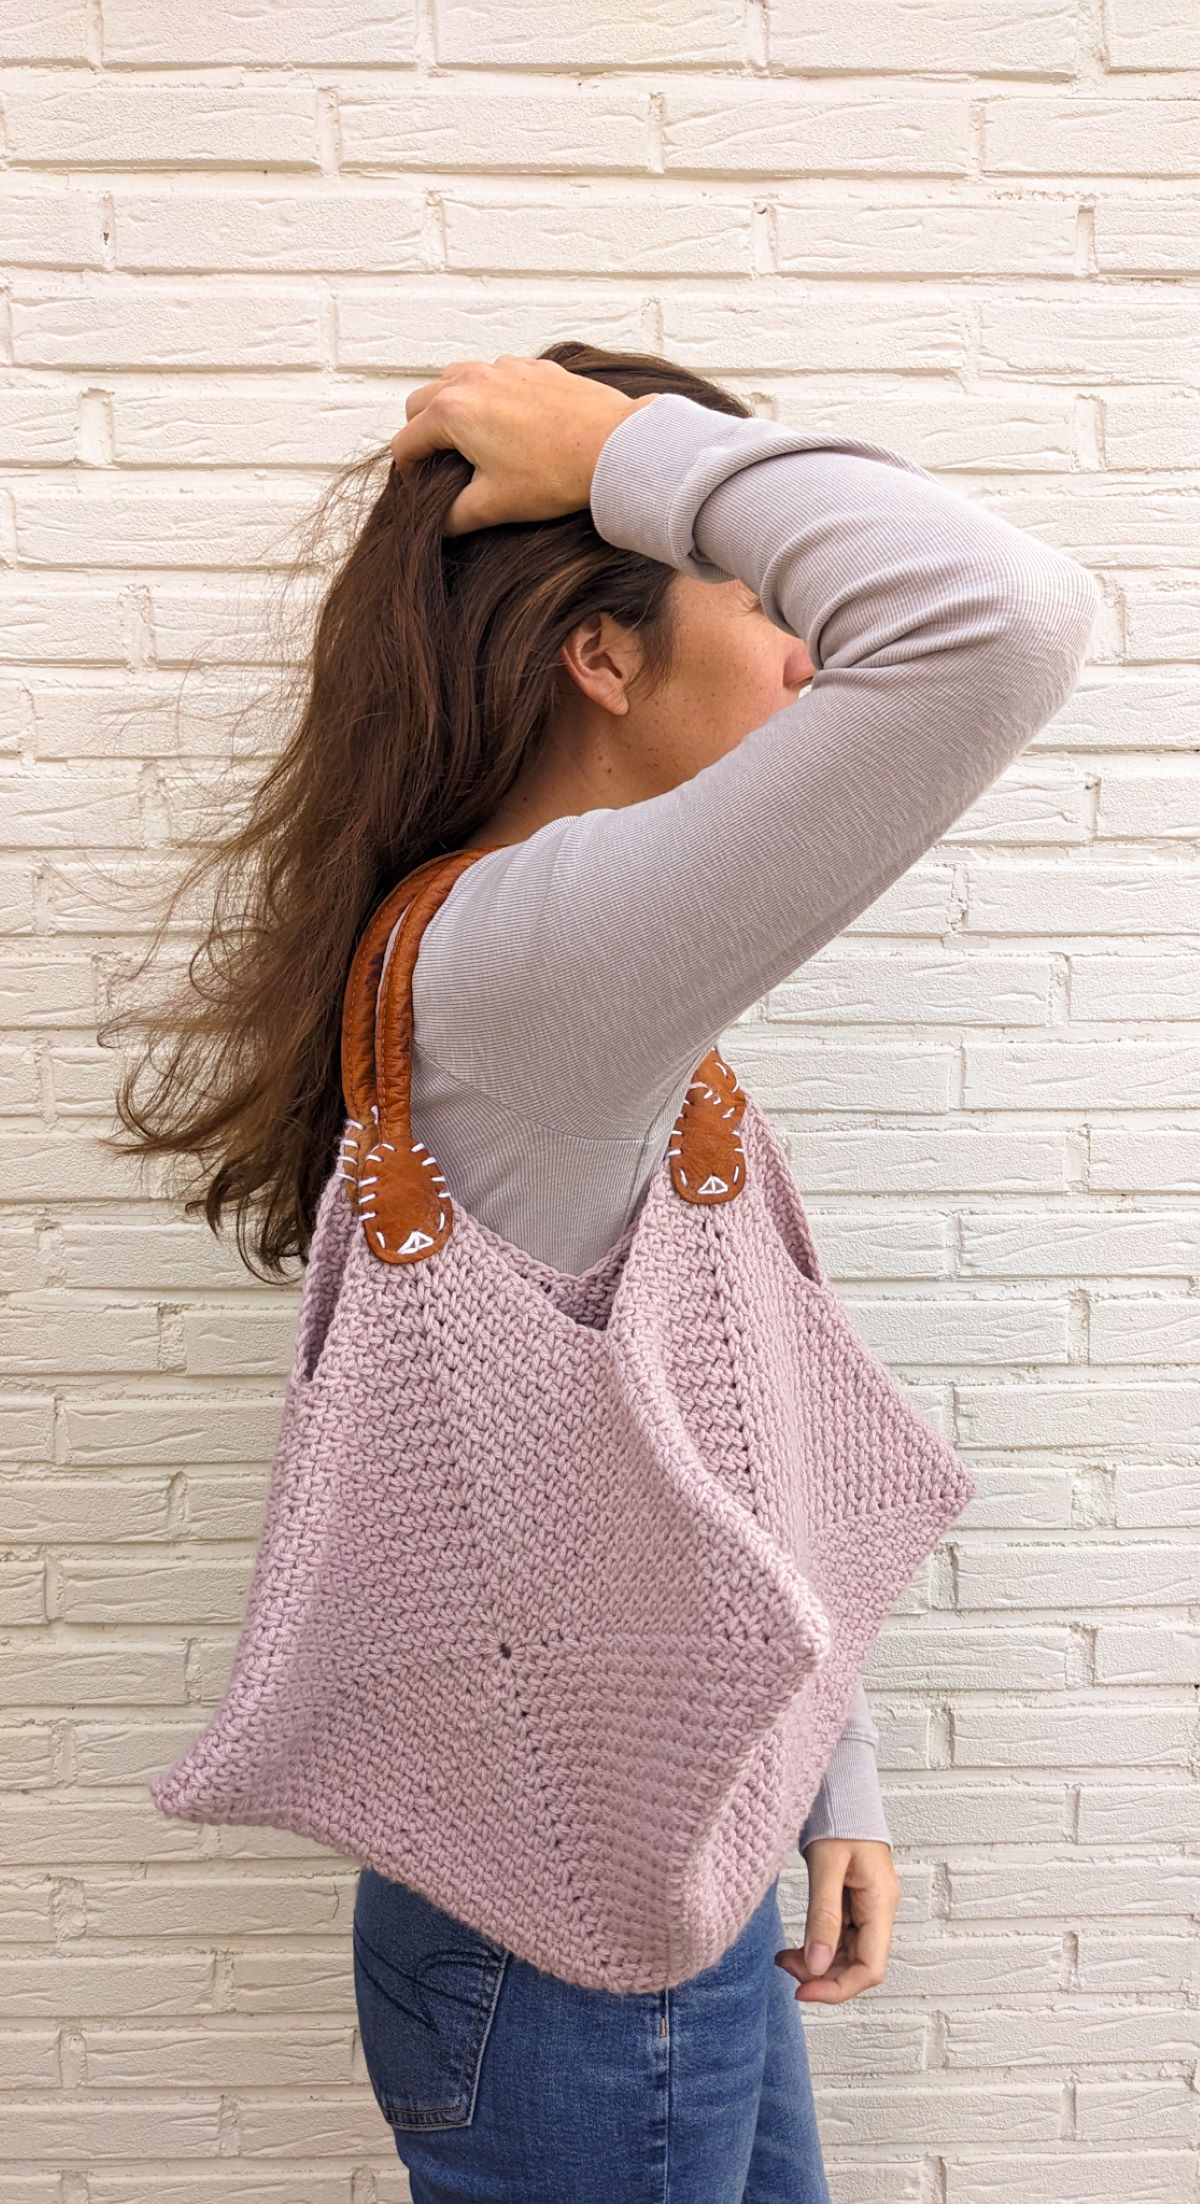
Are you looking for ways to store your current works in progress or just want to take your crochet projects on the go? Well look no further, today I'm going to show you how to crochet a project bag that can store all the things!
It's great to use for your current WIP's, but also is perfect to use for a night out. It's a 2-in-1 crochet bag!
You can find the free crochet project bag pattern and step-by-step video tutorial by scrolling down or click here to purchase an ad-free printable PDF pattern.

This post contains affiliate links, which means I make a small commission at no extra cost to you. See my full disclosure here.
Free Crochet Project Bag Pattern
My latest free crochet pattern on the blog is the Quartz Project Bag. The Quartz Project Bag is an easy-level crochet pattern that's entirely made out of moss stitch squares.
That's right, this easy bag is constructed using only 4 crochet squares. Add in a bit of seaming, and you've got yourself the cutest handmade bag.
So if you love making granny squares and want to try your hand at making a granny square project, I think you'll love this pattern!
It's an easy beginner crochet bag pattern that works up in a few hours!

The Perfect Catch-All Bag Pattern
One thing that I love about this crochet bag pattern is that it's the perfect catch-all bag. You know those times when you want to bring your crochet along, and then some other things, and before you know it your hands are full and you need to find a bigger bag.
Well, I'm happy to say this bag fits it all. It may look small, but with its neat construction, it actually fits a whole bunch of things.
So if you're looking to crochet a bag that can fit all the things, definitely give this pattern a try or check out this mesh crochet bag pattern.
Construction
The construction of this bag pattern is pretty neat as you're essentially making one big square and then seaming it together to form a bag.
You will first crochet your 4 moss stitch squares and then you will seam these squares together using the whipstitch method. Then you will fold the squares together, like an envelope, and seam the sides along the edge.

Once this is done, all that's left to do is to sew on the handles. And that's it! Pretty simple right?
Yarn
I chose to work with Lion Brand Pound of Love yarn for this project and I love how it turned out! This was my first time working with this yarn, and I can't recommend it enough. It's a great worsted-weight yarn with tons of different color options. Plus, each ball contains 1,020 yards of yarn.
So you get a lot of yardage per ball! For this project, you will only need 1 ball of yarn. I chose to work with the color Quartz, which is a pretty soft pink color. I also think this bag would look good in the color white or grey.
Alright, let's get started with our pattern.
Other Free Crochet Bag Patterns

1. Farmer's Market Bag Pattern. / 2. Crossbody Bag Pattern. / 3. Granny Square Tote Bag Pattern.

Free Crochet Project Bag Pattern
Description:
Carry your projects in style with this easy crochet project bag pattern! The Quartz project bag keeps your yarn, hooks, and works-in-progress organized and portable. It's perfect for all skill levels, from beginners to experienced crocheters.
With detailed instructions and step-by-step photos, you'll have your bag ready in no time.
Materials:
- 1 ball of Lion Brand Pound of Love Yarn in the color Quartz (Weight 4/ 16oz, 1,020yds), you will need a total of 560 yards or you can use another worsted weight yarn.
- 6.0 mm (J) Crochet Hook.
- 2 Leather Purse Handles (I repurposed mine from an old bag, but you can find a similar version here).
- Stitch Markers.
- Darning Needle.
- Scissors.
Gauge:
One moss stitch square is approximately: 12 1/2” x 12 1/2" inch.
Bag size: 12 1/2” wide x 12 1/2" long.
Strap size: 16 1/2″ inches long.
Abbreviations:
ch – chain: Yarn over, pull through loop on hook.
sc – single crochet: Insert hook into stitch, yarn over and pull through, yarn over and pull through last two loops on hook.
ss – slip stitch: Insert hook into stitch, yarn over, pull through stitch and loop on hook.
Pattern Notes:
- Pattern written in U.S Terms.
- Bag is entirely made up of 4 moss stitch squares. You will first crochet 4 moss stitch squares, and then seam each square together to form the bag. Once you have the base of the bag done, you will then seam on the straps.
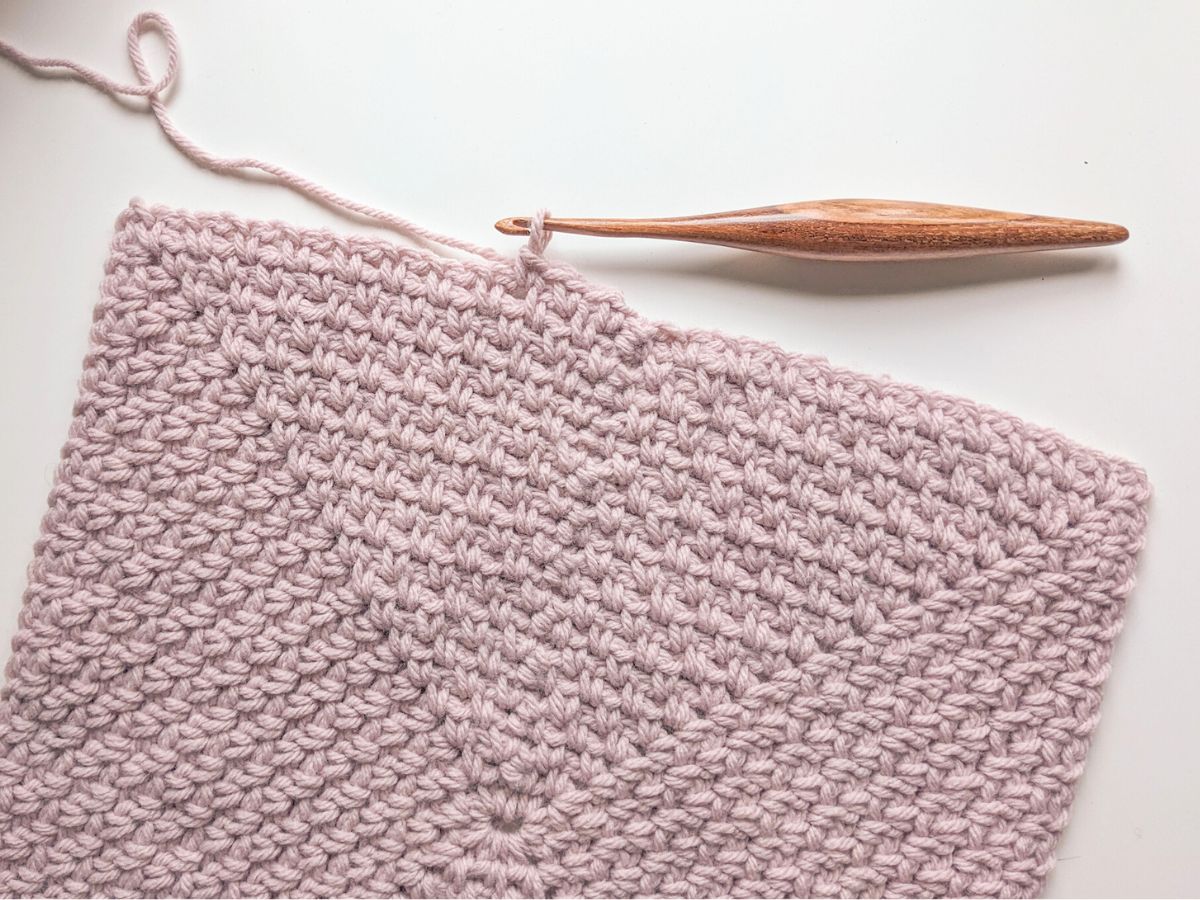
- The Moss Stitch Square is made by turning after each completed round (You will bring your working yarn over the stitch and then work the square per the instructions). Each round is joined together by a slip stitch. Click HERE for a step-by-step photo + video tutorial.
Moss Stitch Granny Square Pattern
With Lion Brand Pound of Love Yarn, make 4 Moss Stitch Granny Squares.
Round 1: Chain 2, * Work 1 single crochet in the 2nd chain from the hook, chain 2, make another single crochet in the same chain, and chain 1. Repeat from * 3 more times for a total of 4 corners. Slip stitch to first single crochet of the round to join the work. Turn your work.
Round 2: *Work 1 single crochet in next side space, and chain 1. Then skip the next single crochet and work (1 single crochet, chain 2, 1 single crochet, chain 1) in the corner space. Repeat from * 3 more times for a total of 4 corners. Then slip stitch to first single crochet to join the work. Turn your work.
Round 3: Work 1 single crochet and 1 chain in each chain space, and work (1 single crochet, chain 2, 1 single crochet, chain 1) in each corner space. Then slip stitch to first single crochet to join the work. Turn your work.
Round 4 – Round 22: Repeat round 3.
Finish off and weave in all ends before seaming your 4 squares together.
Crochet Project Bag Construction
Once you have made all 4 squares and have worked in your ends, it's time to put your project bag together.
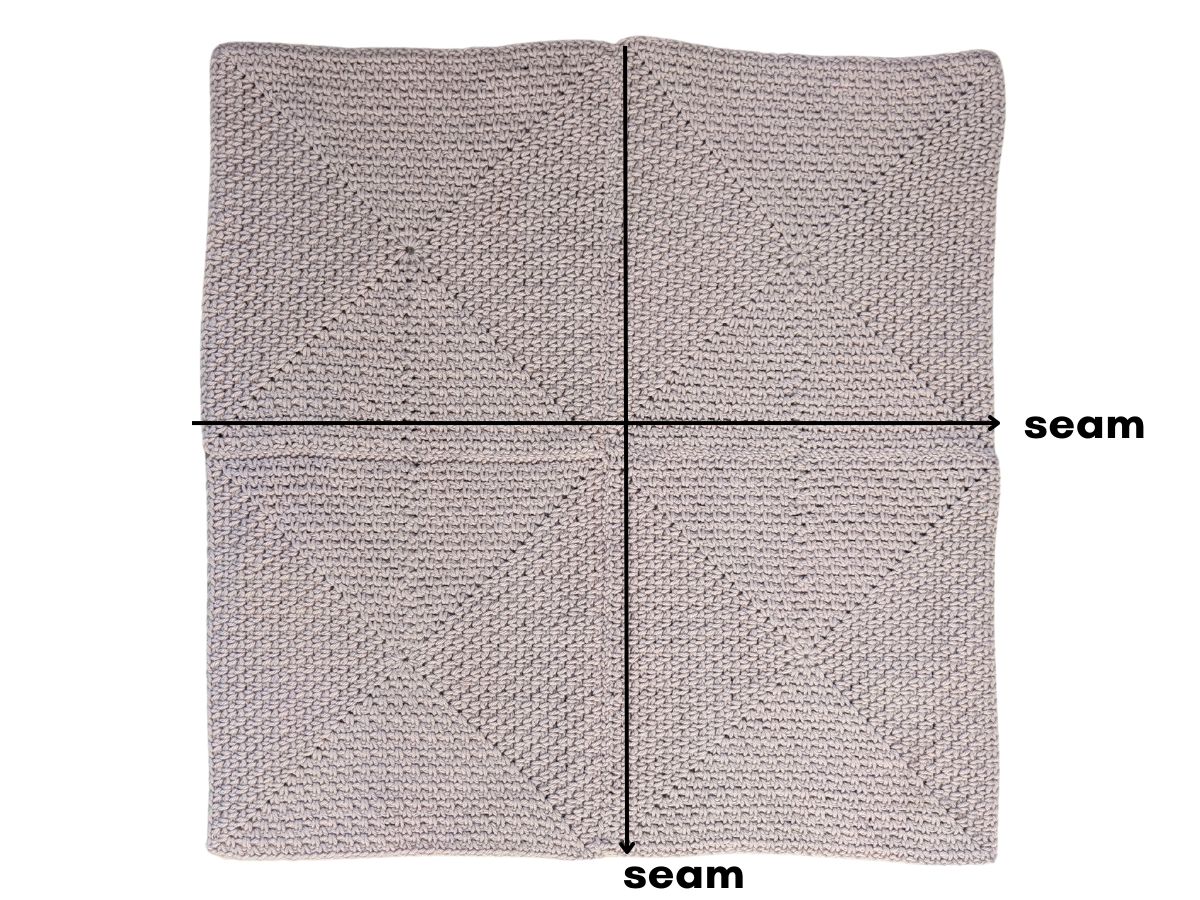
Step 1: Grab the first two squares and lay them together side by side, then grab the other two squares and place them on the bottom of the first two squares.
Note - you're creating one big square (photo down below for reference).
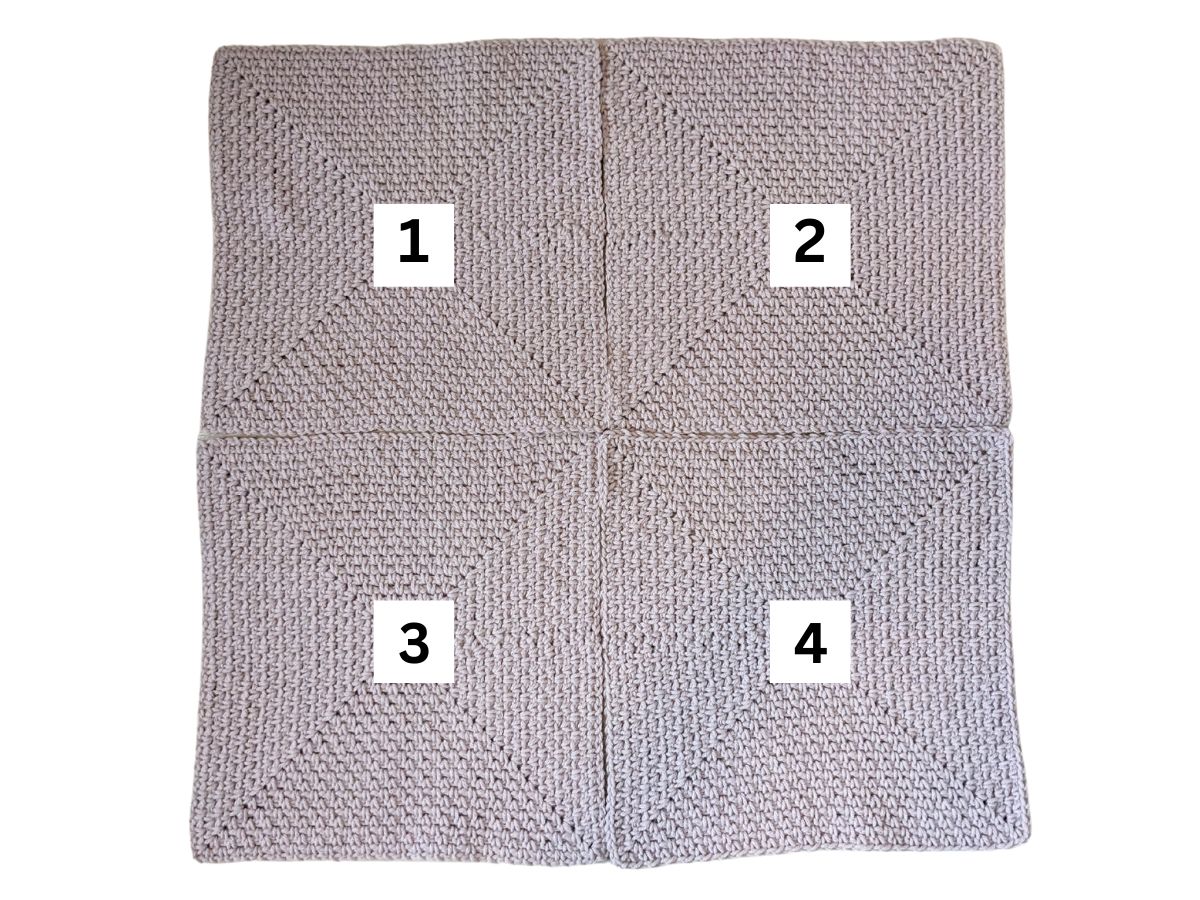
Step 2: Once you have all 4 squares laid out in the correct order, grab your darning needle and the yarn you used to make the squares.
Cut a strand of yarn twice the size of your square and start whipstitching the square together. So place your darning needle in the middle on the bottom and work your way to the top. Then place your darning needle in the middle on the right side and work your way to the left side.
Once you have seamed your 4 squares together, remove the darning needle, and work in any ends.
Step 3: Now that your squares are seamed together, it's time to fold in the corners of the square.
Start by grabbing the top left corner and fold it in, then repeat this process for the last three corners.
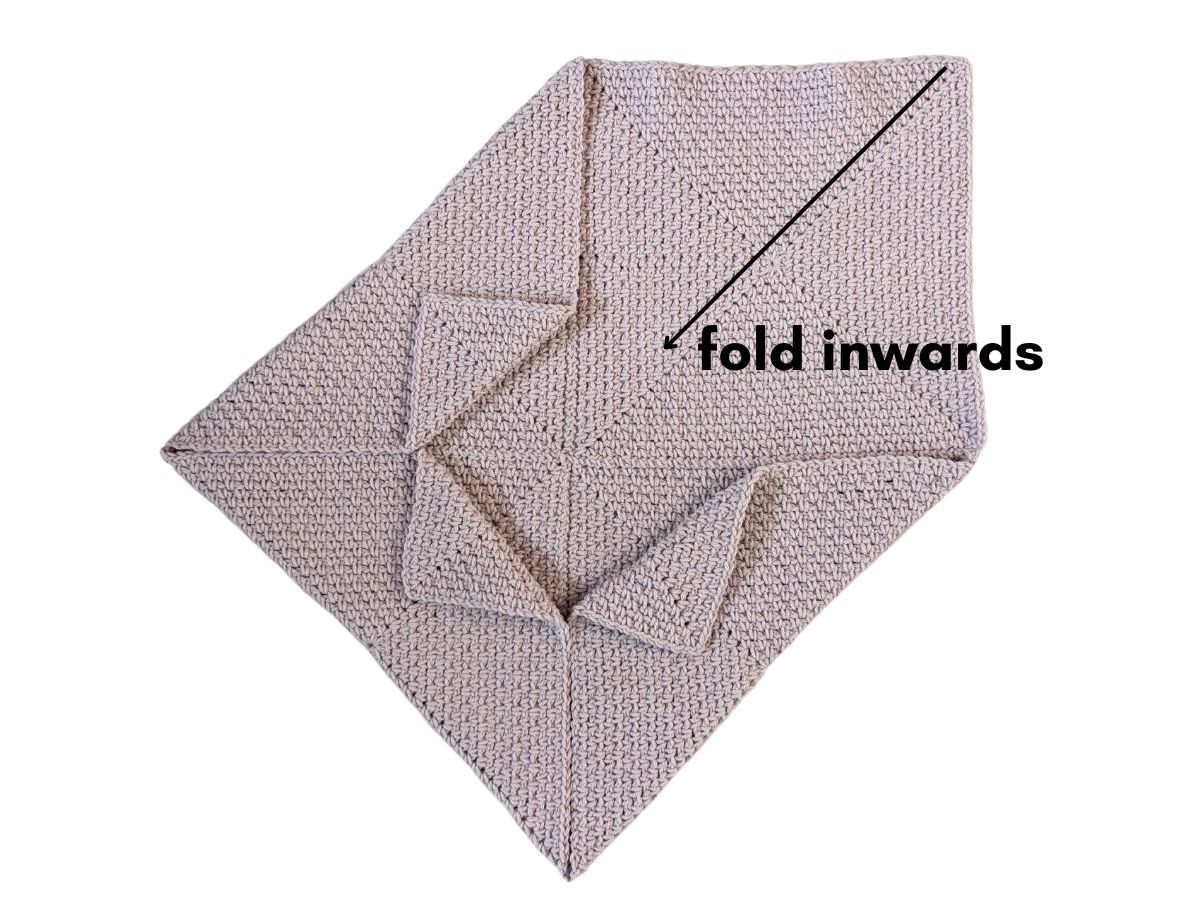
Step 4: Once you have folded the corners, grab one corner again, and fold it 5 1/2" inches outwards. Finally, place a stitch marker at the point in the middle where the folding ends.
Continue to repeat this process for the other three corners.

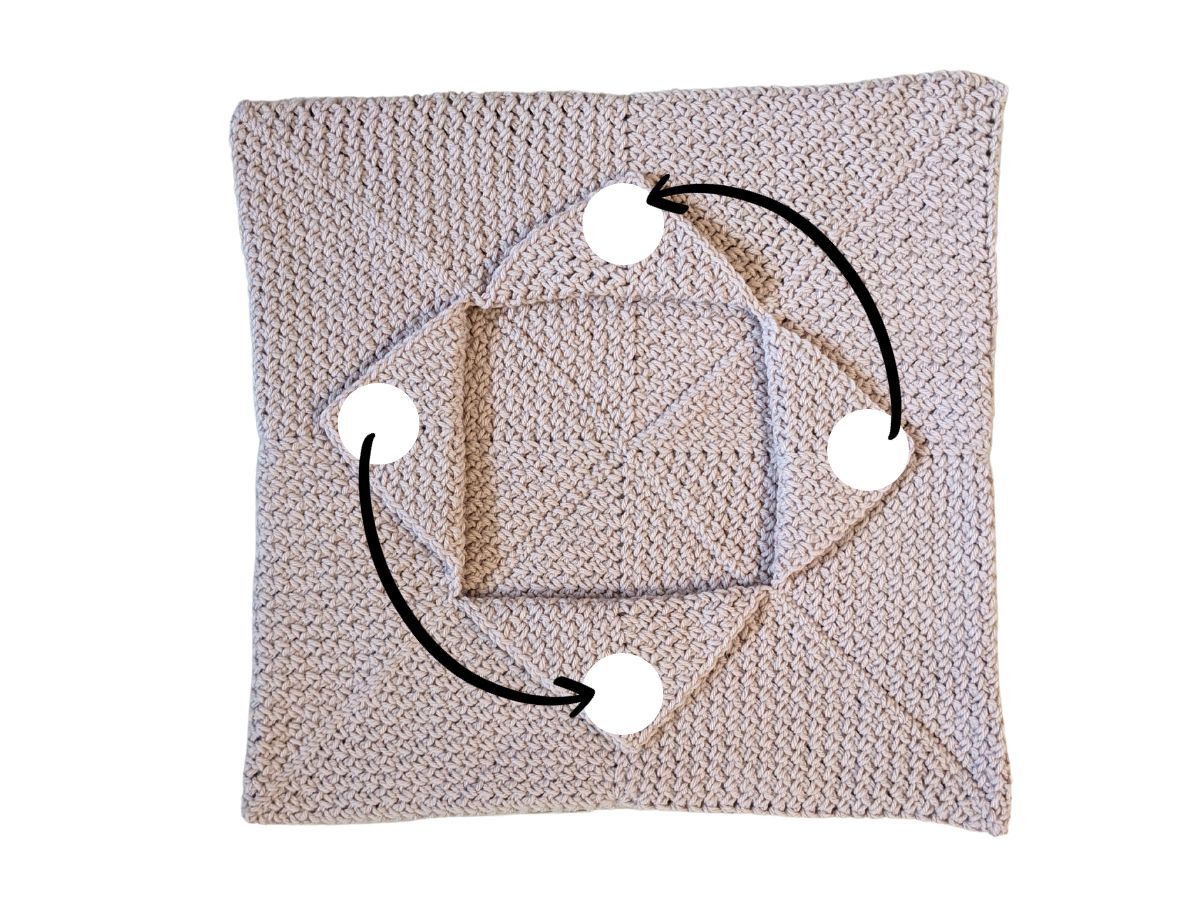
Step 5: Once you have folded each corner outwards, grab your darning needle with yarn, and whip stitch each side together.

At this point, your bag should be seamed together and you're ready for the final step.
Step 6: Lastly, grab your bag handles and sew them onto the front corner of each point of the square.
Note - the photo down below indicates where to place your handles.
And that's it, you're finished!
Crochet Project Bag Video Tutorial

I hope you enjoyed making this crochet bag and get lots of use out of it.
Also, don't forget to save and share this post with other crocheters.
PIN IT for later