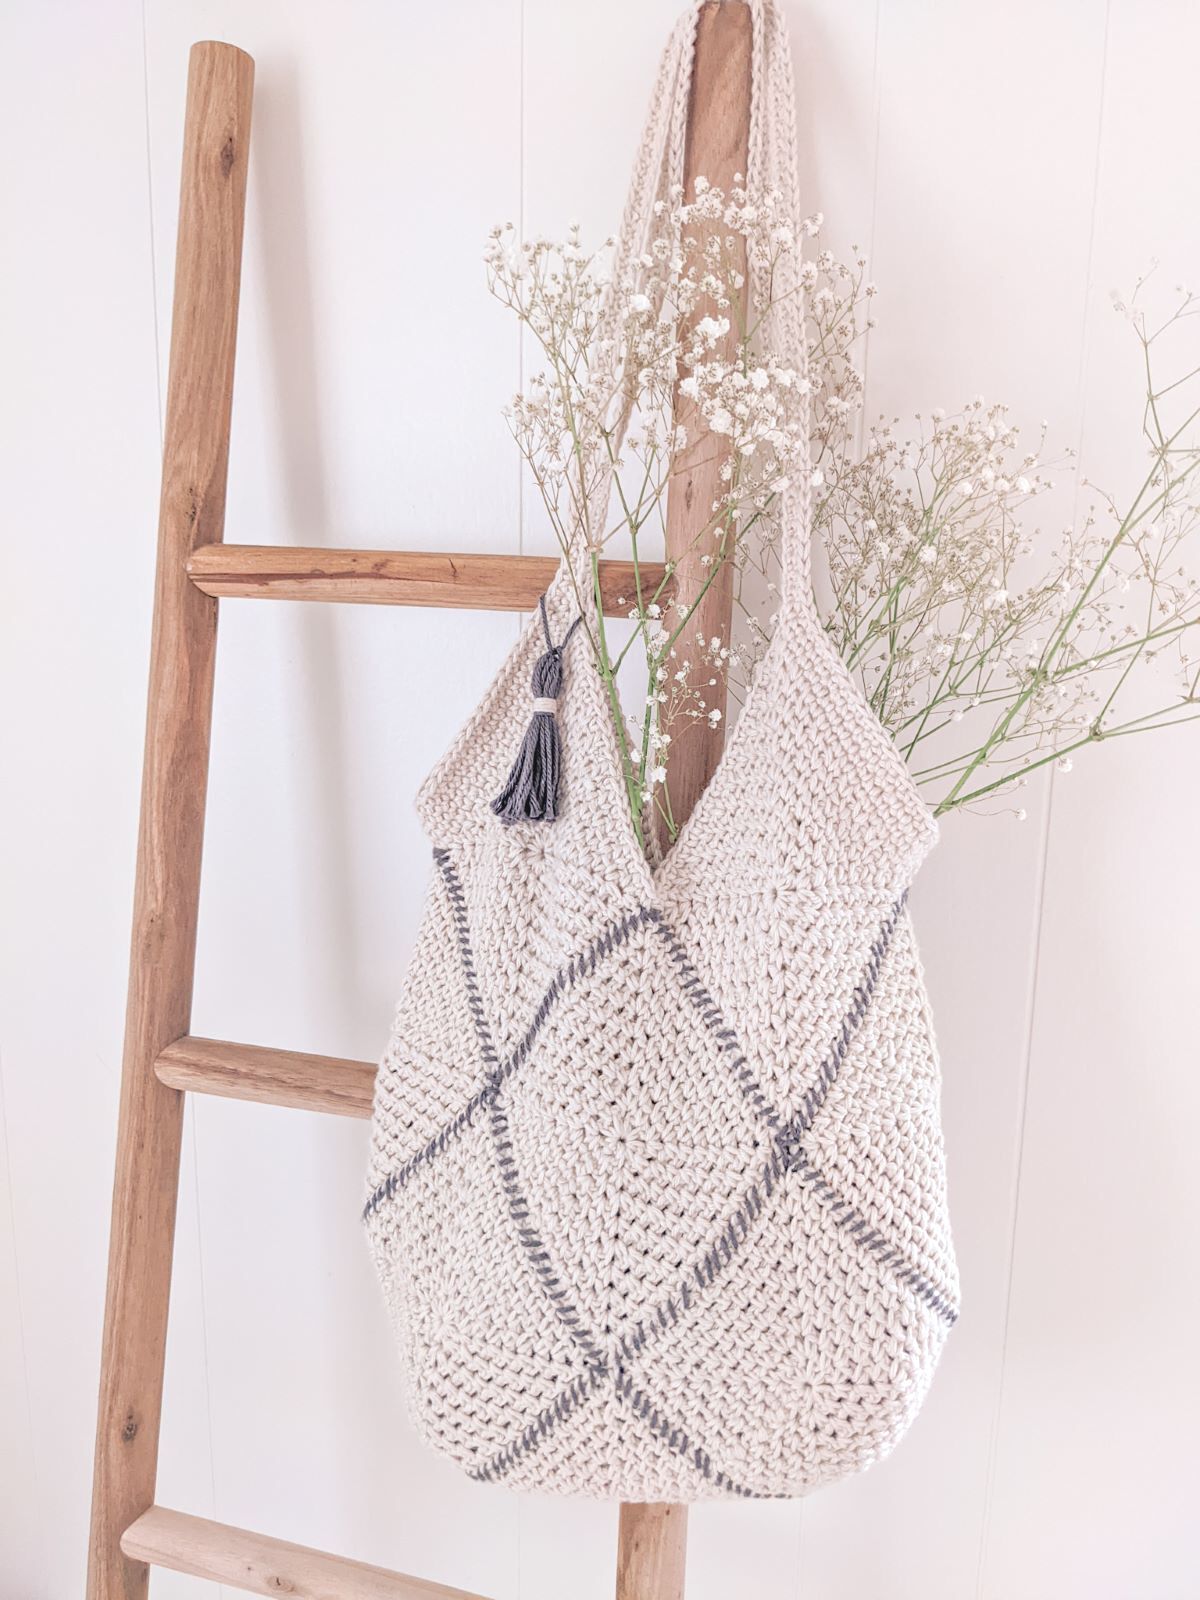
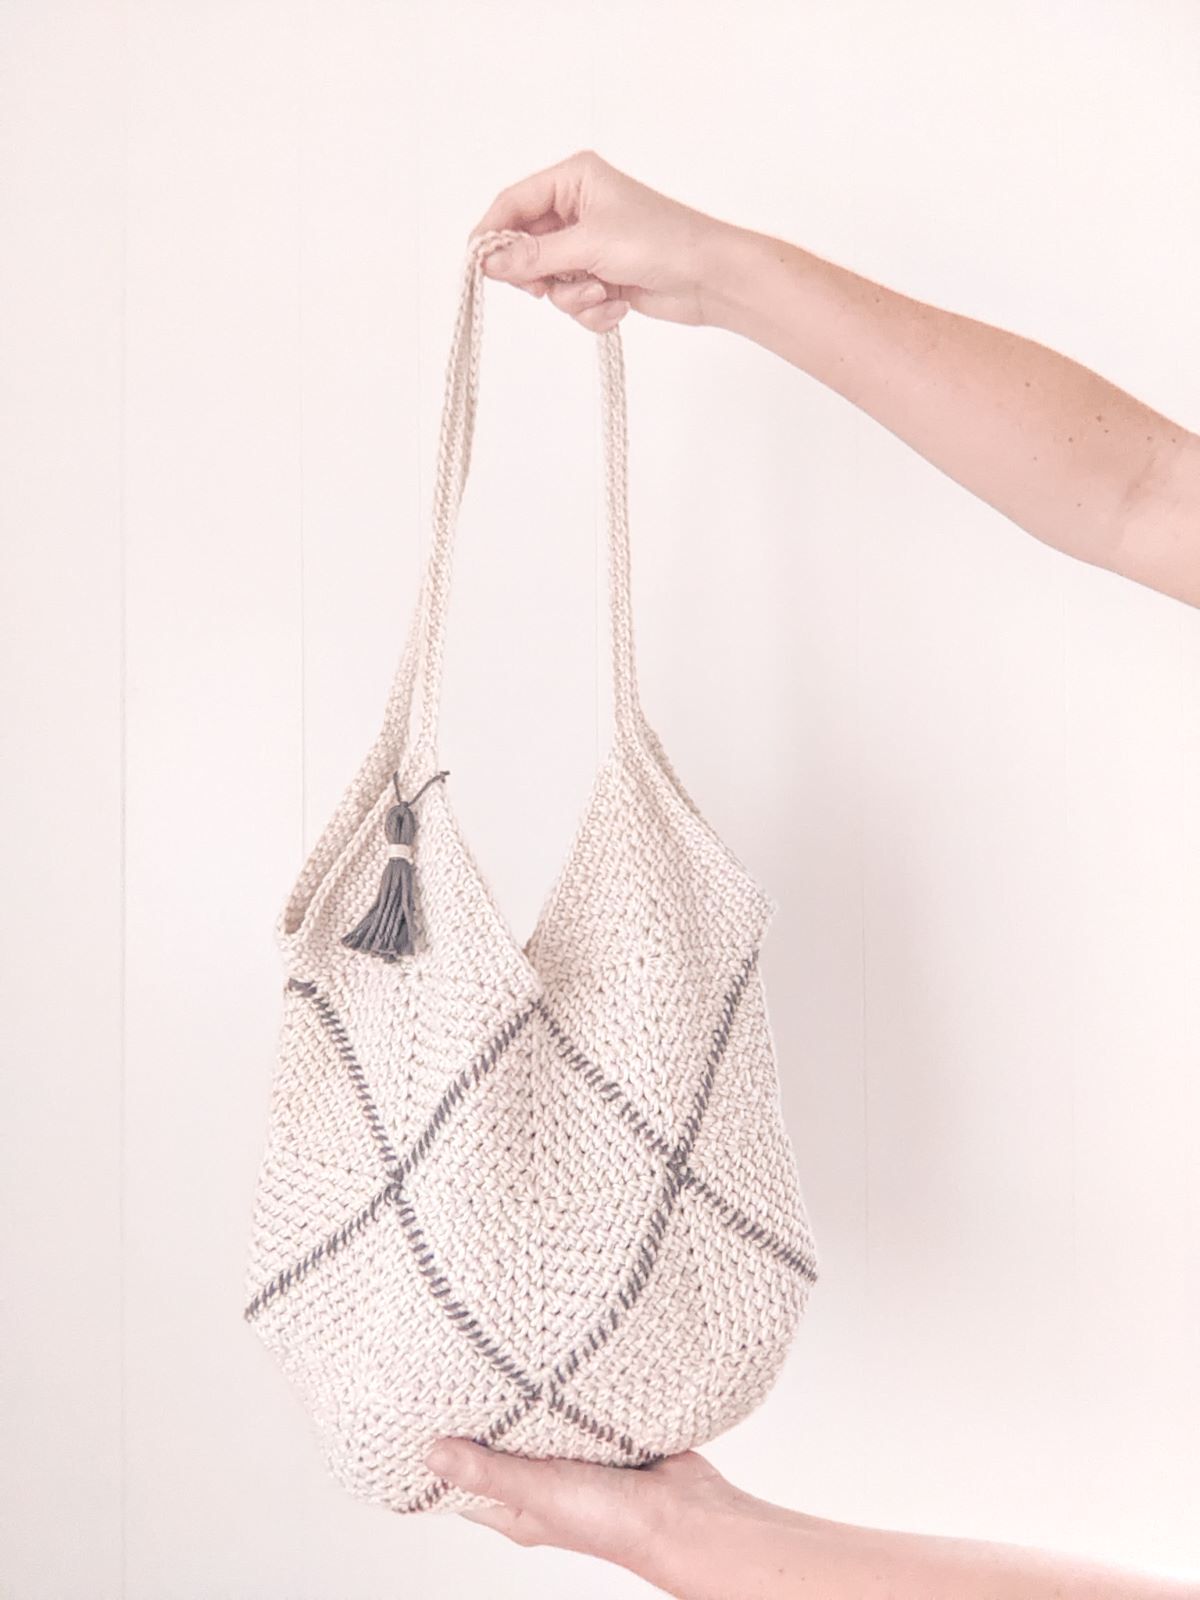
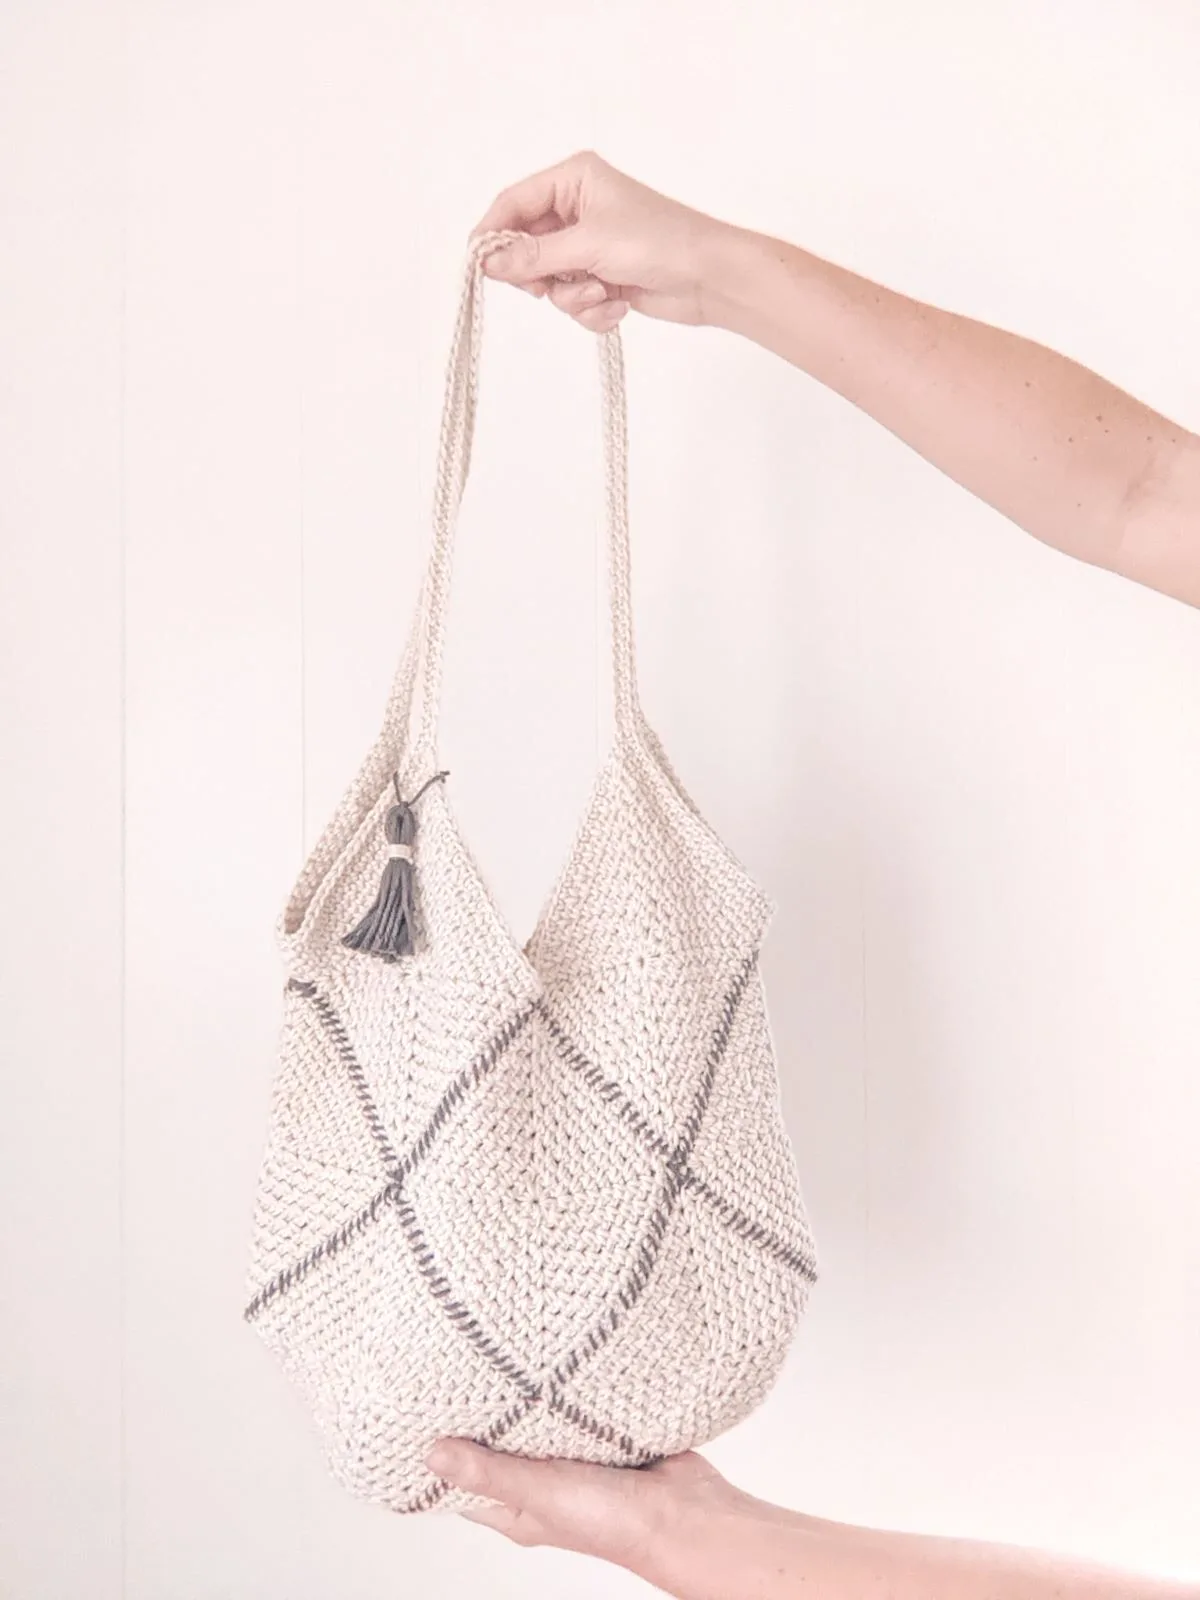
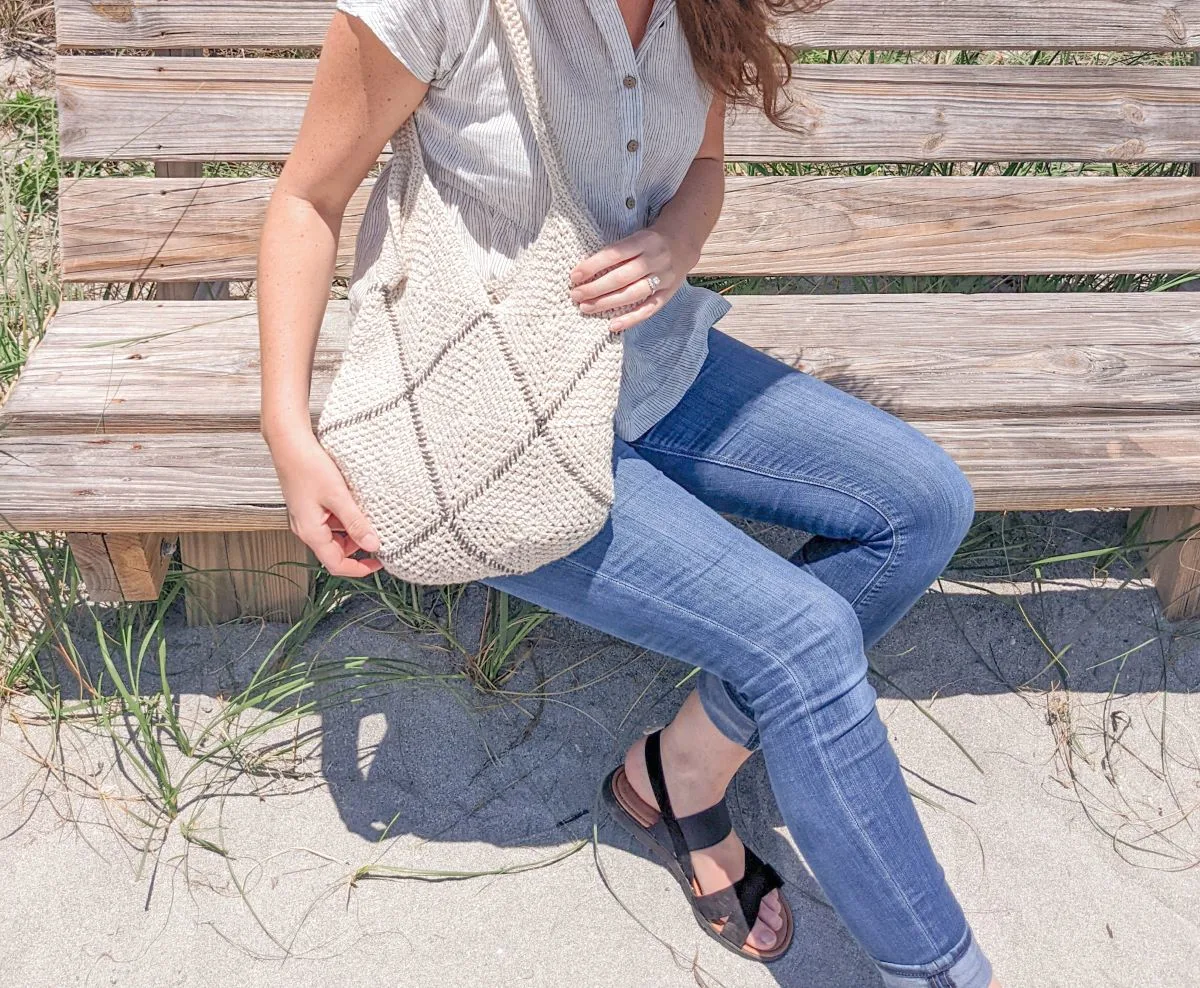
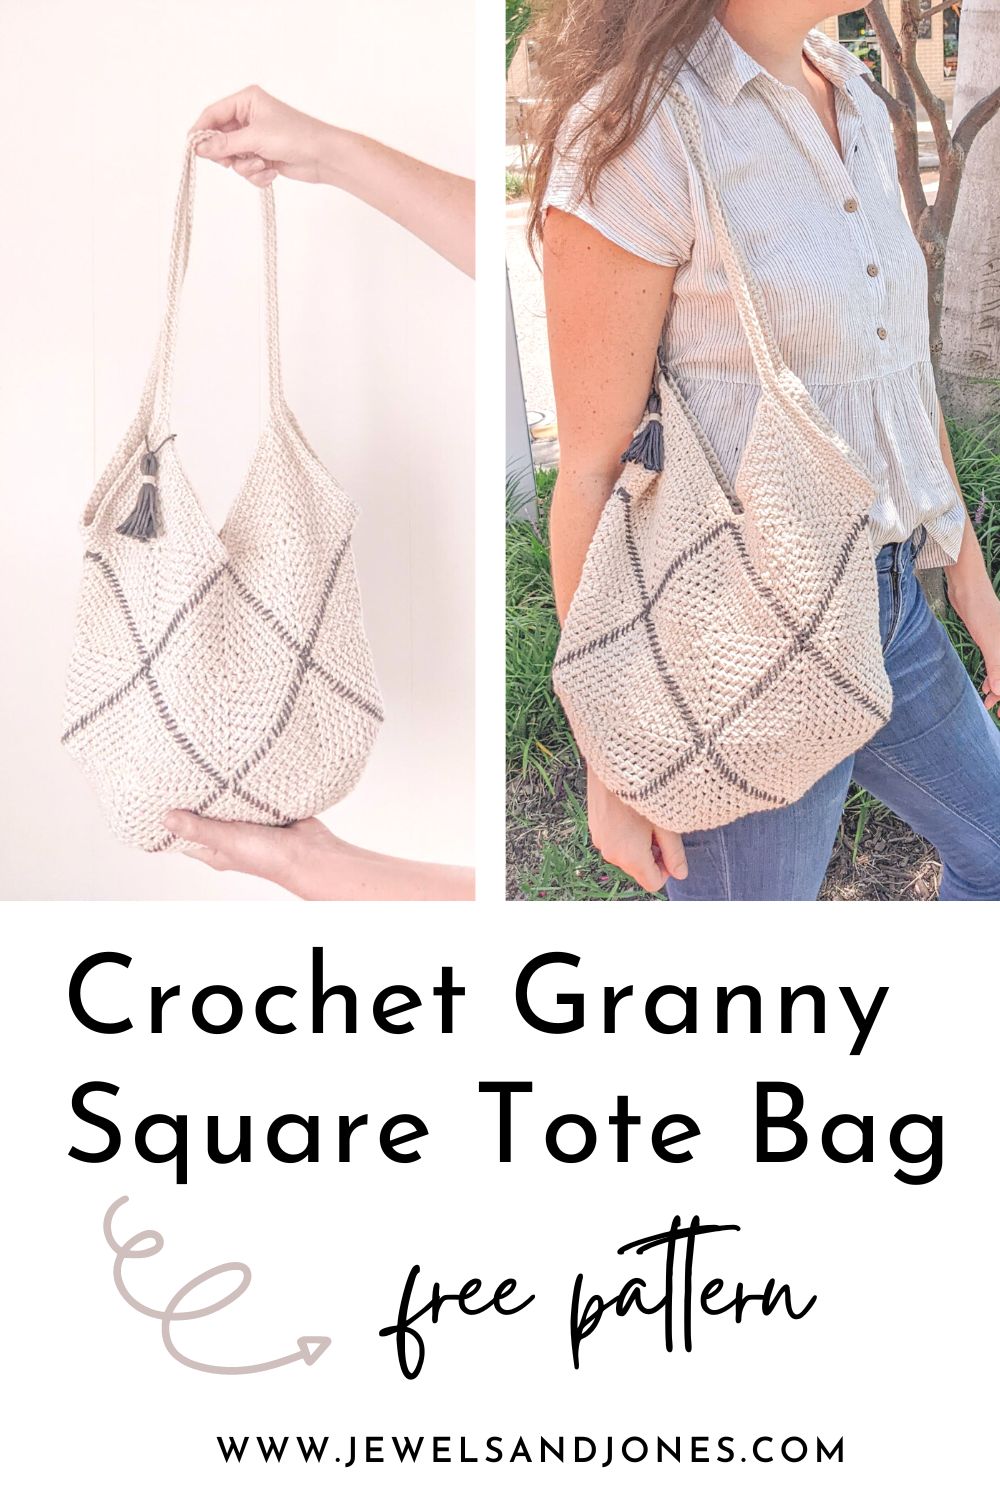
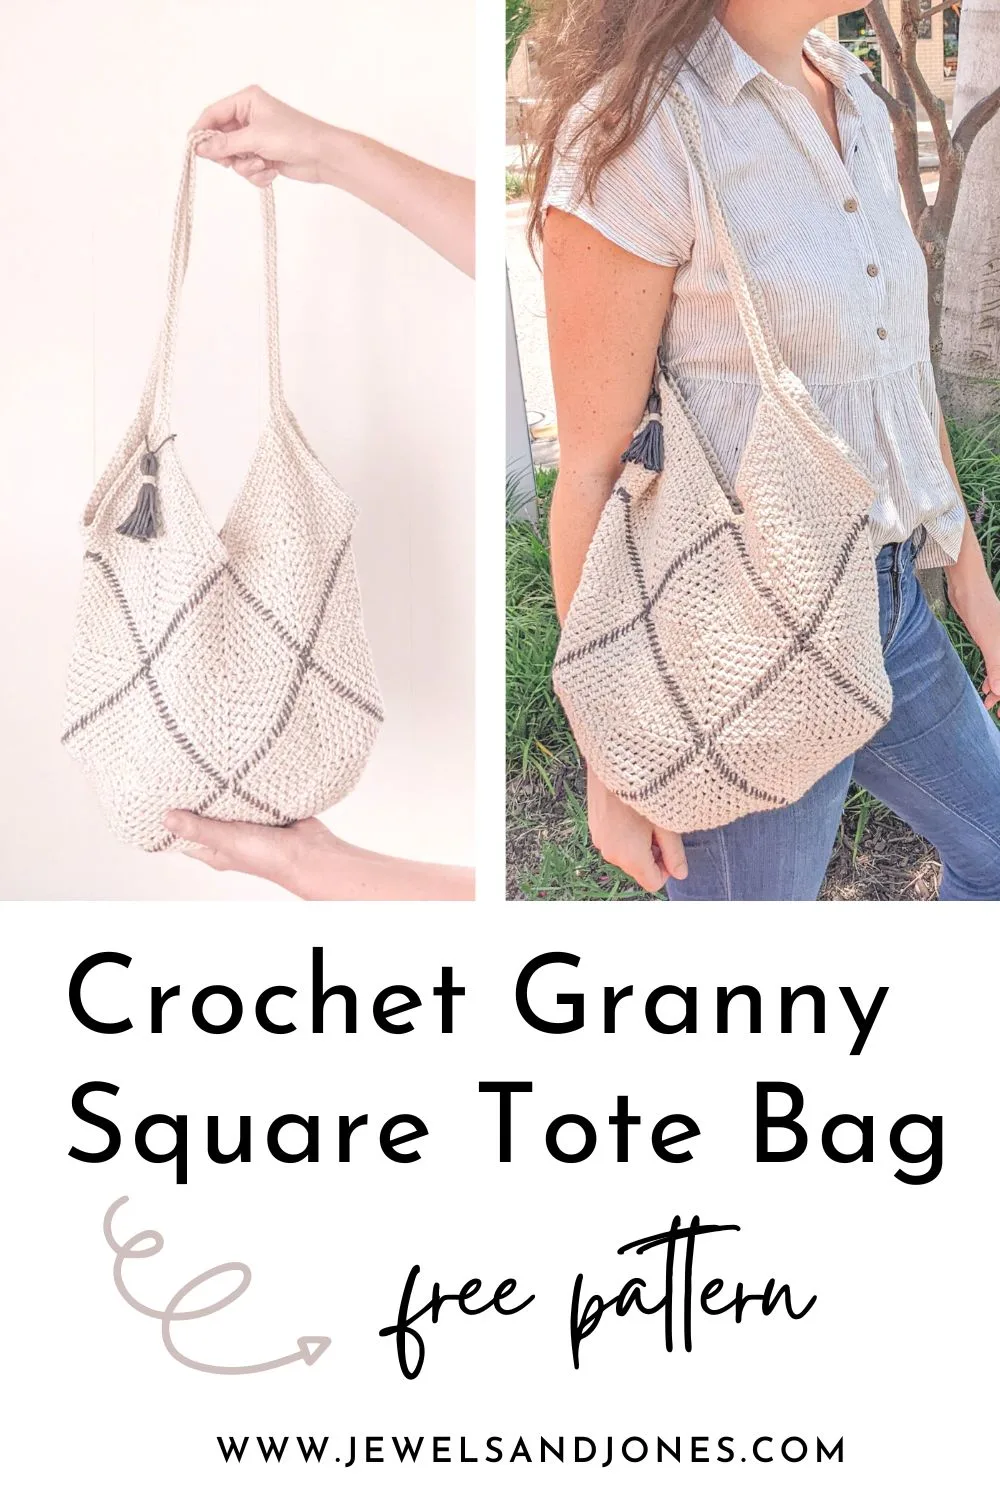
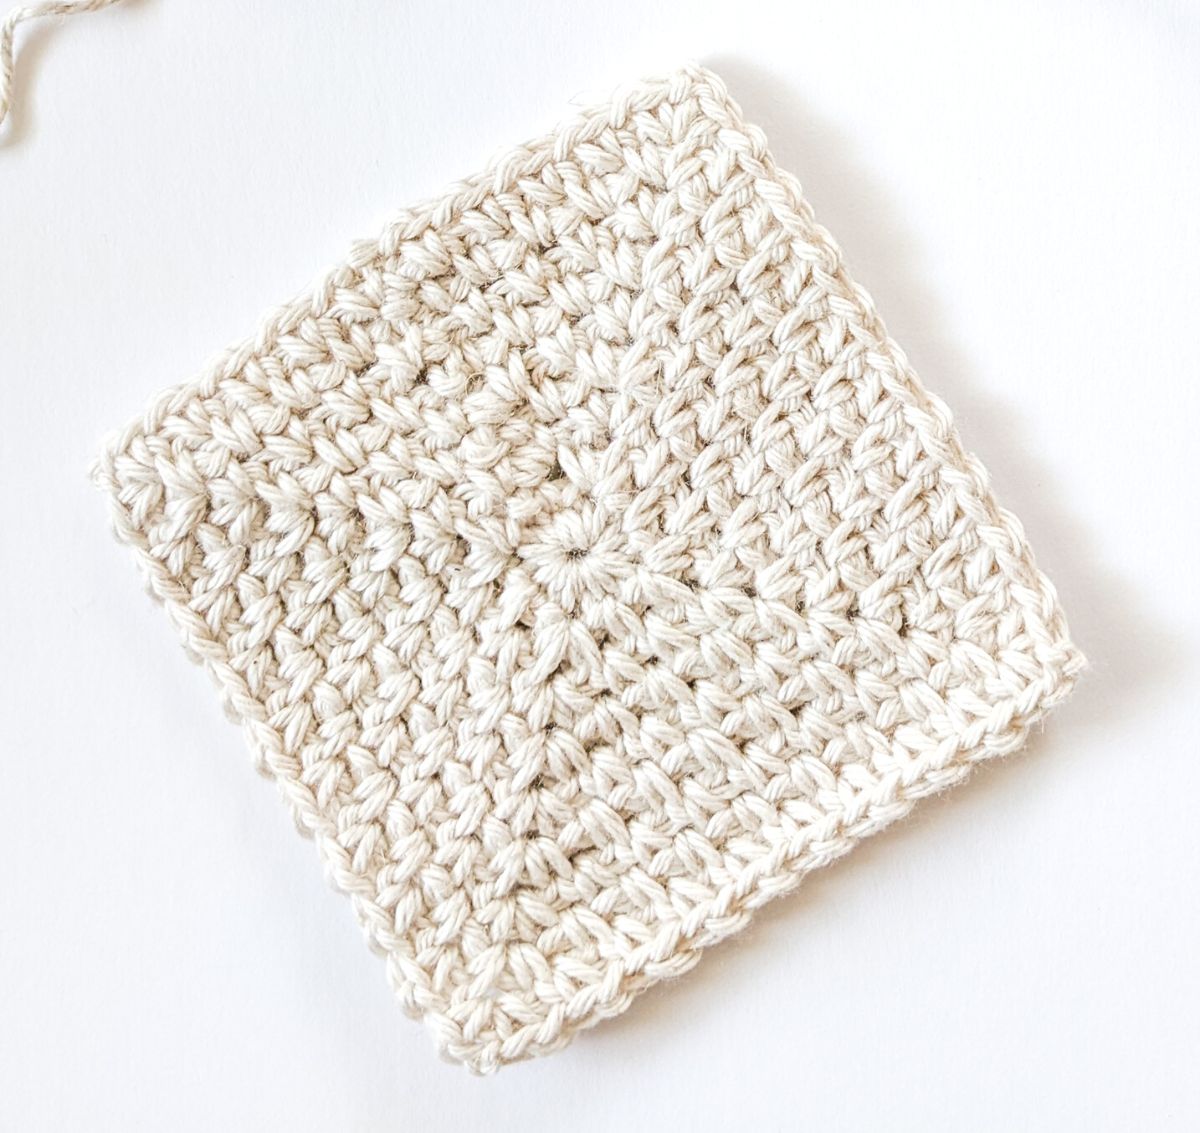
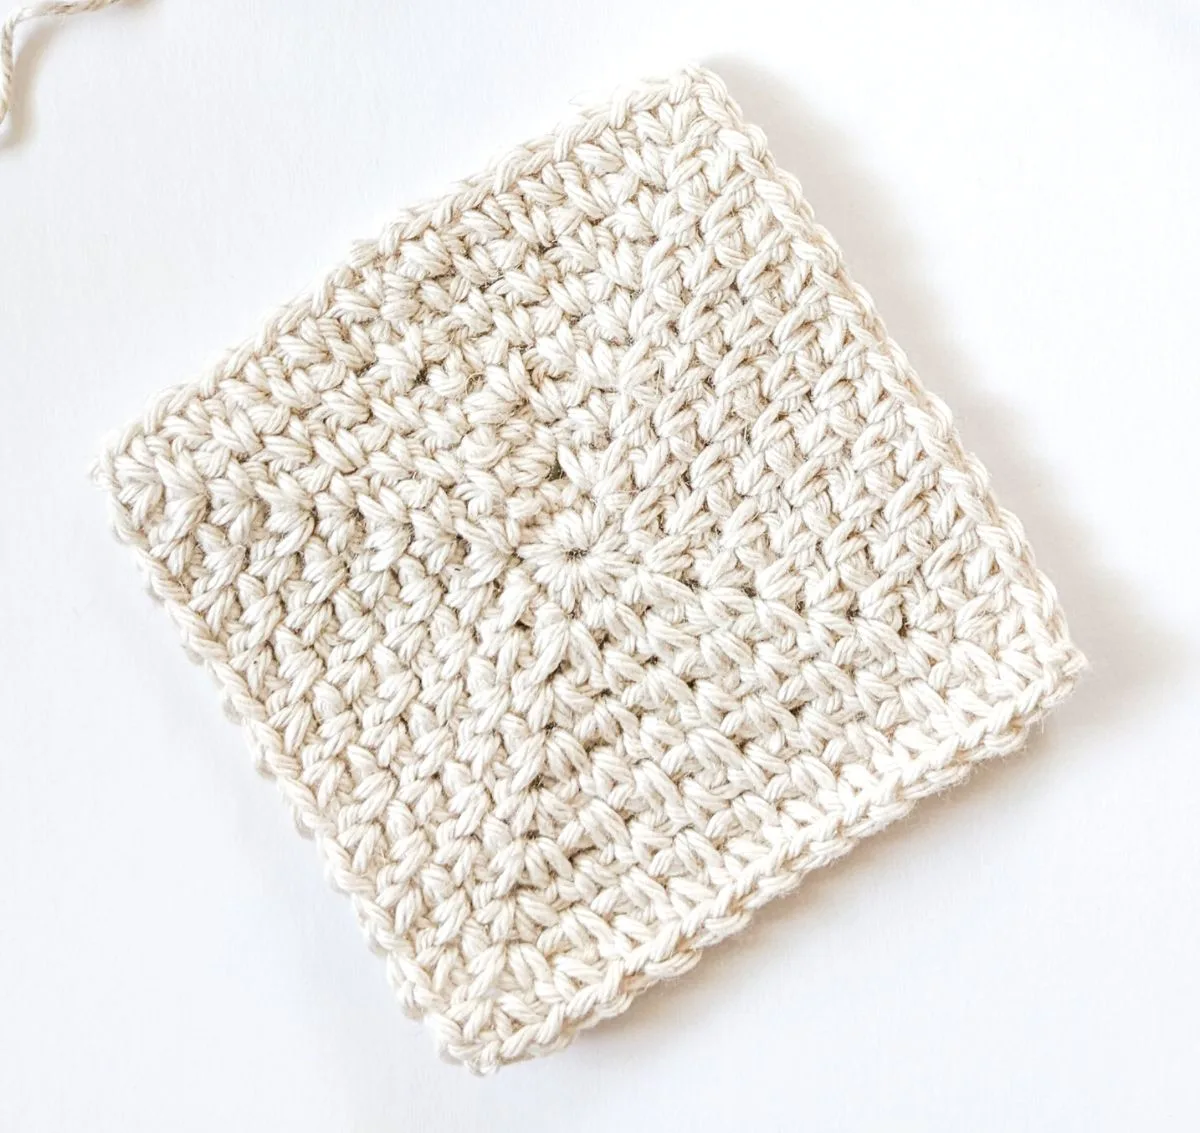
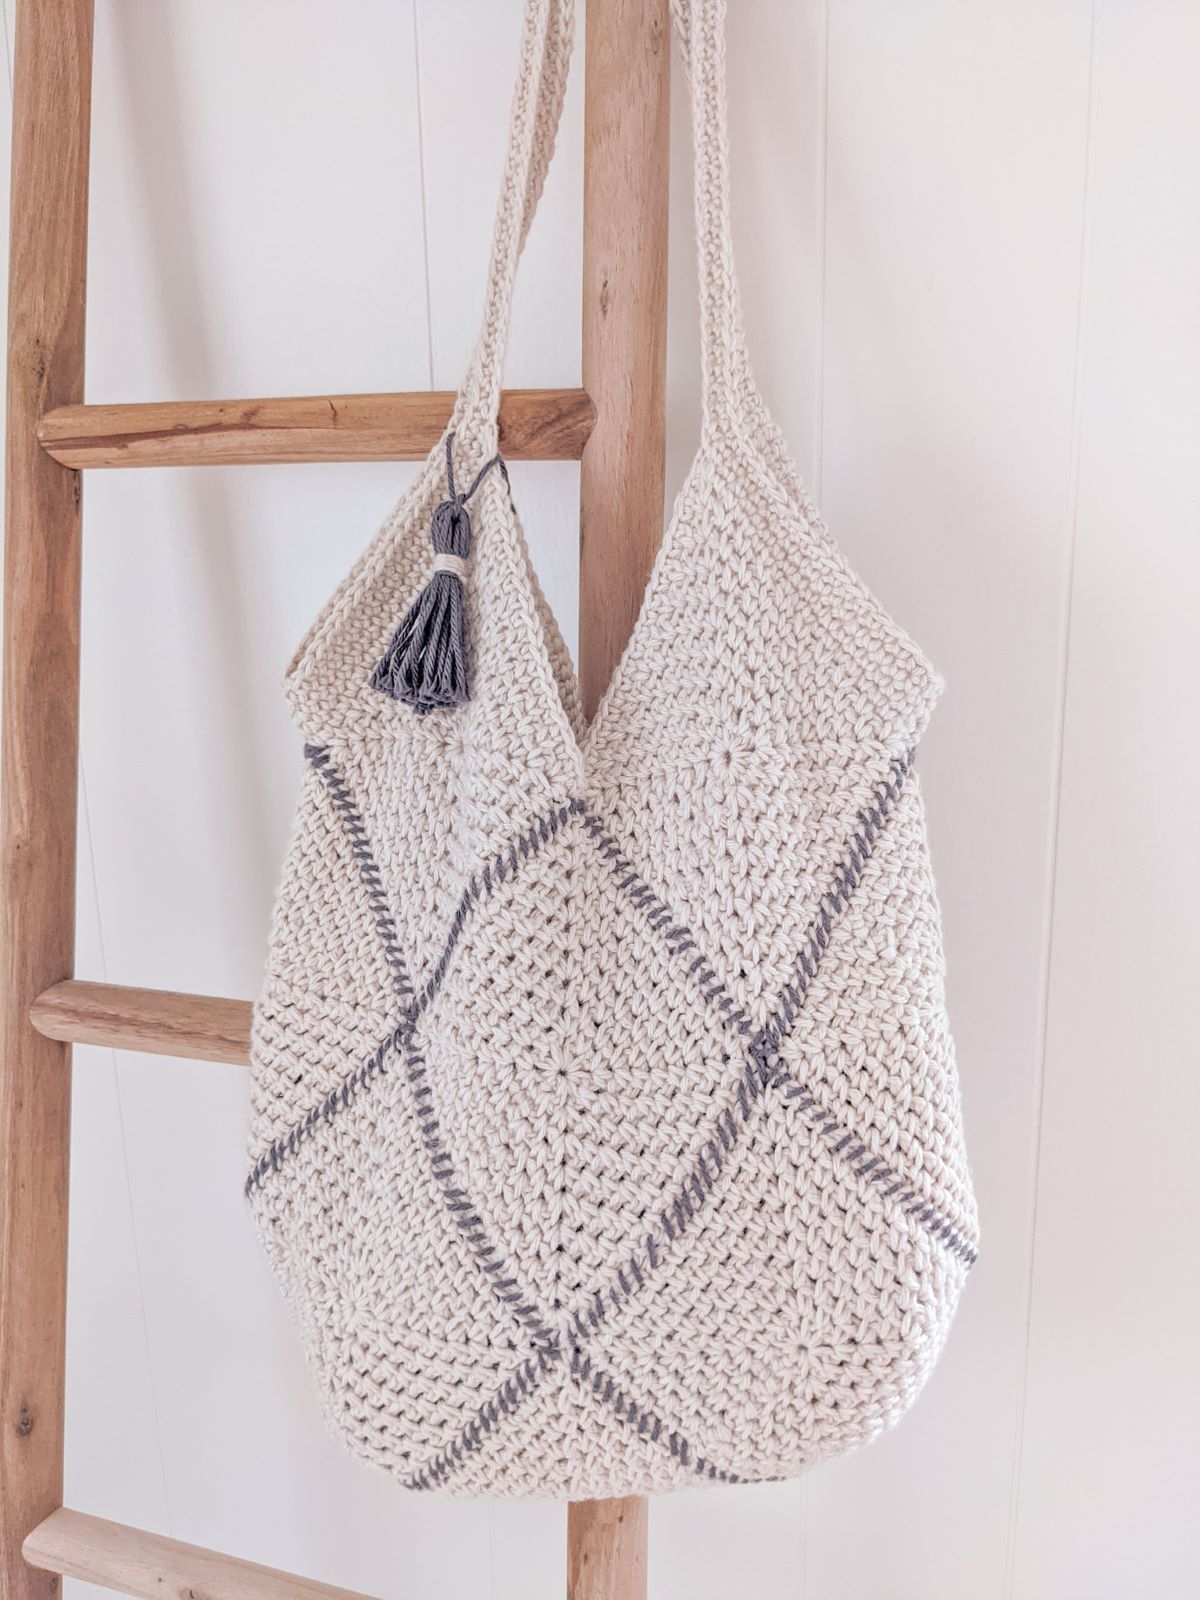
In need of a stylish sturdy tote bag for the summertime? Well look no further, this free crochet granny square bag pattern is fun and easy to make! Thirteen squares come together to form a modern tote bag that is perfect for all seasons.
Continue to read through some of the inspiration behind my latest design or scroll down for the free crochet pattern.

This post contains affiliate links, which means I make a small commission at no extra cost to you. See my full disclosure here.
A Simple Granny Square Bag Pattern
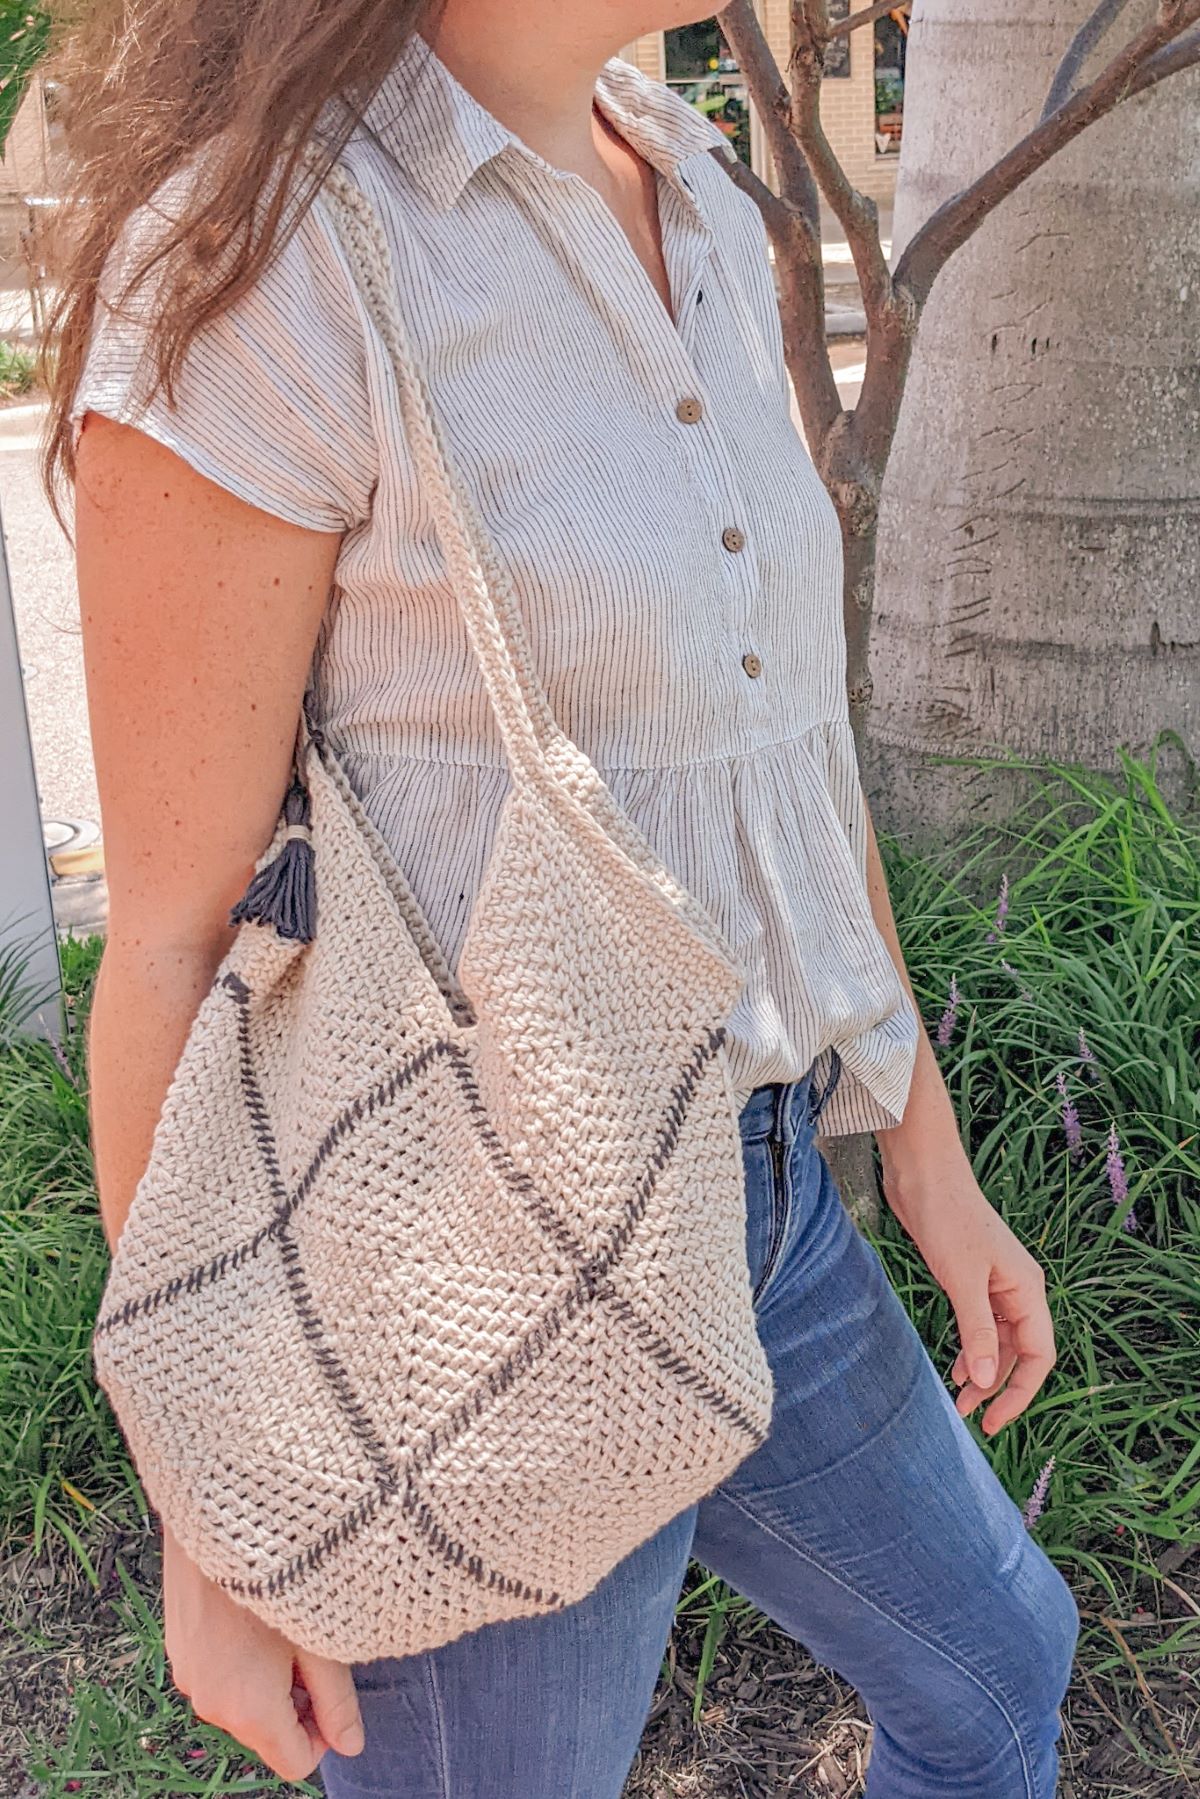
My latest free crochet pattern is a simple granny square bag that is made up of 13 squares. It’s an easy, versatile pattern that works up in a breeze. I took this bag out for the day and stuffed it with lots of things, and everything stayed put!
So if you’re looking for a sturdy multi-purpose bag, definitely check out the free pattern down below or you can also purchase an ad-free pdf pattern HERE.

Modern Twist + Simple Stitches
With granny squares being all the rage this summer, I really wanted to put my own spin on the traditional granny square bag. So after researching tons of granny squares, I decided on using the moss stitch square for my crochet bag.
I really liked the simplicity and the sturdy structure of this square. Plus, this crochet square is made using only 3 stitches. So definitely beginner-friendly!
Once you get the hang of where to place your stitches, you won’t even need to look at the pattern. It’s a great sit-down and watch your favorite movie type of project.
How to Make a Crochet Granny Square Bag?
The first step in making a granny square bag is to make 13 squares. So for this pattern, you will be making 13 moss stitch squares. Once you have all your squares made, it’s time to place each square in a certain order.
Once this step is done, all that’s left to do is seam each square together and crochet the handles on. That’s it! It’s a fun easy pattern.

The Yarn You’ll Use for This Tote Bag
For this crochet bag pattern, you will need two different colors of yarn. I used Hobby Lobby Cotton Et Lin in the color Parchment for my main color and then I used Hobby Lobby Yarn Bee Pima Suprema in the color Charcoal to seam my squares together.
The first yarn that I used is a blend of cotton and linen and the second yarn that I used is 100% cotton yarn. I loved using this yarn for this project and definitely recommend it, but any worsted weight yarn will do.
Here are some other great yarn substitutes you can use for this pattern.
- Lion Brand 24/7 Cotton Yarn
- Lion Brand Pima Cotton Yarn
- WeCrochet Dishie Cotton Yarn
Alright, so let’s dive into this pattern!
Other Free Crochet Patterns
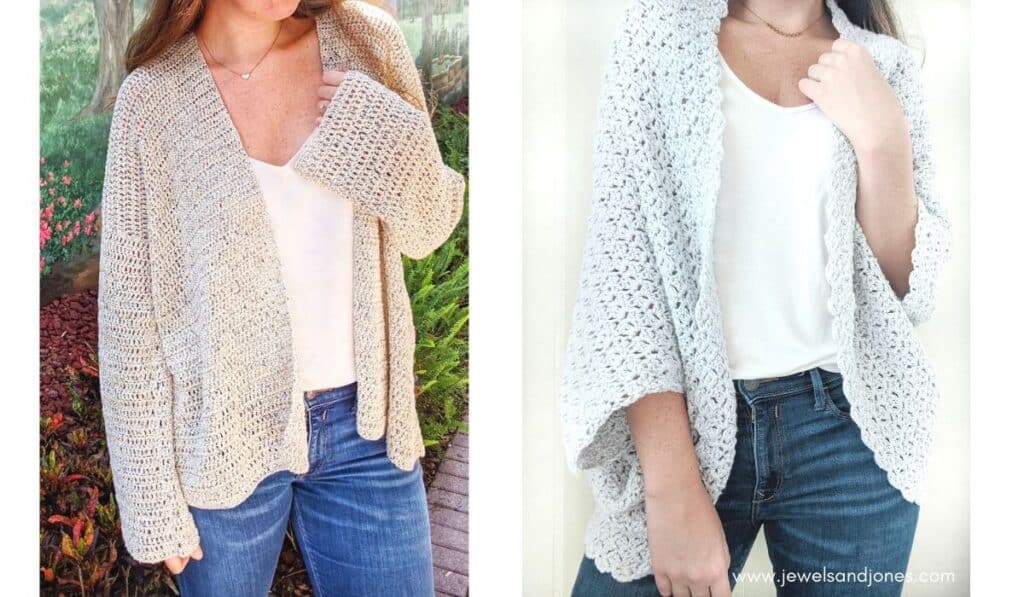
Interested in making some easy crochet wearables, then you might like this simple crochet cardigan pattern on the left and this basic crochet shrug pattern on the right
Free Crochet Granny Square Bag Pattern
Description:
Thirteen squares come together to form a modern tote bag that is perfect for all seasons. This easy and fun crochet granny square bag is a beginner-friendly pattern that is made using basic crochet stitches.
It’s a sturdy stylish bag that fits a variety of things!
Materials:
- 3 skeins of Hobby Lobby Yarn Bee Cotton Et Lin in the color Parchment (Weight 4/ 3.5oz, 180 yds), a total of 540 yards or you can use another worsted weight yarn (like this one here, and here).
- 1 skein of Hobby Lobby Yarn Bee Pima Suprema in the color Charcoal (Weight 4/3.5 oz, 180 yds), a total of 180 yards or you can use another worsted weight yarn (like this one here).
- 5.0 mm (H) crochet hook.
- Stitch Markers.
- Darning Needle.
- Scissors.
Gauge:
One moss stitch square is approximately: 4 3/4” x 4 3/4” inch.
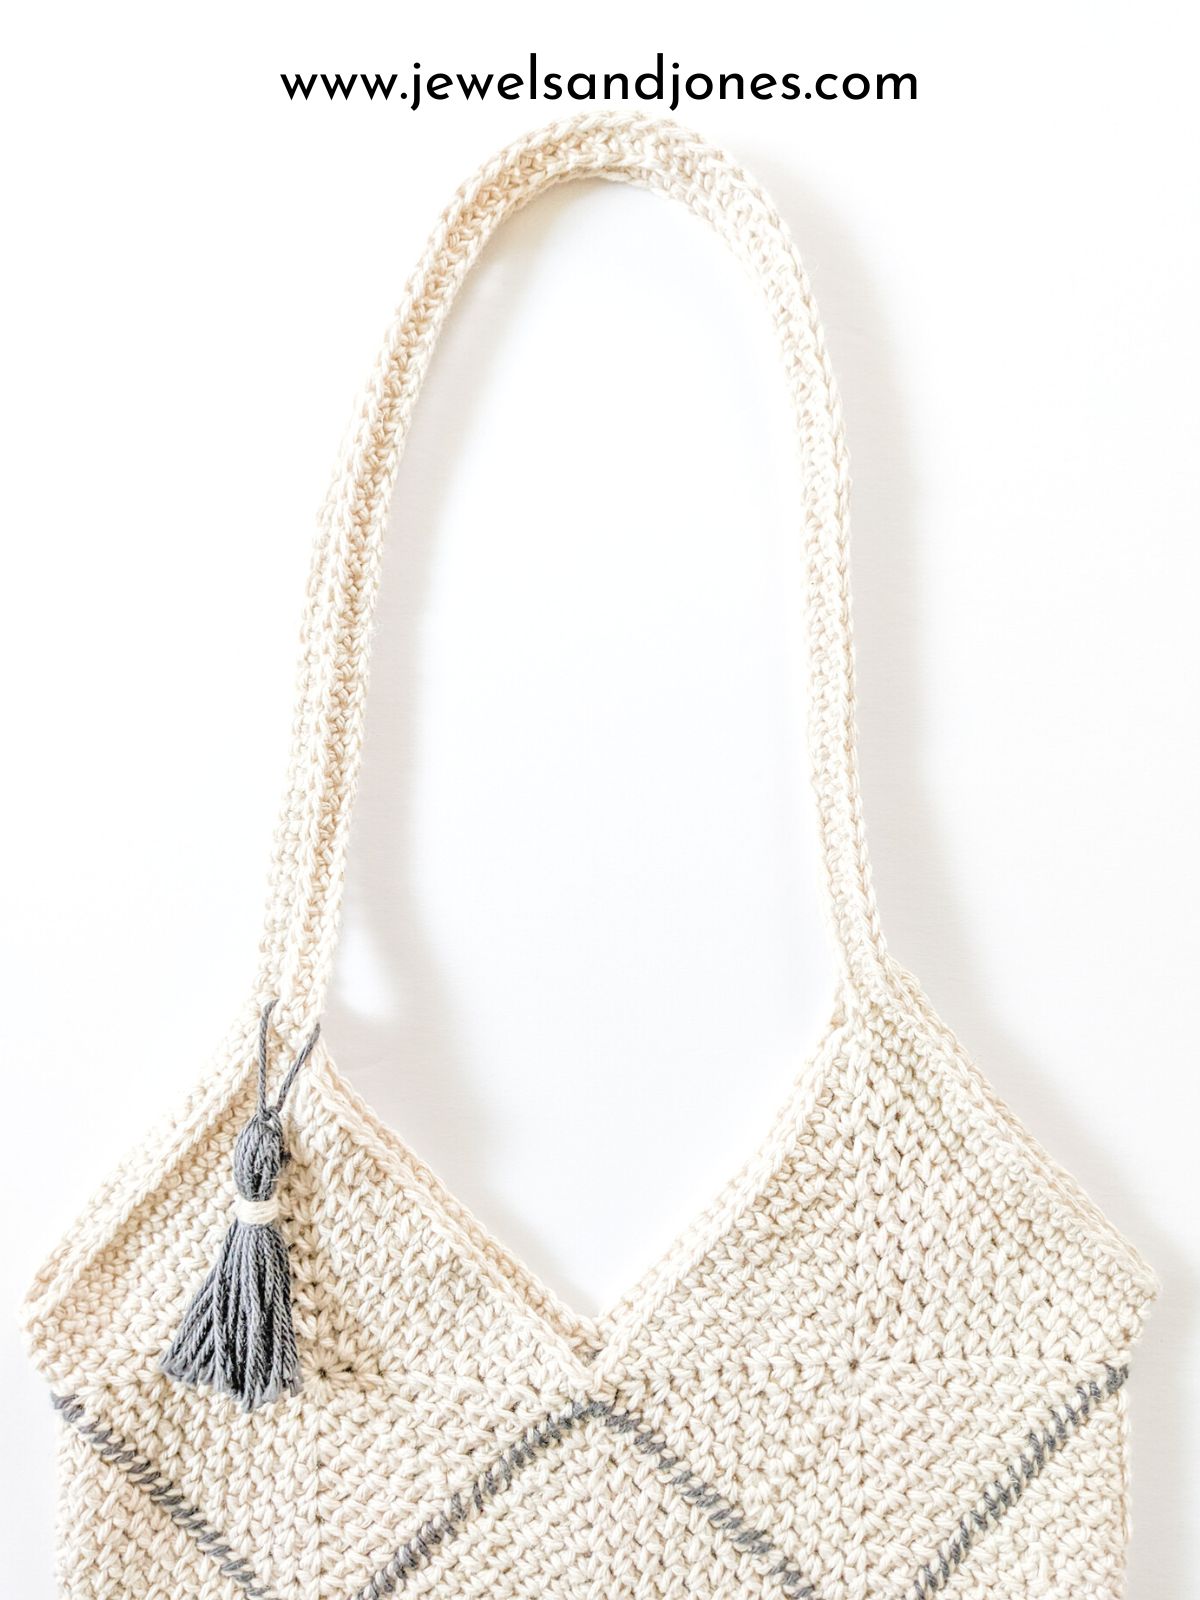
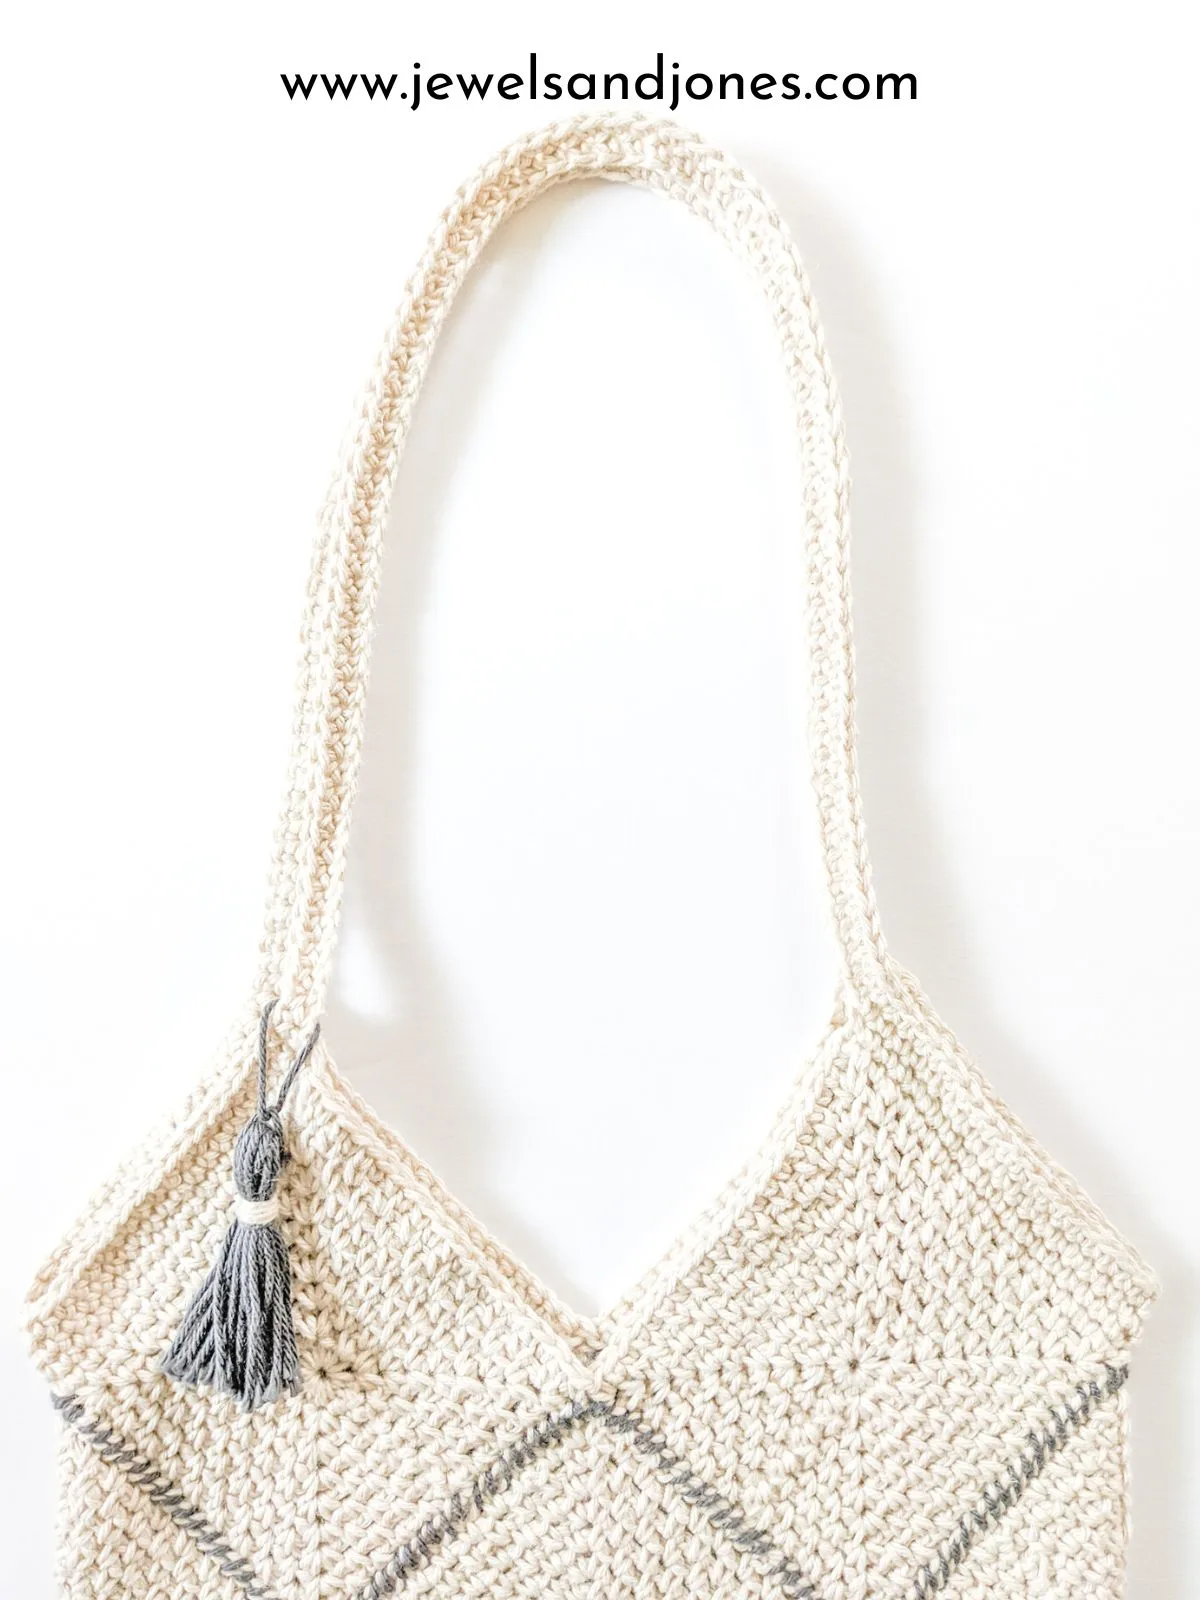
Bag size: 12 1/2” wide x 10″ long.
Strap size: 21″ inches long.
Abbreviations:
ch – chain: Yarn over, pull through loop on hook.
sc – single crochet: Insert hook into stitch, yarn over and pull through, yarn over and pull through last two loops on hook.
ss – slip stitch: Insert hook into stitch, yarn over, pull through stitch and loop on hook.
Pattern Notes:
- Pattern written in U.S Terms.
- Bag is worked by making 13 moss stitch squares. Once all squares have been made, you will then whipstitch each square together in a certain order to form a bag. The straps on the bag are made last and will be crocheted directly onto the bag.
- The straps on this bag are a bit longer, however, you can easily adjust the straps by decreasing the number of chains.
- The Moss Stitch Square is made by turning after each completed round (You will bring your working yarn over the stitch and then work the square per the instructions). Each round is joined together by a slip stitch. Click HERE for a step-by-step photo tutorial.
Moss Stitch Granny Square Pattern
With Hobby Lobby Yarn Bee Cot Et Lin color Parchment, make 13 Moss Stitch Granny Squares.
Round 1: Chain 2, * Work 1 single crochet in the 2nd chain from the hook, chain 2, make another single crochet in the same chain, and chain 1. Repeat from * 3 more times for a total of 4 corners. Slip stitch to first single crochet of the round to join the work. Turn your work.
Round 2: *Work 1 single crochet in next side space, and chain 1. Then skip the next single crochet and work (1 single crochet, chain 2, 1 single crochet, chain 1) in the corner space. Repeat from * 3 more times for a total of 4 corners. Then slip stitch to first single crochet to join the work. Turn your work.
Round 3: Work 1 single crochet and 1 chain in each chain space, and work (1 single crochet, chain 2, 1 single crochet, chain 1) in each corner space. Then slip stitch to first single crochet to join the work. Turn your work.
Round 4 – Round 8: Repeat round 3.
Work in all ends of each square before putting them together. I know it’s my least favorite part too, but it’ll make the whipstitching part of this pattern so much faster!
Assembling Your Squares Together
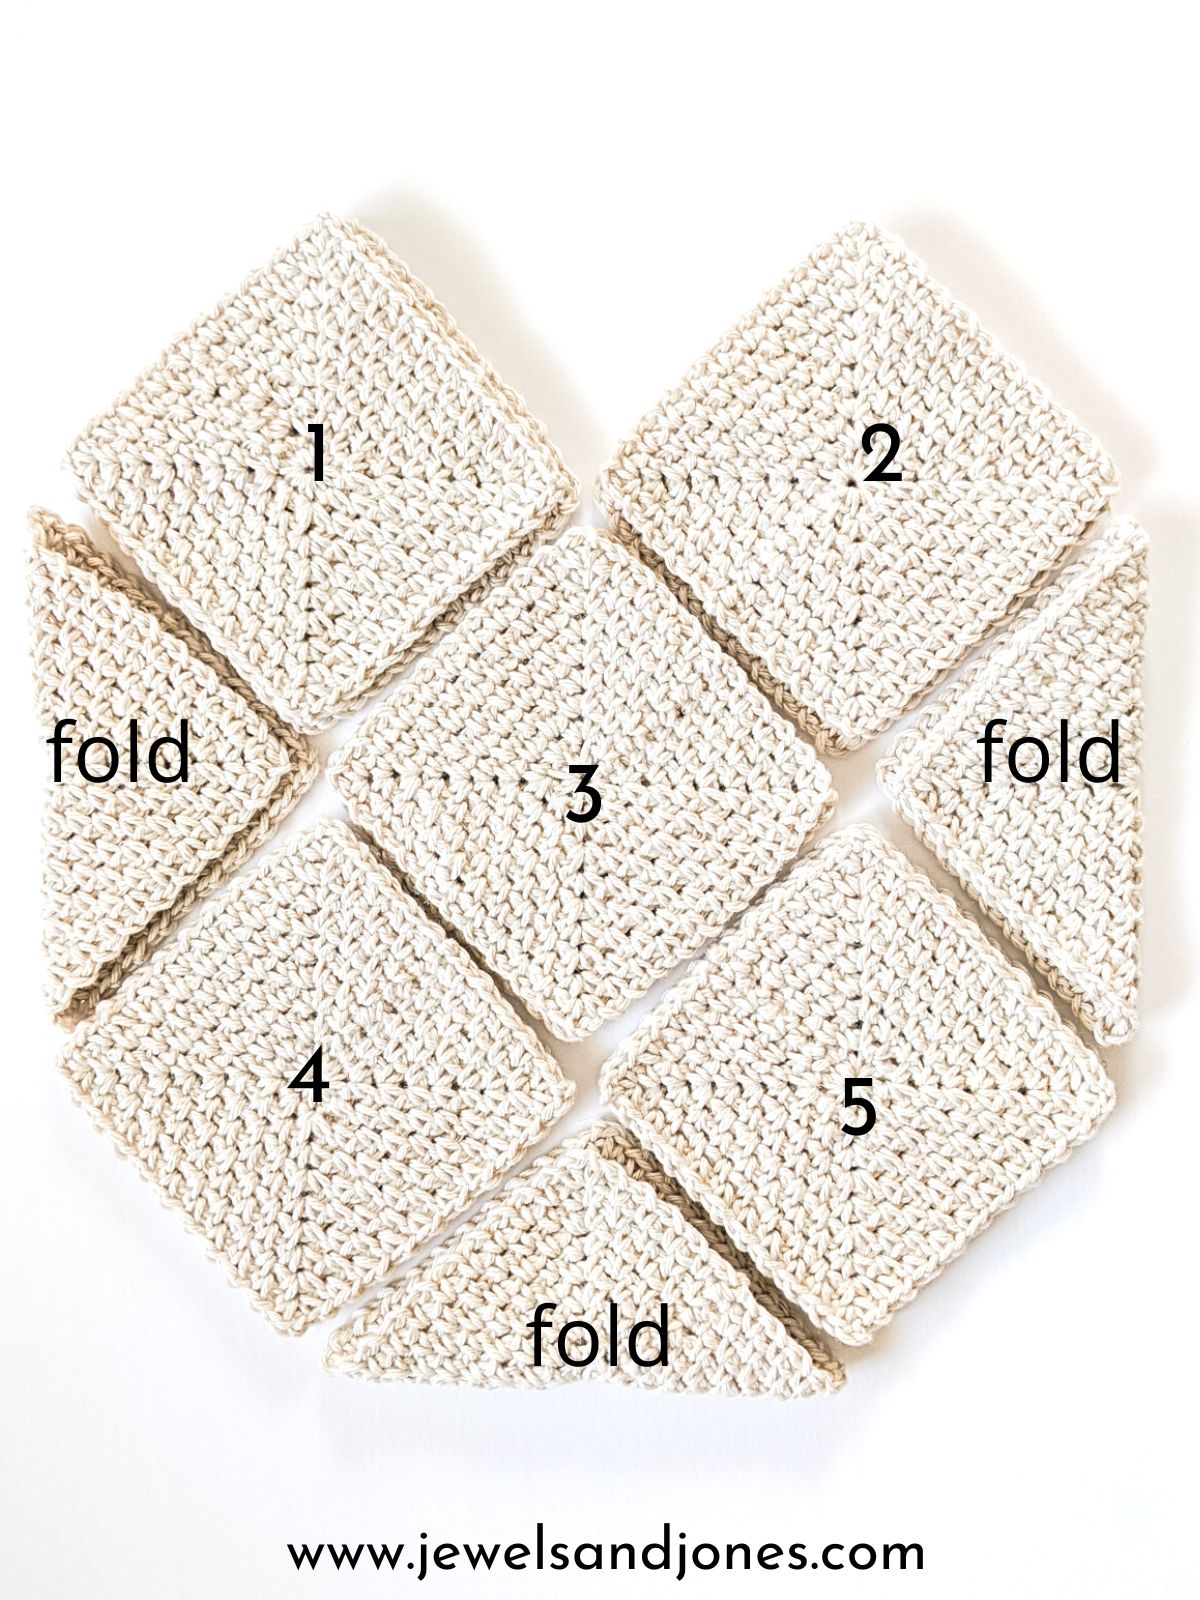
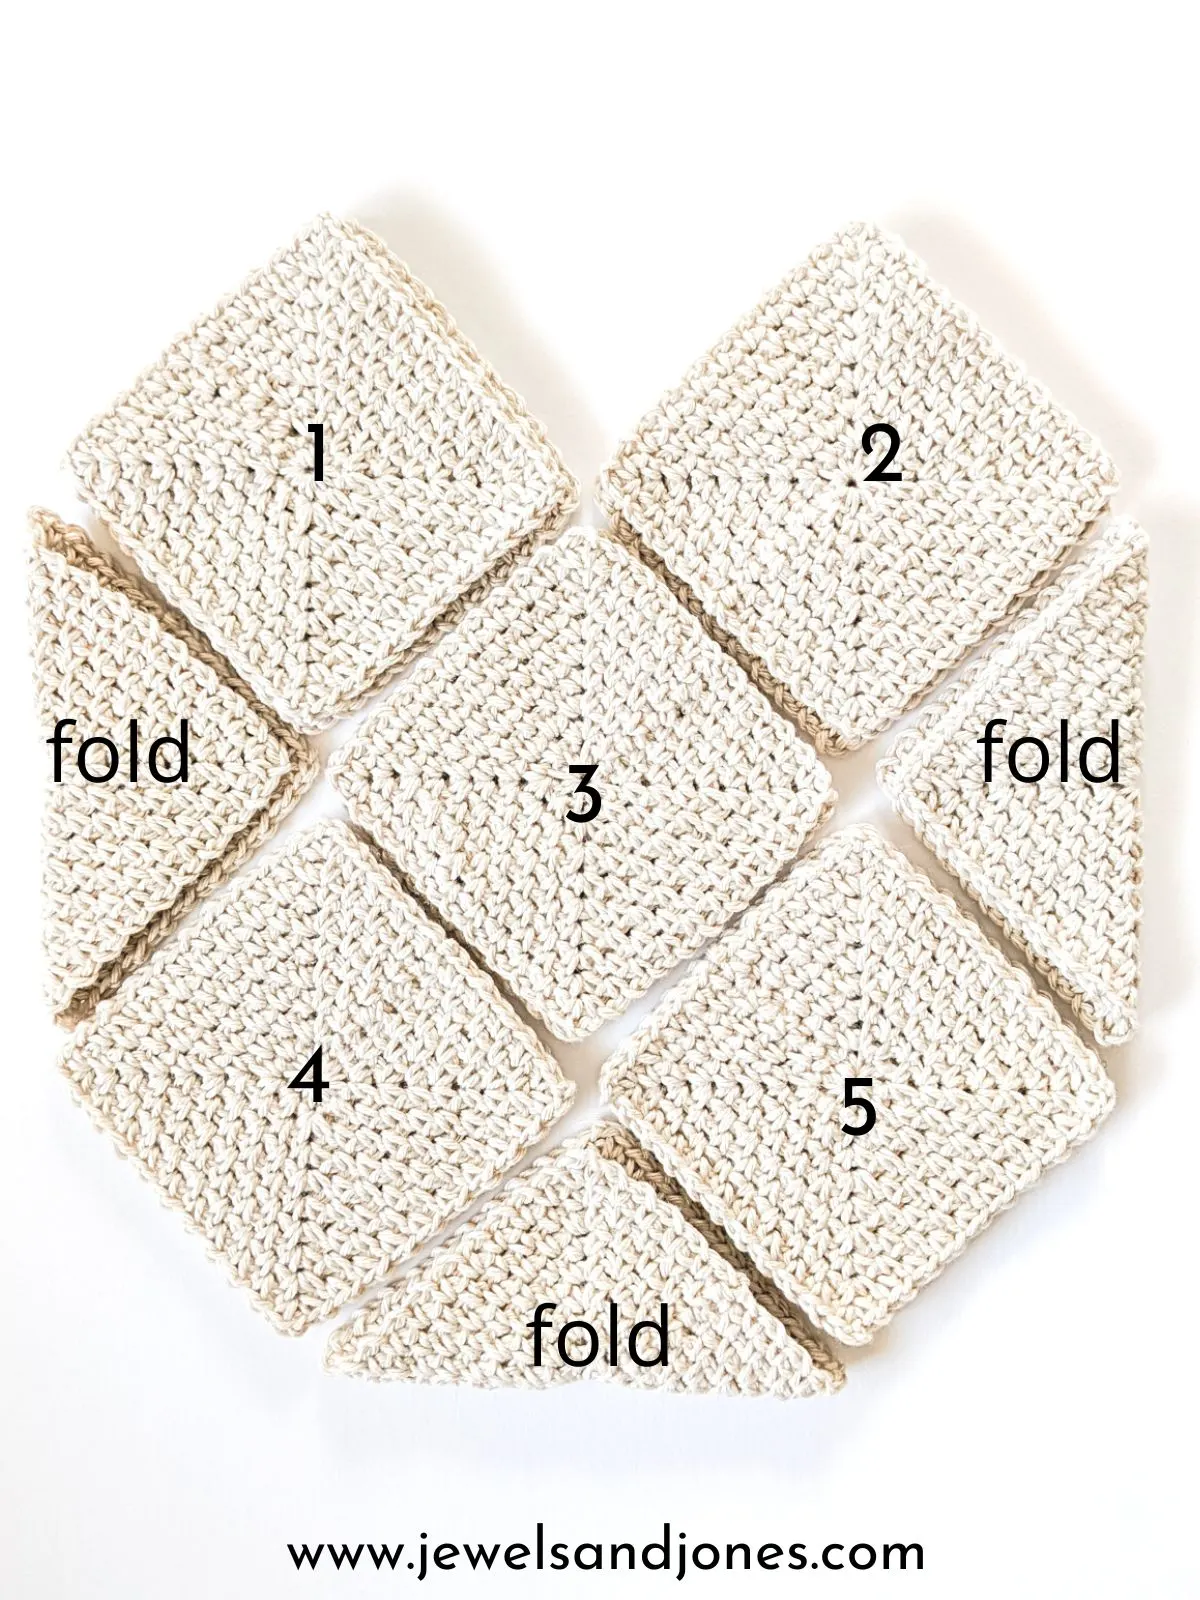
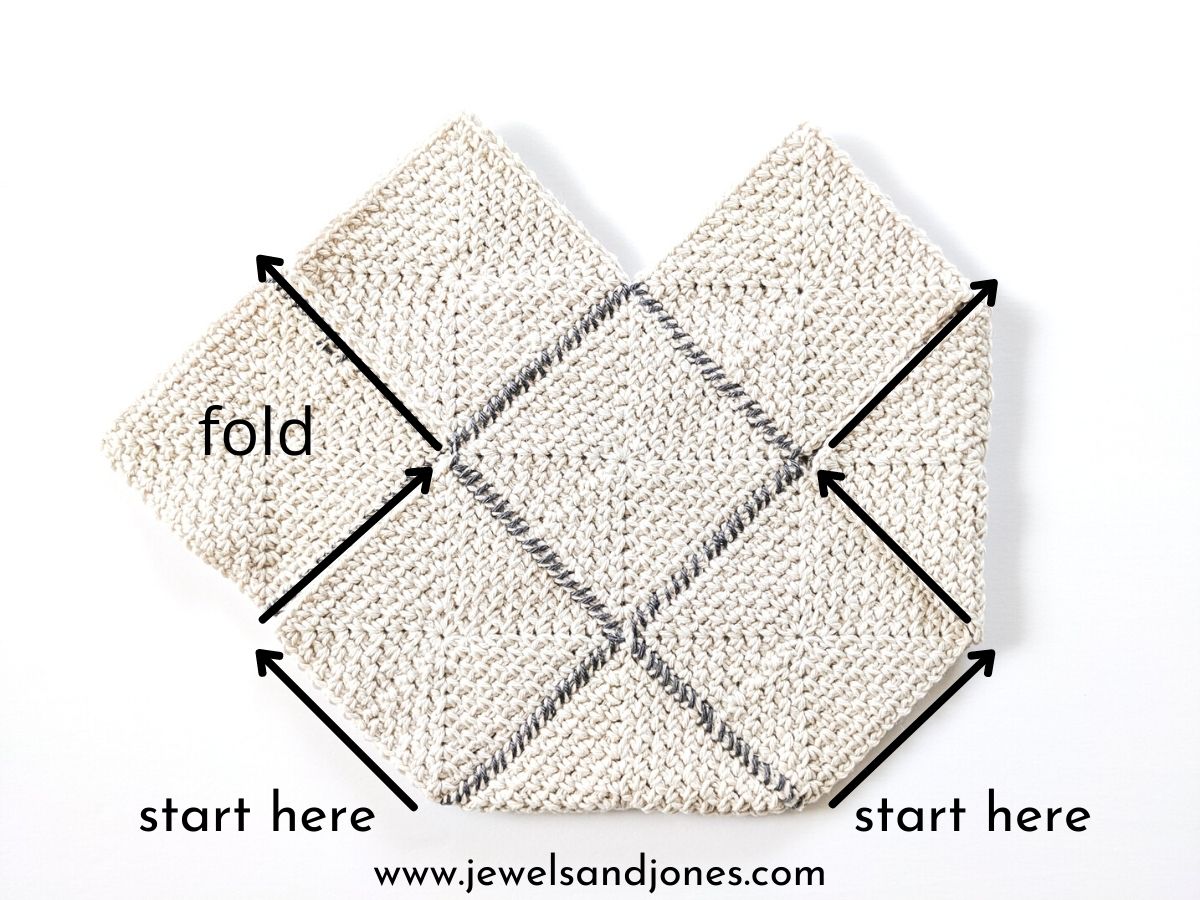
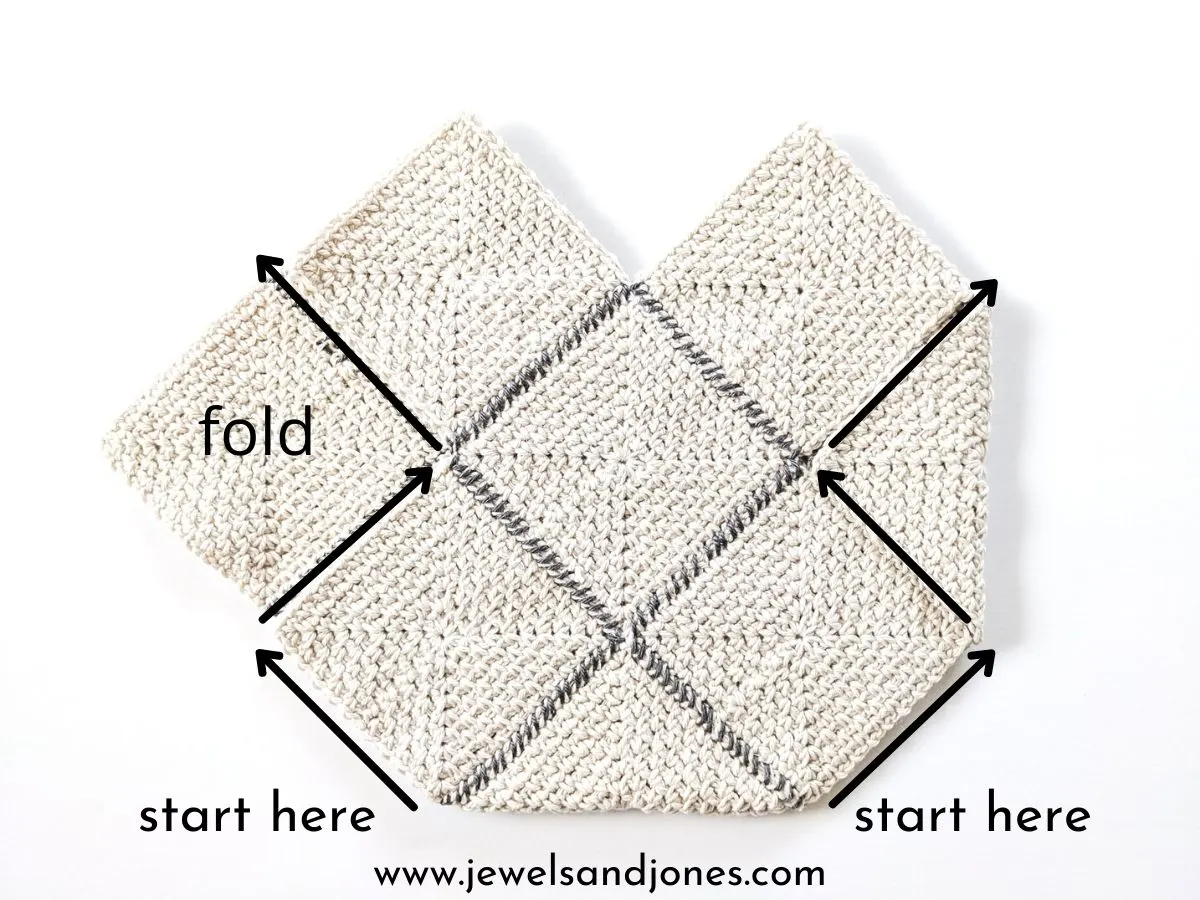
Step 1: Gather all your squares together and lay them flat out in the order that the photo shows down below.
Numbers 1-5 are repeated twice because once you whipstitch each square together, these squares will lay on top of each other. The squares that say the word “fold” will be folded over to create the sides of the bag.
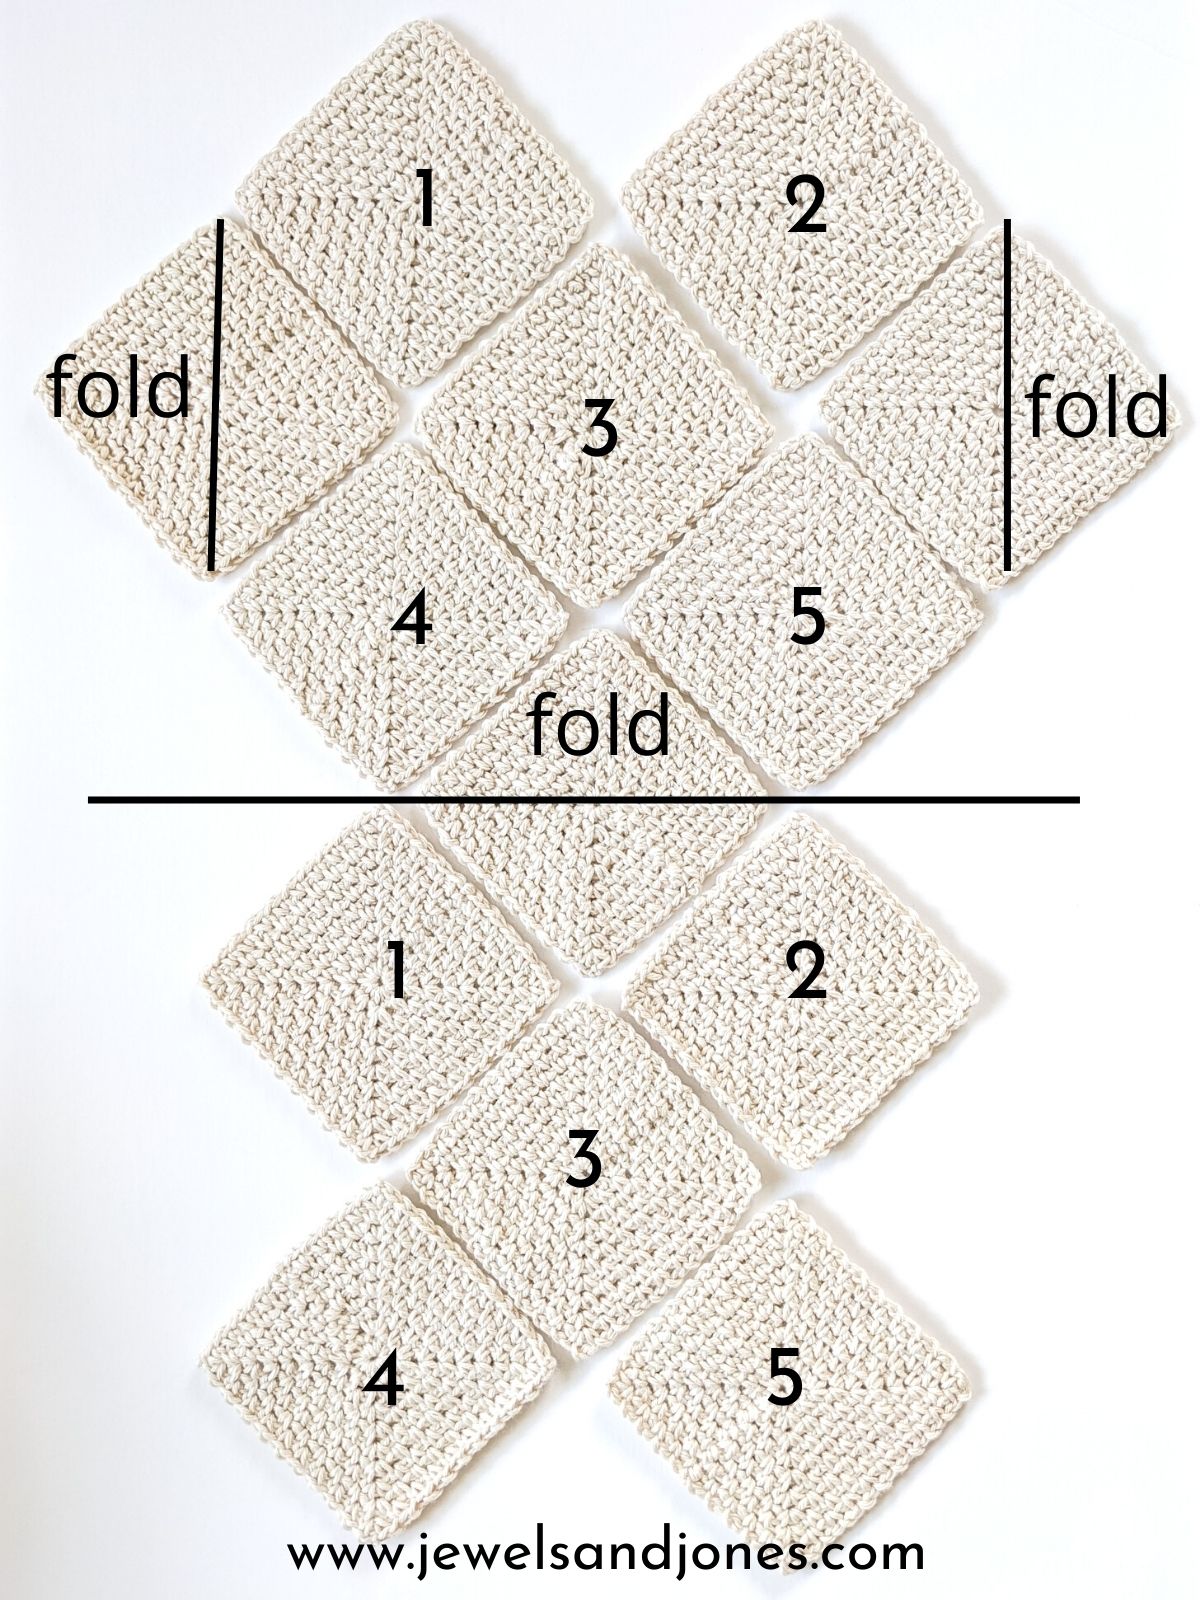
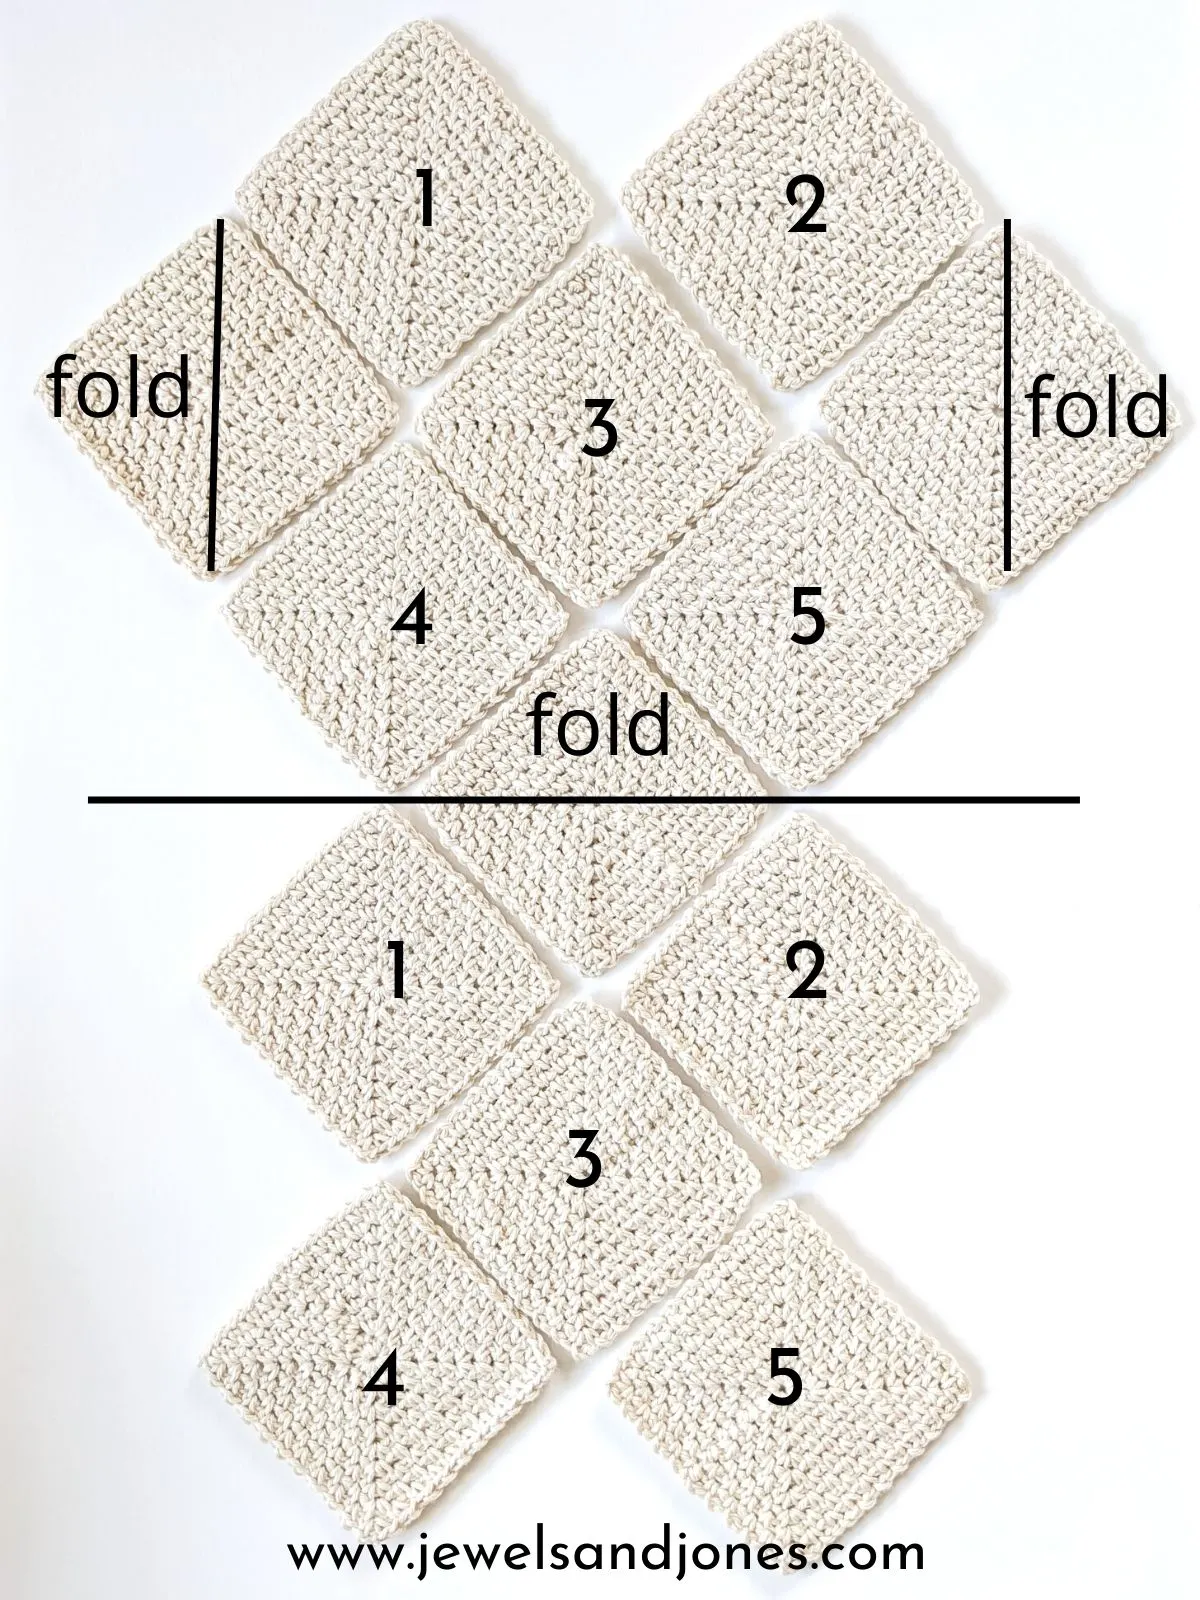
I wanted to include the photo down below to show you what the bag will eventually look like.
Step 2: Using Hobby Lobby Yarn Bee Pima Suprema in the color Charcoal and your darning needle, whip stitch each square together based on the photo down below.
It doesn’t matter where you start at, just make sure that all the squares remain in order.

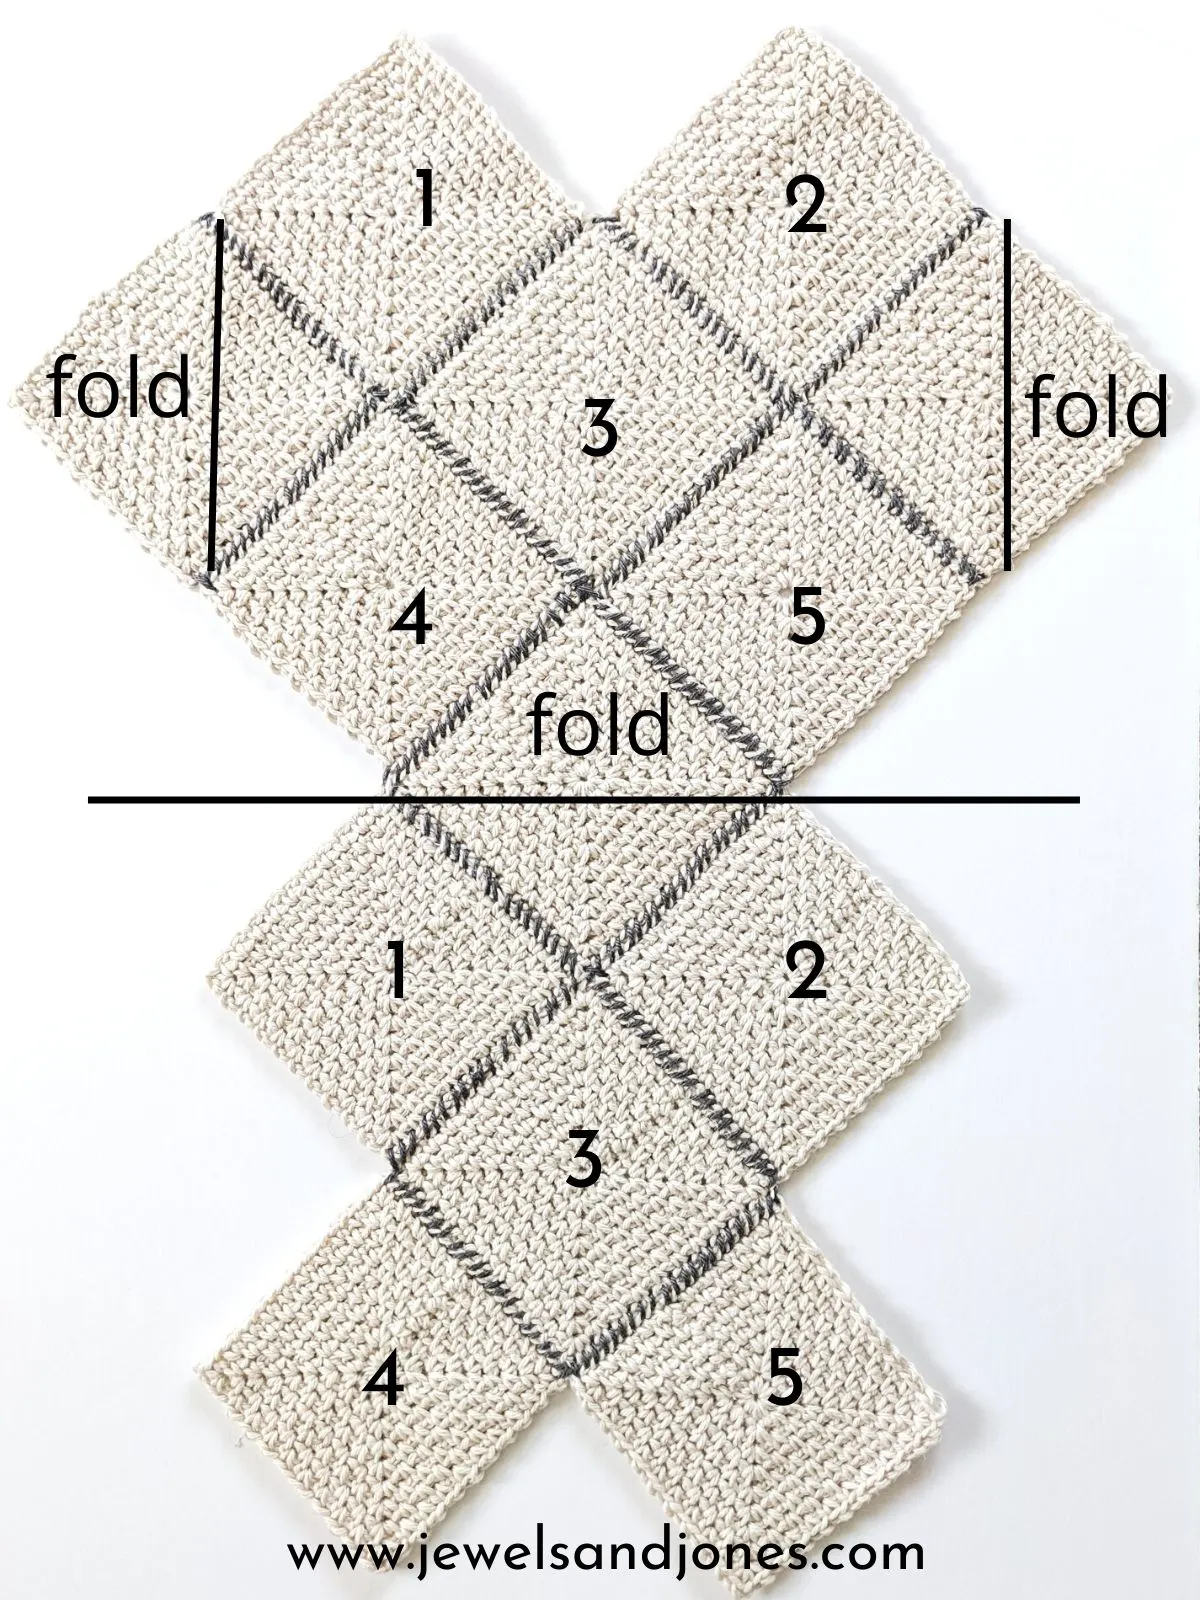
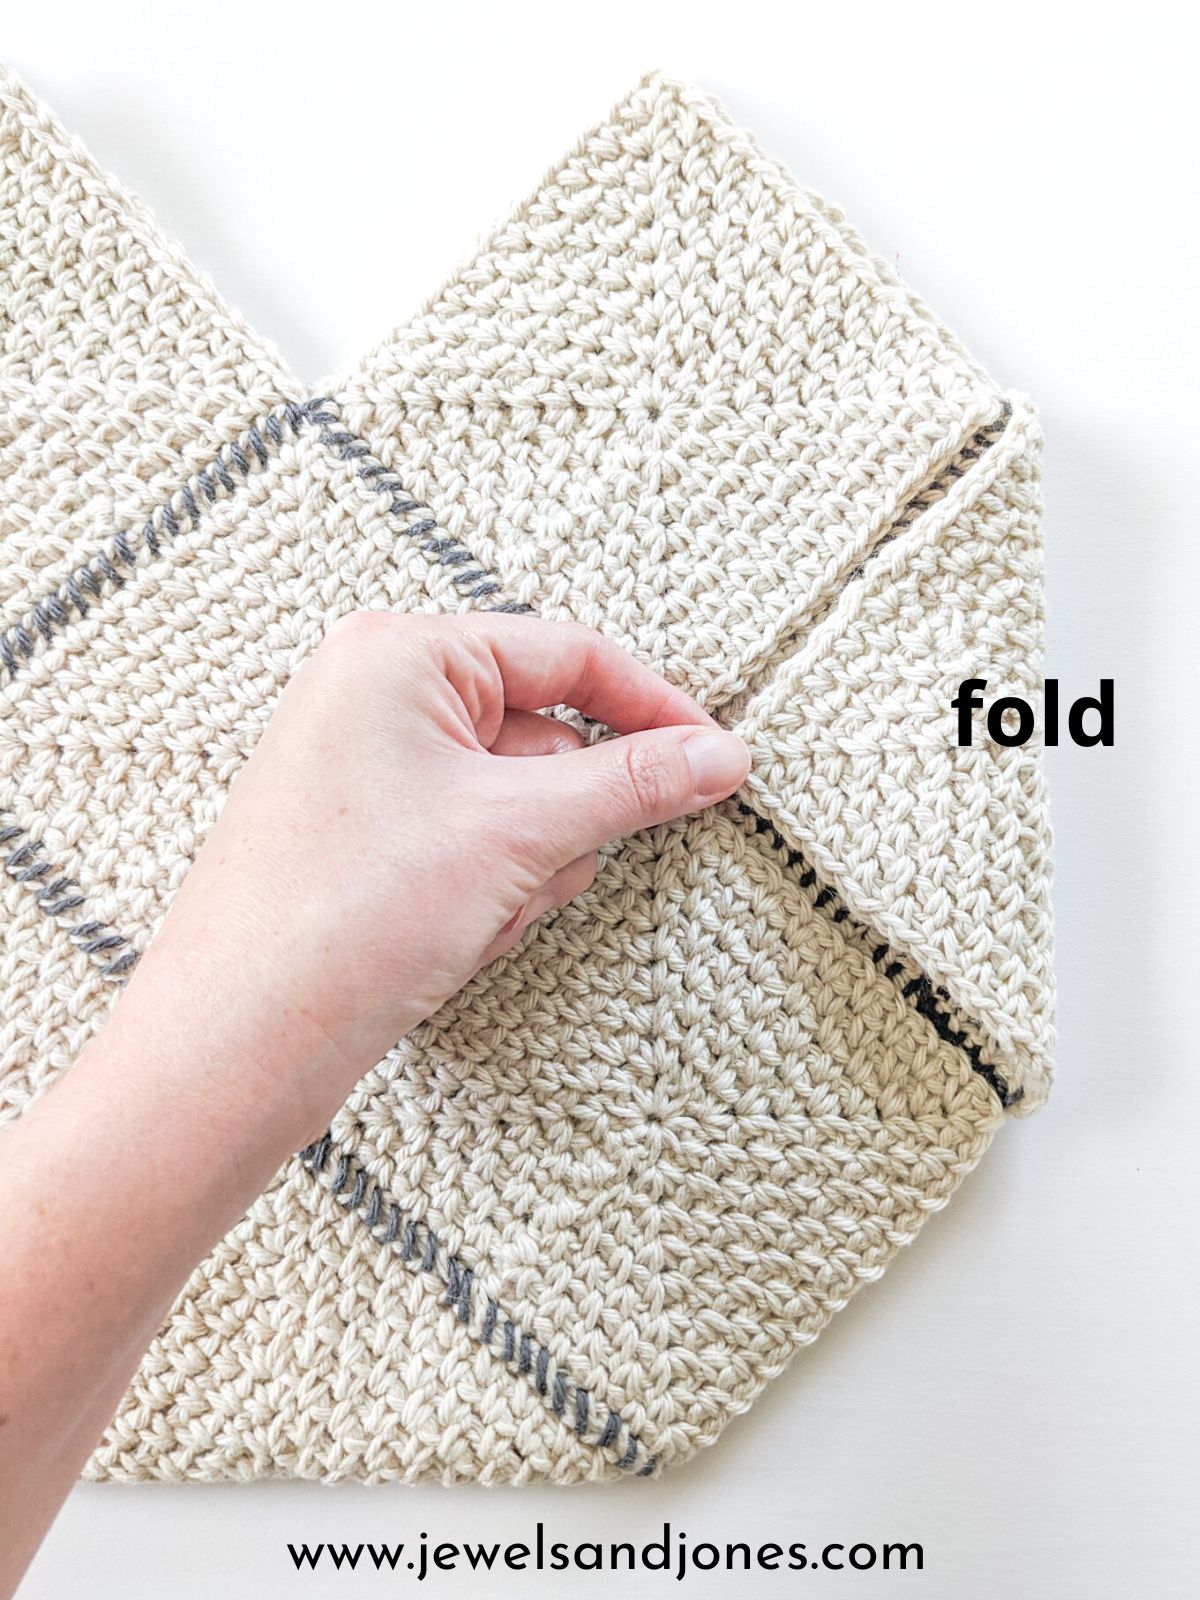
Step 3: Once you have seamed all your squares together, fold your panel in the middle, and whip stitch the sides of the bag together.
So start by folding the right square (photo below), and whip stitch from the bottom to the top (second photo down below).
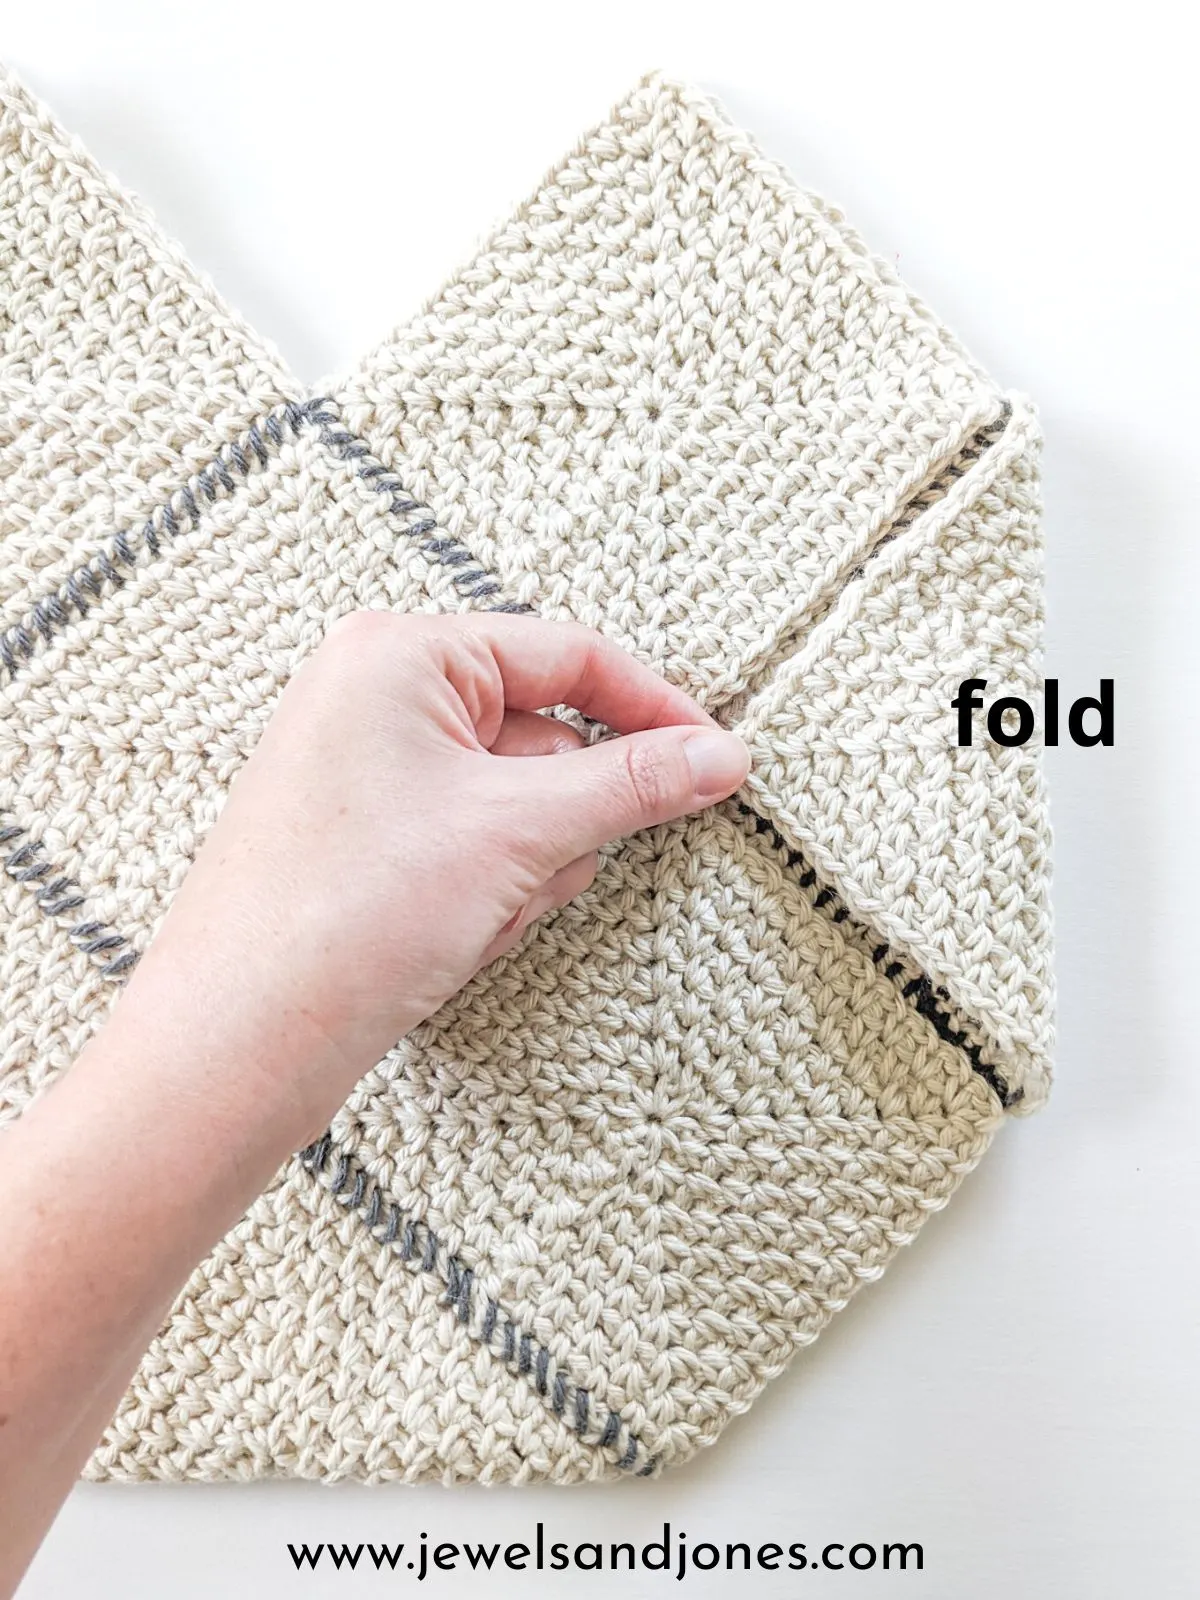
Step 4: Once your bag is seamed together, it’s time to make the straps of your bag. Reattach your yarn to the outer edge on the right side and make 1 single crochet in each stitch all the way around the bag.
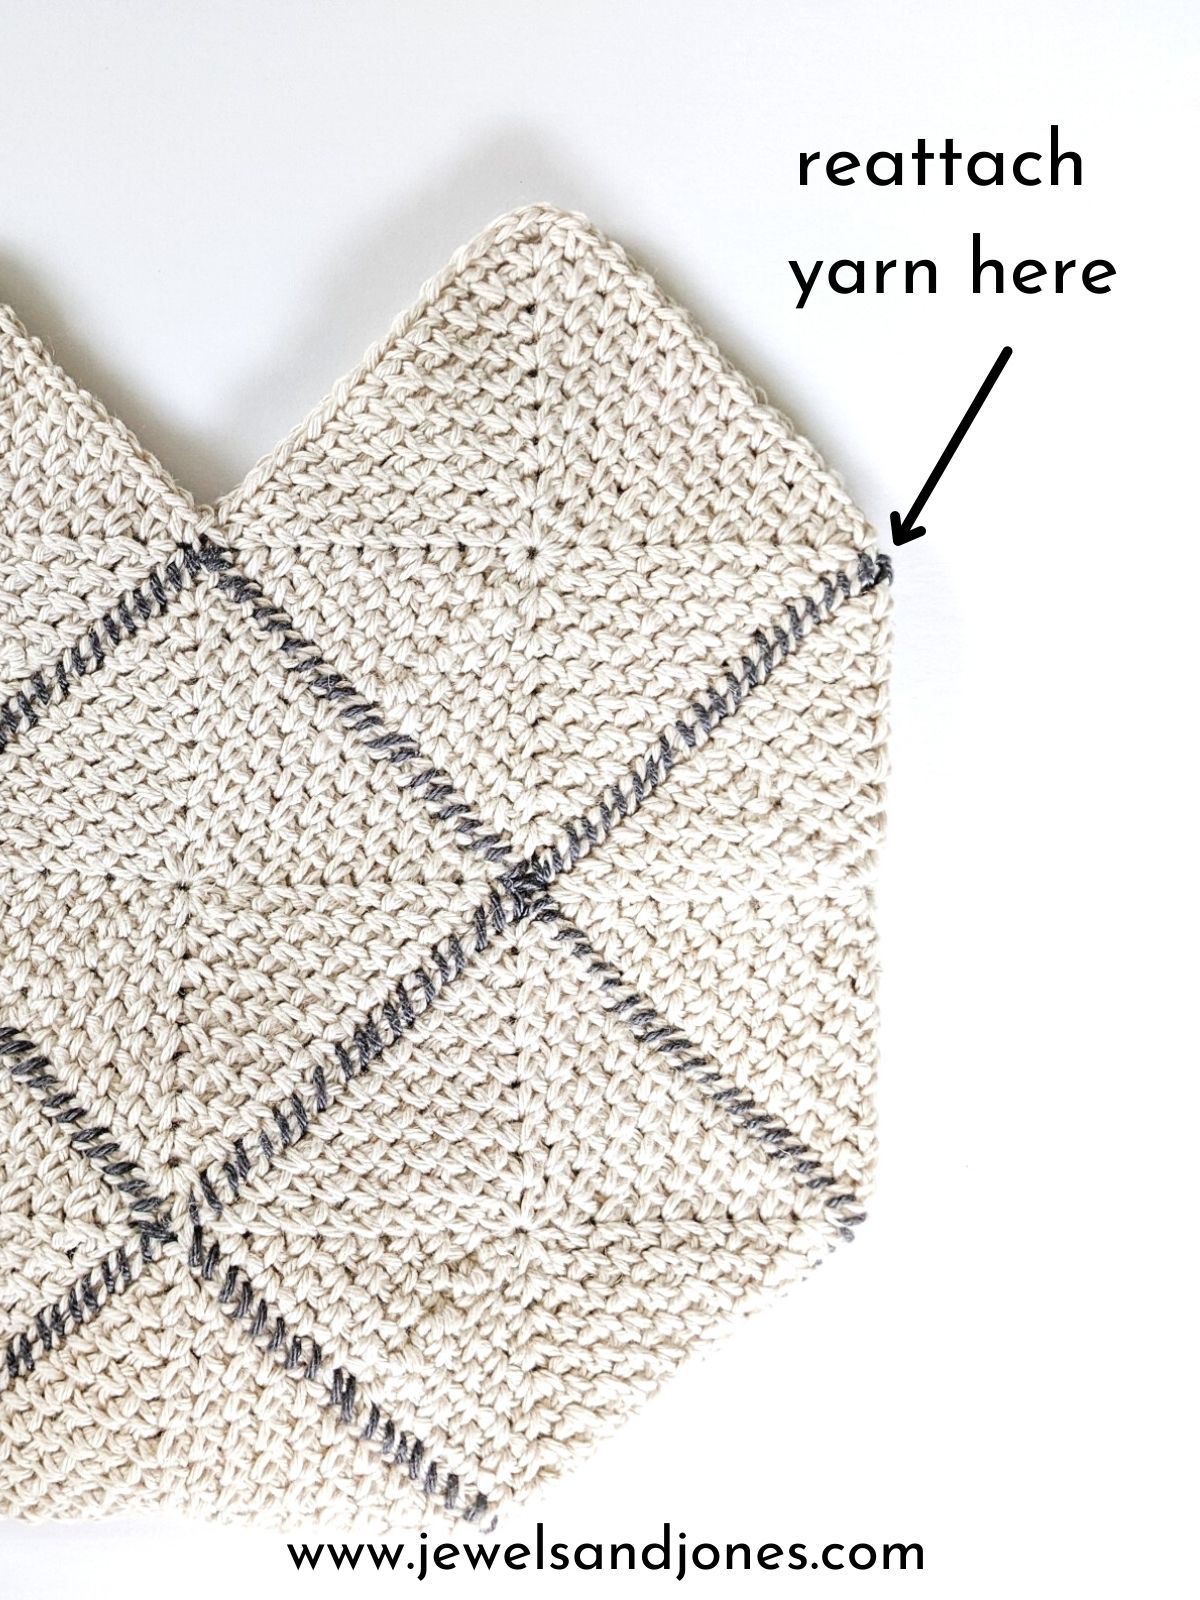
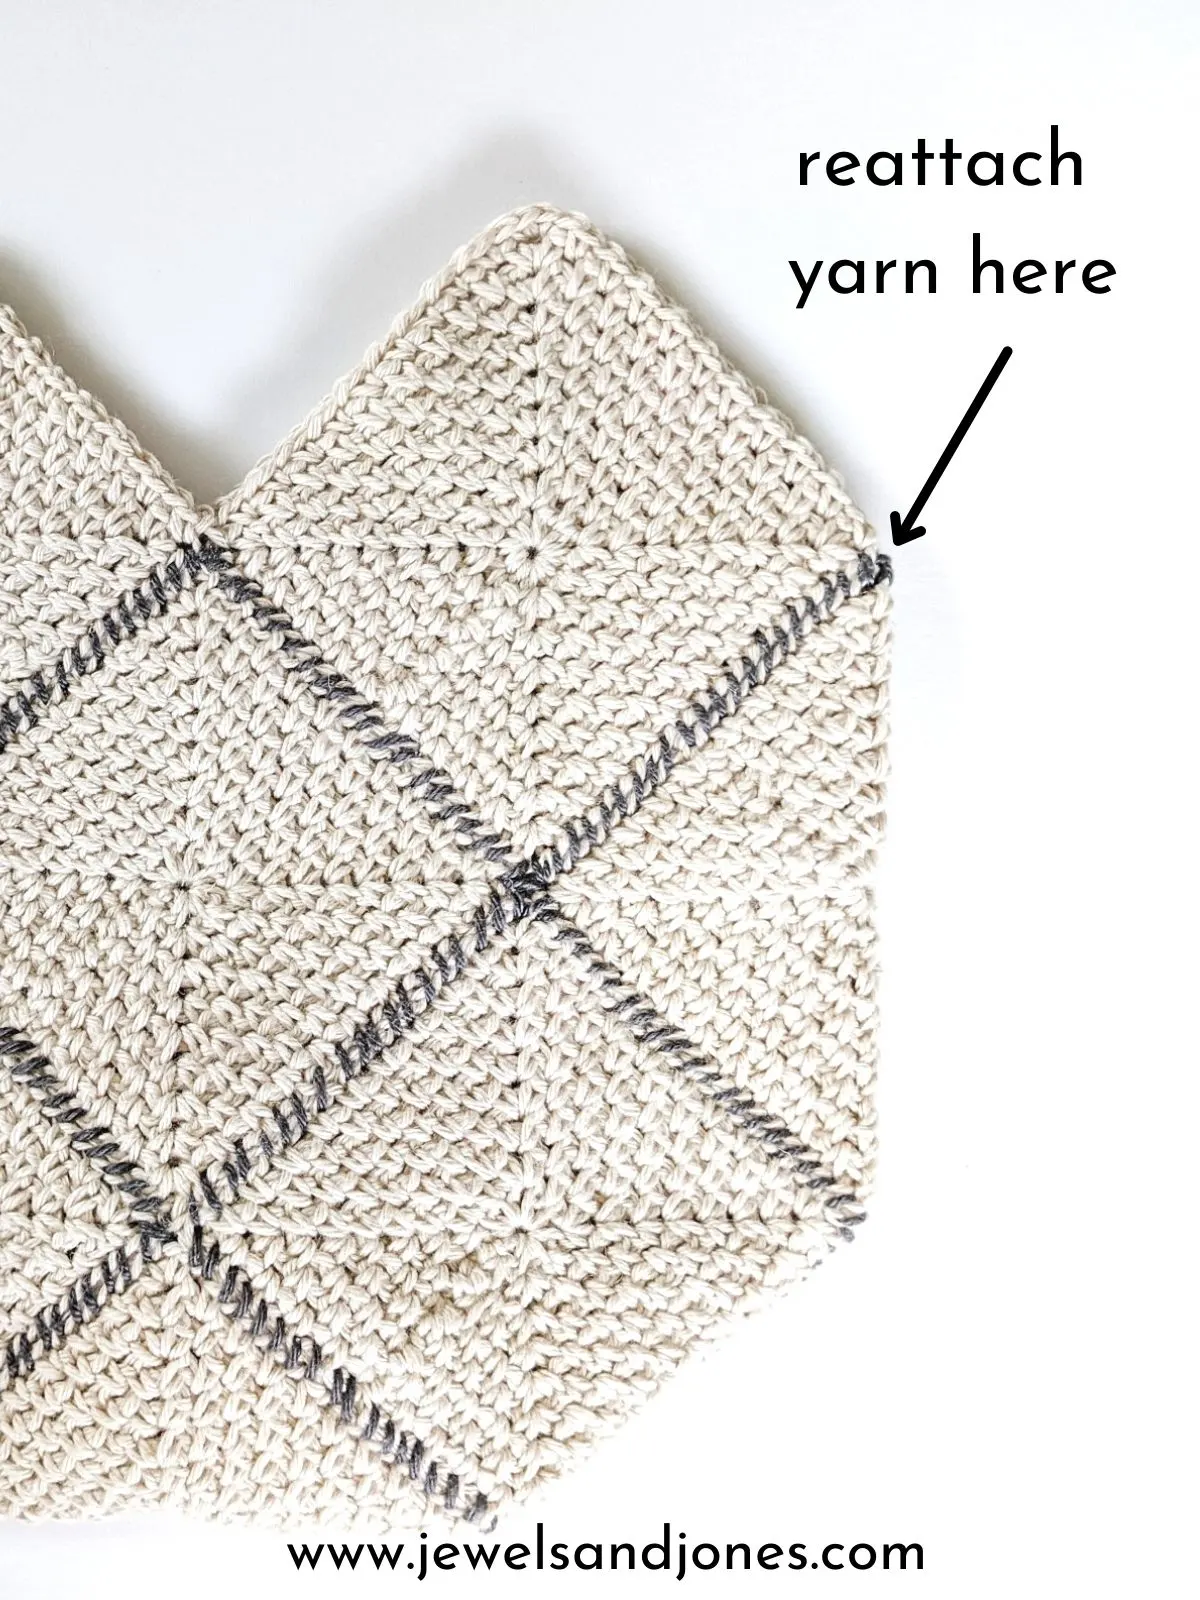
Once you’re back at the beginning of where you reattached your yarn, continue to make single crochets until you reach the top of the first square. Chain 75, and slip stitch to the top corner of the second square.
Continue making single crochets in each stitch until you reach the top of the 3rd square (back of bag), chain 75, and slip stitch to the top corner of the 4th square (back of bag).
Continue by making single crochets in each stitch until you reach the beginning. Make 1 more round of single crochet and tie a knot when you’re finished (you can add additional rows if you prefer thicker straps).
And that its! I hope you enjoyed making this fun variation of the granny square bag. I had so much fun making this one and have another one already on my hooks.

Nina
Friday 7th of July 2023
Just finished my bag, it’s the first one I have ever done and I love the pattern, I did mine with some polyester makrame cord that I had in white and slip stitch it together with the purple that I had, I’ve done the strap in purple and white, and I’m so happy with it, thank you for letting the pattern be used, it’s lovely, will try sending you a picture sometime today, thank you again x
Nicky
Friday 7th of July 2023
You´re welcome!😊 I´m so glad you enjoyed making the bag. I love how you used macrame cord, all have to try that as well. Yes, I would love to see a picture.
Melanie
Saturday 24th of June 2023
Love the bag! Just finished mine today. Any suggestions on how to add a liner inside? Thanks for the awesome pattern!
Nicky
Monday 26th of June 2023
Oh that's awesome! I'm so glad you enjoyed the pattern 😊. A liner for the bag is a great idea. I'm still currently working on a tutorial for a liner for the bag, but YouTube has some great tutorials on how to do this.
Jean McKelvy
Tuesday 23rd of May 2023
Finished my bag last night. Instead of using a whip stitch to connect the squares, I used a slip stitch. Also, I found it very beneficial to block the squares before stitching them together. The other thing I did was crochet a row of the contrasting color as the last row on the handles and along the top of the bag and the bottom of the handles. I wish I could post a picture! I am very pleased with the finished product.
Nicky
Thursday 25th of May 2023
Oh that's a great idea. My mom actually used the slip stitch method as well and it came out really good! Yes, blocking definitely helps. 😊 I love how you added a contrast color. All have to make another one too and add a contrasting color. If you would like too, you can always send me a photo of the bag to my email address: [email protected] (I would love to see it!). ✨
Mel
Saturday 13th of May 2023
This is adorable. Time to go pick out my yarn…
Nicky
Sunday 14th of May 2023
Thank you so much! I hope you enjoy making the bag. 😊
Julie
Tuesday 2nd of May 2023
I’m loving this bag pattern I’ve waited a very long time to be well enough to make it for my 30 year old granddaughter . I think I’m ready now I just have to purchase the yarn. I love it . I might make the straps a little it wider.
Nicky
Friday 5th of May 2023
Thank you! I'm so glad you like the pattern. Yes, you can definitely make the strap wider. I would just add a few additional rows of single crochet. Good luck! 😊